The Photo Video Guy Podcast - Episode 69

Contour shuts its doors.  Nikon calls off profit targets, blames poor adoption outside Japan of mirrorless cameras.  Nikon 18-140.  Nikon SB-300 flash.  Olympus PEN sales drop 12%.  Canon to acquire a medium format line?  Canon has new firmware for the C300.  DP Review likes the Sigma 17-70/2.8-4 as an alternative to manufacturer kit lenses.

The Photo Video Guy Podcast - Episode 68

Nikon can repair a D4 in 20 miunutes.  Nikon patents two f/1.2 lenses.  Canon updates firmware for older 1D models.  Canon event on Aug 21.  Canon releases Vixia persoanl camcorder.  No 7D Mark II this year.  Sigma announces mount conversion service.  Sigma working on 24-70/2 full frame?  DP Review of Fuki X100s out.  Panasonic releases Lumix LX-7.  Panasonic announces 42.5/1.2 M43 lens.  SmugMug undergoes full redesign.  Adobe releases ACR 8.2RC and LR5.2 RC.  CIPA says camera sales are way off.  Ilford will file for bankruptcy protection.  Blackmagic drops the price of the Cinema Camera by $1000 and releases the Pocket Cinema Camera.

First Prints : Breathing Color Crystalline Satin

I'm one of those photographers who thinks that a photo is only truly complete when it becomes a print.  There's something very special about holding a piece of art in your hands, a tactile experience very different, and in my opinion, superior to seeing it on screen. I was recently listening to an interview with Tokyo based wildlife photographer Martin Bailey and he was raving (again) about Breathing Color paper and canvas.  I went online and tried to place an order as they only sell direct, but when the company got back to me, shipping was going to be more than the cost of the paper.  I live in Canada, and I guess sending stuff from parts of the USA is akin to launching a rocket to Mars.  That's not true for Red River Paper, they process orders and all the costs are included at excellent pricing, but I digress.

A tech support person at Breathing Color advised me that Amplis in Canada sold their paper direct.  Amplis has an online store so I went to it.  No Breathing Color.  It only appeared on the Dealer secure site.  I wrote back to Breathing Color and told them their Canadian option seemed broken.  The same young gent contacted Amplis and I was contacted in short order by Phil Neilsen and Pat Cameron.  Phil sells for Amplis.  Pat is on the order desk.  Both were very helpful.  Pat processed my order and I picked it up, with only a couple of hiccoughs, the same day.

I ordered five 17" x 20' trial rolls.  The new metallic paper was not in stock but the others were so I collected them.  Lyre Canvas, Crystalline Satin Canvas, Vibrance Matte and Optica One were my selections.  This morning I had some time and so unloaded the default roll of Epson Professional Premium Lustre that I typically have queued up in my printer.  After loading the roll of Crystalline Satin, I set to making some prints.

I love the Epson 4900 but it has its quirks.  Single sheet canvas handling is one of them.  Once I got the roll loaded and feeding properly, (more challenging than it should have been), I read the insert that came with the paper.  Breathing Color not only supplies setup instructions for Windows and Mac for their papers, they include screenshots to help you out.  Of course the screenshots did not match my world exactly, but there was more than enough information to create a printer preset for the roll of Crystalline Satin.

One of the other things I really like about Breathing Color is that when you go to download their ICC profile for a paper, the download contains all their ICC profiles in a single package along with an aliased installer to make installing them completely painless.  Every other paper company SHOULD learn from this simple and very customer-centric step.

Lightroom 5.2 was used to make my prints.  Two shots were in colour, shot on a Canon 1D Mark IV with the 100-400 and 1.4x teleconverter, the first of a giant panda and the second of an african rhinoceros.   The third was a scan of a 4x5 TMAX 100 negative shot with a Nikkor 210mm on my Sinar P that I had processed earlier this week.  I thought it would be nice to try these different subjects on canvas.

Despite a first time feed error, once I unloaded and reloaded the canvas, the Epson 4900 did the job I bought it for.  It produced great prints in a reasonably timely fashion.  I liked very much that the ICC profiles worked flawlessly with Lightroom's proof print function and that I could see what the prints would look like before printing.  I have had issues where this did not work properly with other vendor's ICC profiles.  I keep my displays calibrated using a Color Munki Photo so I got out what I saw on screen after allowance for reflective textured media vs backlit display.

The canvas is very thick and Epson advises not to use the built-in cutter for canvas on the 4900.  I set the printer for no cut, and learned how to advance and then withdraw the paper once I cut it with an X-Acto after each print.  The 4900 does a great job of prepping the roll and my not straight cuts caused no issues with the next prints.

Once the pigments had dried for a while, I sprayed each print with Hahnemuhle's spray canvas protector.  You have to do this outside unless you want to go on a coughing jag.  Once the varnish was dry enough for handling, I took a tip from friends Kathy Constantinou and Simeon Tse and mounted the prints on foam core.

My usual response to printing is to frame stuff, but I had done an experiment with mounting a Moab Metallic Pearl print on foam core and I liked the outcome very much.  I have not yet bought gallery mount kits for canvas, (next week, Amplis has some great kits), so I thought, what the heck?  I sprayed the back of the canvas with 3M photographic spray cement and then placed the prints on the foam core.  I covered the print with parchment paper and used a rubber roller working from the centre out to lay the canvas down on the foam core and roll it flat.  It worked surprisingly well, so a big thanks to Kathy and Simeon for their initial coaching.  Once the glue had set up a bit, I used a steel straight-edge and the heavy X-Acto to trim away the excess foam core.  I bought a self-healing cutting mat at the Currys Art Supply store and it's perfect for this kind of work.

The canvas looks awesome.  Colours are bright, gamut is excellent and the canvas texture is very appealing without degrading the image quality in any way.  The black and white print from the Sinar looks stunning on the canvas.  I spent a lot of time making the shot and while there is always room for improvement, I love that I can see ten zones in the image.  Canvas is the perfect media for this kind of work.

I have not yet tried the other Breathing Color papers, but my first experience with their Crystalline Satin has been awesome.  They make a really fine product and handle the software end better than most paper companies.  Now that I know the trick to ordering the paper in Canada (call Pat at Amplis direct), I'll buy more in the future.

First round with the Sinar P 4x5

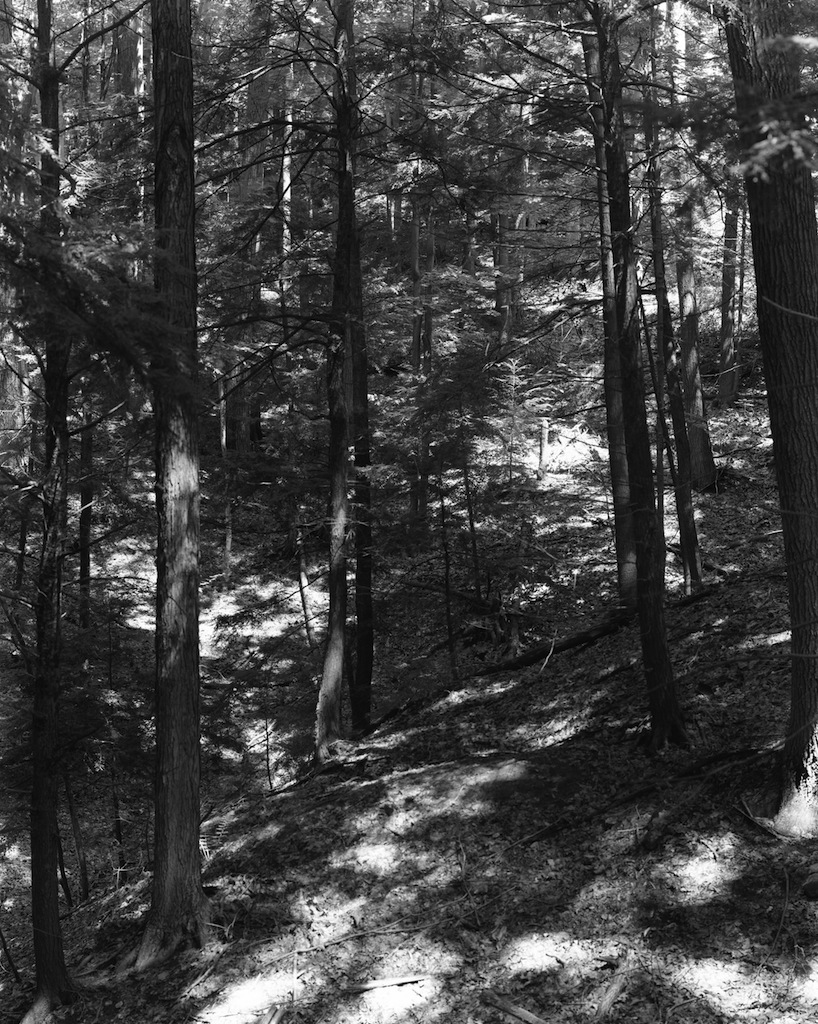
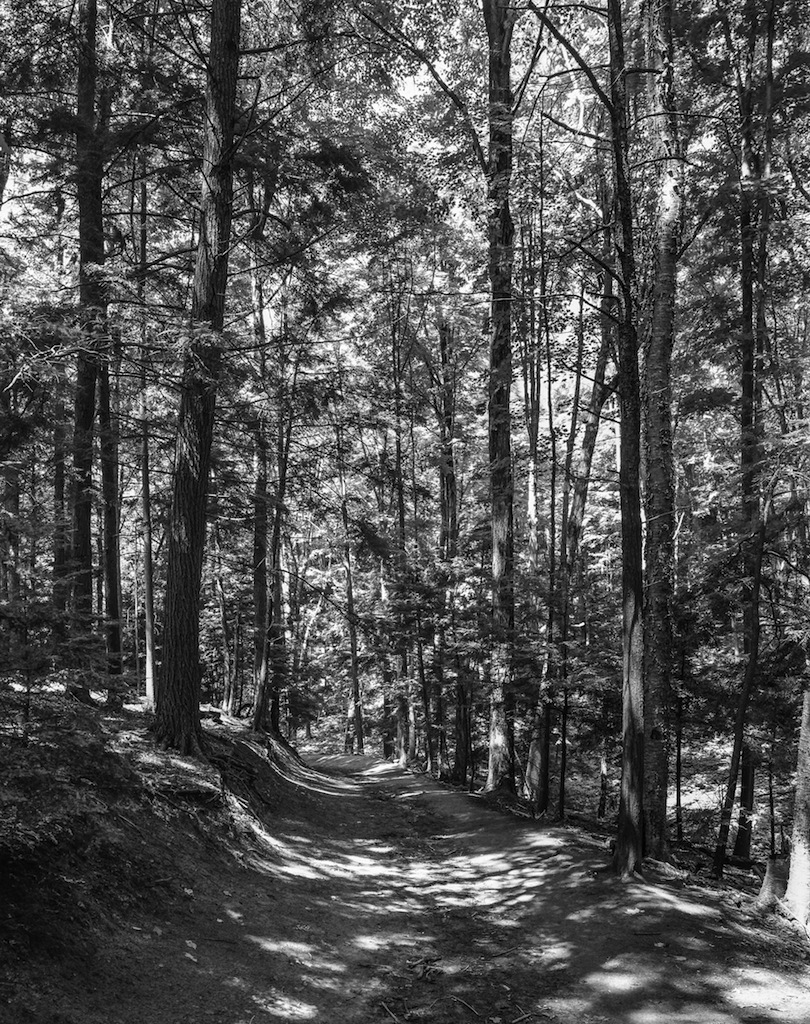
Just after Christmas 2012 I bought a used Sinar P and lenses from a fine gentleman in Illinois.  I loaded up five film holders and then proceeded to do pretty much nothing with the camera.  This past weekend, I took the four unexposed holders into the woods with the camera and kit and made eight exposures.  I processed the film myself.  Fortunately, I did not screw up the negative developing step and while it's been nearly three decades since I last processed my own negs, it was really a blast.

So I ended up with eight sheets of 4x5 Kodak TMAX 100 hanging on a piece of string in the mud room to dry.  Two out of the total ten that I shot, I screwed up the in camera part, forgetting to close the iris completely before pulling the dark slide on the film holder.  The other eight came out ok, but I have made a note to carry a spot meter in addition to my incident meter when I next decide that humping the Sinar, lens, tripod and related kit into the woods is a good idea.

One of the challenges with the 4x5 is that while I have very good lenses for it, with reliable shutters, the image on the ground glass, even when under the dark cloth, is pretty dark.  Using my old Nikon slide loupe for focus worked fine but I need a loupe with a bit more power, and I probably need to think about having more available light when I shoot as each exposure was 1 second with the aperture varying between f/13 and f/18.  You focus with the lens wide open, but even then I had some trouble checking the edges and in one case, when I first put the 75mm Nikkor wide angle on, I neglected to remove the monorail extension that is needed when shooting the 210mm Nikkor, so the frame has this silver cannon poking in from the bottom.  A real amateur mistake, but I caught it before the next exposure.  I've also got a light streak on one sheet so either one of the film holders is wonky, or one of the sheets was touching something in the tank.  It happens.

I am loving the 4x5 because there is absolutely no spray and pray, and while the images made this time are nothing that special, I was shooting for practice, not for art.  Even then, by the time you check the meter half a dozen times, make myriad tiny adjustments, play with the shift, the tilt and maybe some swing, making a single exposure takes a while.  After about two hours in the woods, I made eight exposures in total including the 1.5km hike in and out.

I processed the film in Ilfotec DDX because it was recommended on a forum for TMAX 100.  I had bought Kodak TMAX developer because it was recommended, and then I discovered that Kodak says not to use it on sheet film.  So I went all Ilford except for the Photo-Flo 200 wetting agent and everything worked out fine.  I had intended to go with tray developing, but I was able to get a Yankee tank designed for sheet film so the only real darkroom work was loading the sheets from the film holders into the slots in the tank sheet rack.  Once closed up, it was a room light experience.  I was very glad to have found my ancient timer, and for the web on guidance on agitation and timing for the chemistry.

After letting the negs dry and then spending a day out shooting, I sat down today to learn how to get the negatives into the computer.  I bought my Epson 4990 scanner several years ago, and I knew that it came with negative and slide holders.  So I had to discover where they were after over five years.  Fortunately, someone else in the house is organized and I found them quickly.  I loaded the first two sheets of film into the film holder and did a preview.  Then I played with the settings a bit and kept at it until the preview looked close to right.  About the time I was trying to determine the correct resolution to scan at, I came upon a very useful web site produced by Konrad at www.howtoscan.ca  The information there was well laid out and very helpful.  Konrad suggests that 900dpi resolution on a 4x5 negative is suitable for a 24x30 print.  So I decided to scan at 1200 dpi understanding that I would end up with larger files and a longer scanning step.

At first I scanned using the Epson Scan software that came with the scanner.  It seemed to work fine.  Then I read that post OS X 10.6 scanning should be invoked from the operating system, so I tried scanning from Photoshop CC.  The scanning part worked ok but the exposures were all very dark.  I remembered that the Epson Scan software had done a nice job so I gave up on scanning from Photoshop CC and went back to the Epson software.  Each image at 1200dpi scans to 49.3 megabyte files.

Then I opened the first image in Photoshop.  I'm not a Photoshop guru, but I did read a tip for people who are Lightroom / ACR types so I converted the image to a Smart Object and then used the Filter | Camera Raw Filter tool to make my very subtle adjustments.  There is so much tonal range in this film it is absolutely awesome.  When I saved the TIFF after the adjustments, the file size had loomed to about 230mb average.  So 8 shots consume about 2GB.  I have a lot to learn about working with scanned negatives in Photoshop but for a start, I'm pretty happy.  I'm sure I will look at these in a year and ask myself what I was thinking.

REVIEW : Westcott Skylux - Continuous Light in a Studio Flash Style Head

A big tip 'o' the hat to Chris Atkinson and Louise Booth at Henry's Store 005 in Newmarket Ontario for providing the Skylux for this review. I have six studio flash heads, 4 at 500ws and 2 at 1000ws.  Why?  When using modifiers, it's better to have enough power to be able to select the aperture you want for the amount of depth of field you want.  When it comes to flash, there's no such thing as too much power.

Most studio heads have modelling lights that help the photographer position the light to get the style he or she wants.  However, I find that sometimes users still struggle.  For some subjects, flash can be disconcerting or downright frightening so an alternative is needed.  A couple of years back I added Westcott Spiderlites to my arsenal, a TD-5 and a pair of TD-6 units.  For soft continuous light they are really nice.  The big drawback is that while you can control output by switching banks of lamps on and off, there is no continuous dimming function like you find on professional video lights, and so I've found myself going with my KinoFlos more than not when needing continuous light.

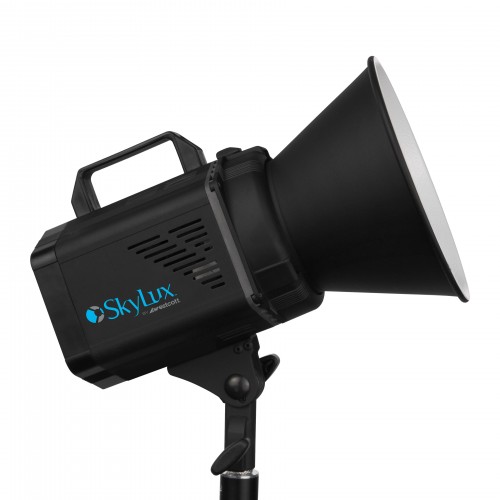
Skylux-Side-500x500Westcott has stepped up with a continuous light that looks and mounts like a studio flash head.  It's a frosted LED lamp head that accepts a variety of standard softboxes and octaboxes using Bowens speed rings.  In fact you can buy the head in a kit with Westcott Octas if you so desire.

Let's start of with what Westcott has to say;

  • Dimmable daylight-balanced LED for motion and still capture
  • Pristine 5600K continuous output
  • Cutting-edge 94CRI LED technology
  • Quiet operation essential for video
  • Lightweight, solid metal housing
  • Diffused front emits shadow-free output
  • Built-in tilter bracket and umbrella mount
  • Attaches virtually any light modifier
  • Regulated ballast for flicker-free output
  • Multi-voltage for international use

The Skylux is equivalent in output to a 1000 watt photoflood, that you can dial down to 30% output or about a 300w light.  The LEDs are colour-balanced to 5600K, equivalent to daylight.  LEDs typically run very cool, but the head has a built-in fan that will keep temperatures down.  Normally fans are anathema to videographers because of the noise, but this fan is very quiet, not silent as sometimes articulated but still reasonably quiet, so this makes the Skylux good for videography as well as stills.  The head is of metal construction as is the tilter bracket, nicer than the plastic used by other vendors.  There is a carry / grab handle on top as well.

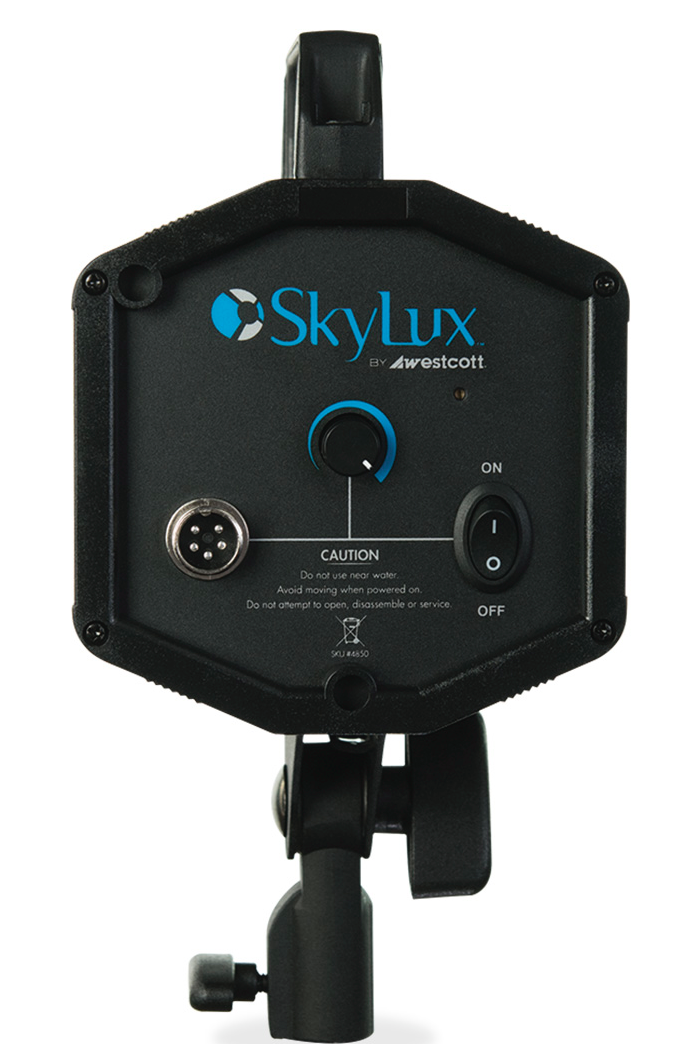
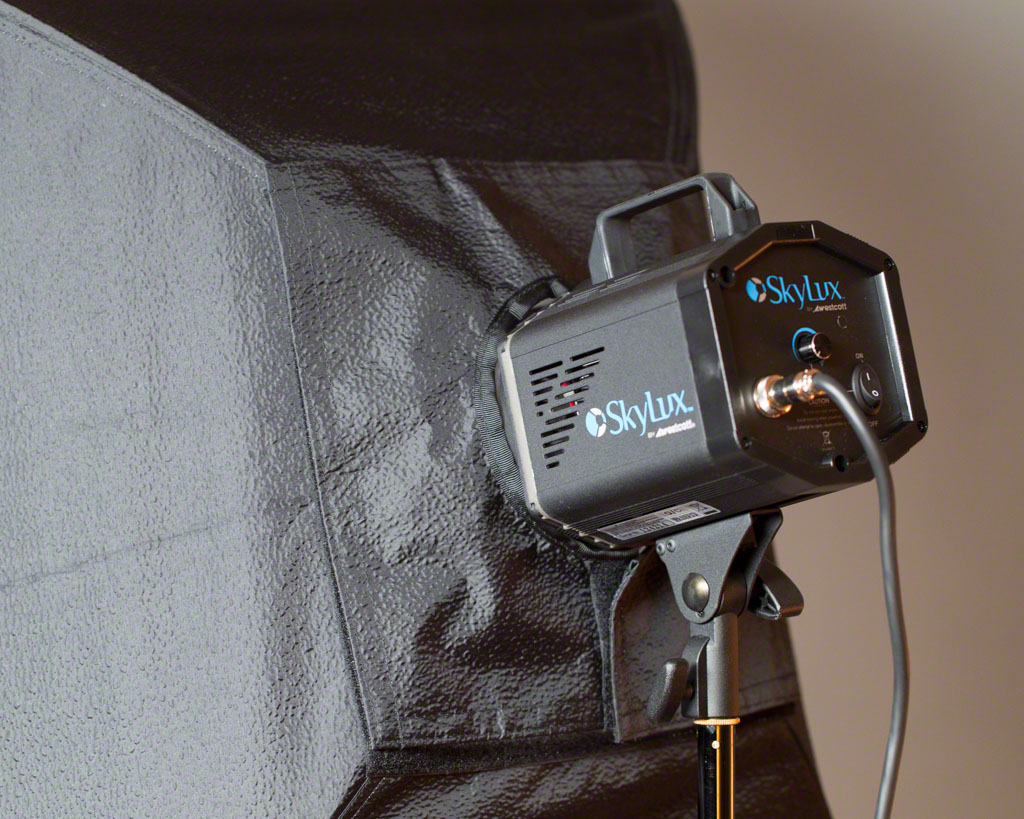
Skylux_LED_from_Westcott_LightingLooking at the unit from the back there is a connection for power, a dimmer for output and an on/off switch.

Looking face on, you see the LED arrangement, that is positioned to not cast edge shadows and has a diffusion panel mounted permanently.  The ring mount system is easy to use and the light comes with a mid-depth disk reflector so you can direct the light.  And I mean direct.  Expect harsh shadows from this arrangement.  Fortunately, the mount is a Bowens S Mount, so you can take anything that attaches to a Bowens Speedring and attach it directly to the Skylux.  Very handy in concept.  In execution, it was much more of a struggle.  The Bowens speedring fits the mount fine, but turning it to achieve a lock required more force and fuss than it should have.  As I was handling a medium sized soft box this was somewhat annoying.  I would have to work on this if I owned one, but when I tried the Bowens Maxi-Lite reflector, it connected quickly and correctly.

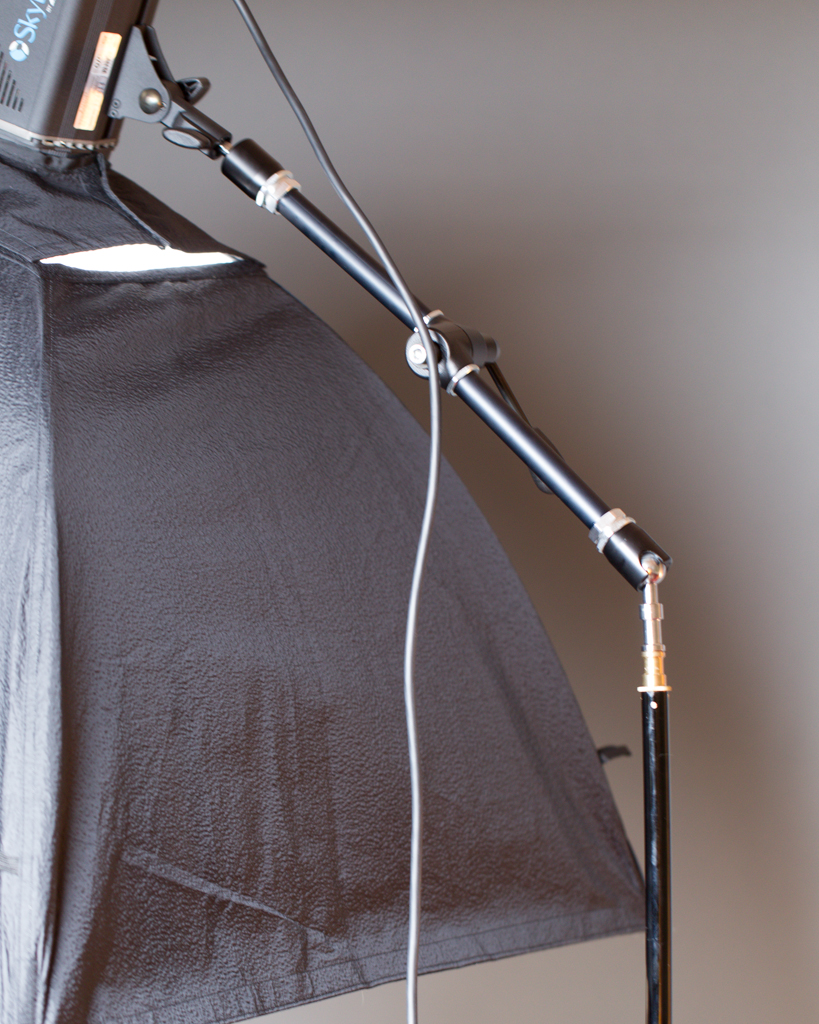
Westcott has been thinking about how people need to work.  The power connector is a Skylux_LED_from_Westcott_Lighting_1screw down five pin connector and the cable is about 15' long to where it plugs into the external ballast.  The ballast then has a 5' cord to the AC outlet.  The ballast unit comes in a lightly padded case with a strap so you could hang it on a light stand or hook if you wish.  The lamp feels lightweight, the ballast feels like a brick, so separating them makes it much easier to hang the Skylux at the end of a boom arm.  This is where that 15' initial power cable comes in handy.  In reality the head is heavier than the ballast according to the specs but it just doesn't feel that way.  In a couple of the sample shots you can see that the unit is attached to the light stand via a Manfrotto Magic Arm.

At the top of the tilter handle, under the lamp housing,  is a small recess designed to take an umbrella.  I slid a Bowens umbrella into the holder and it worked fine.  I would have used my big Westcott but did not have the room for the demo shot.

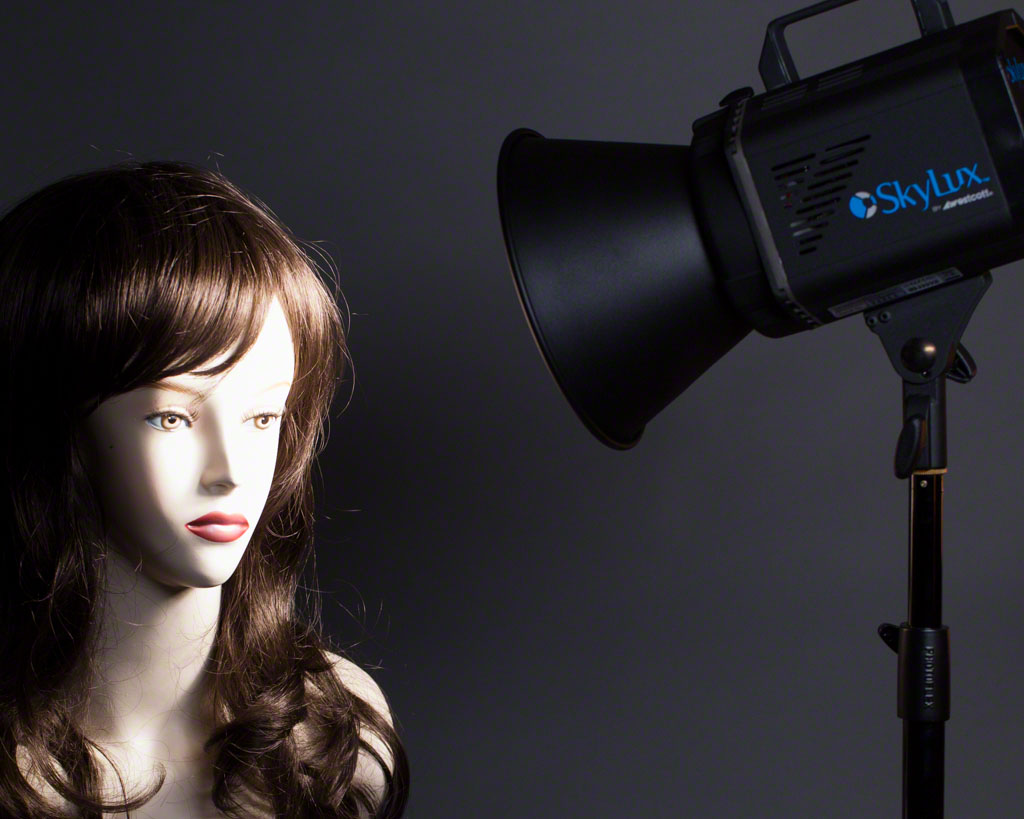
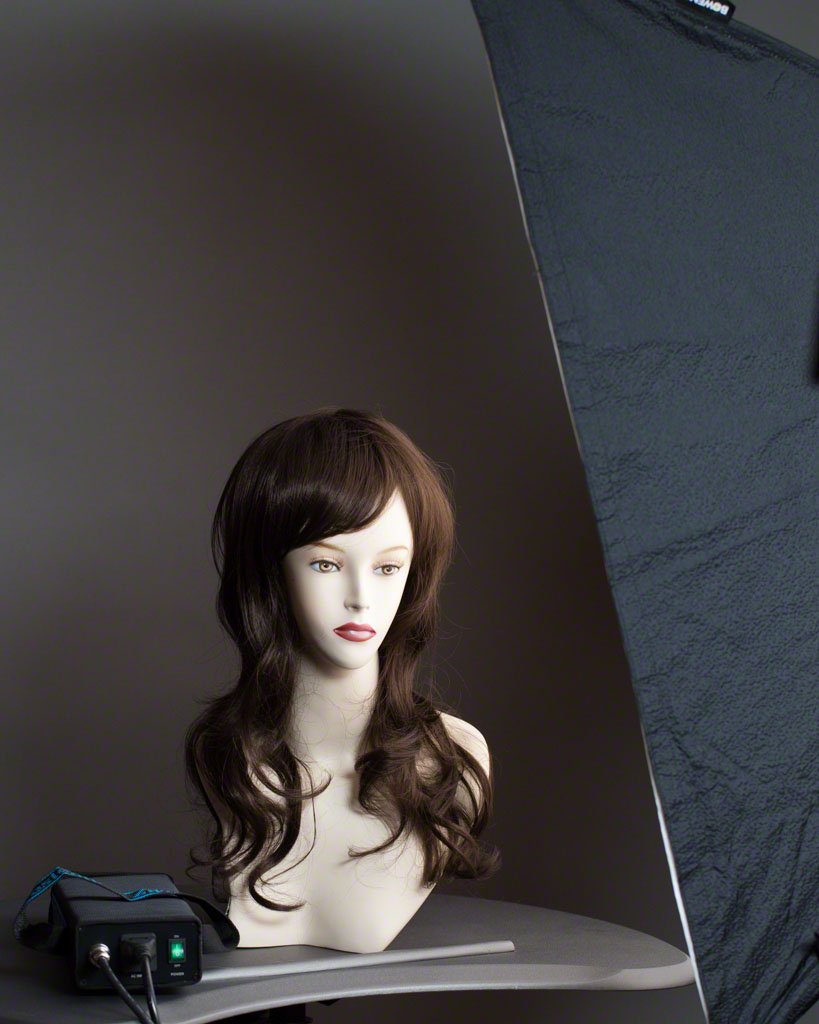
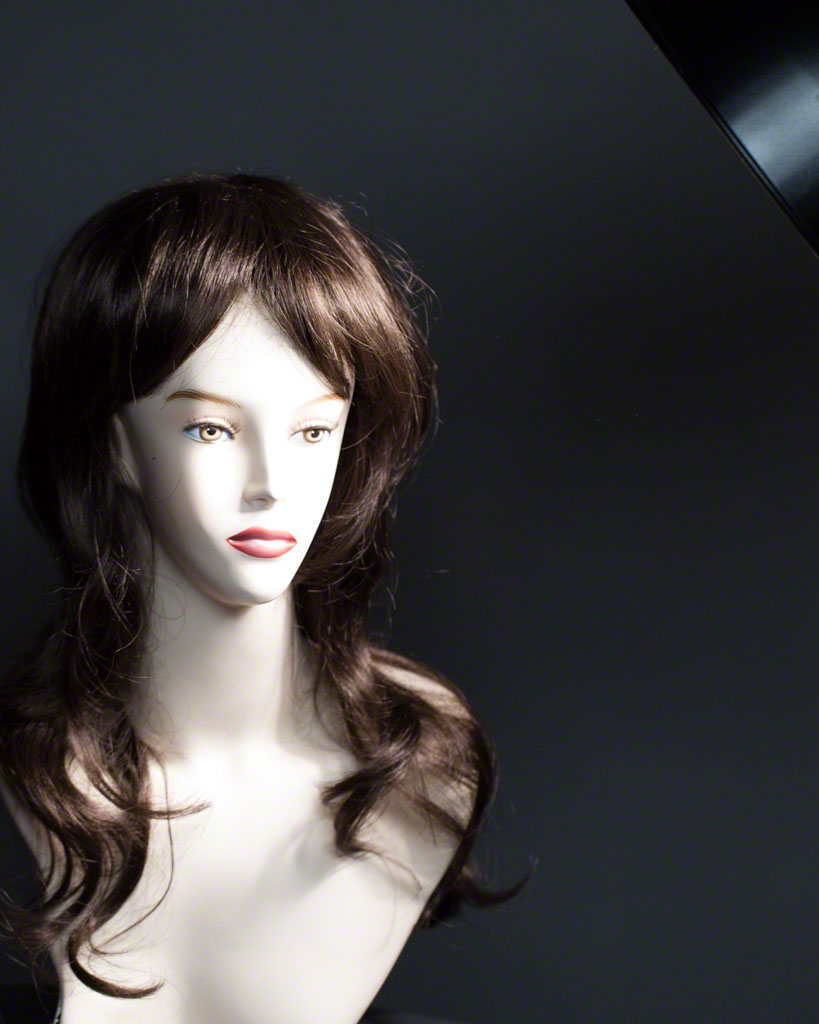
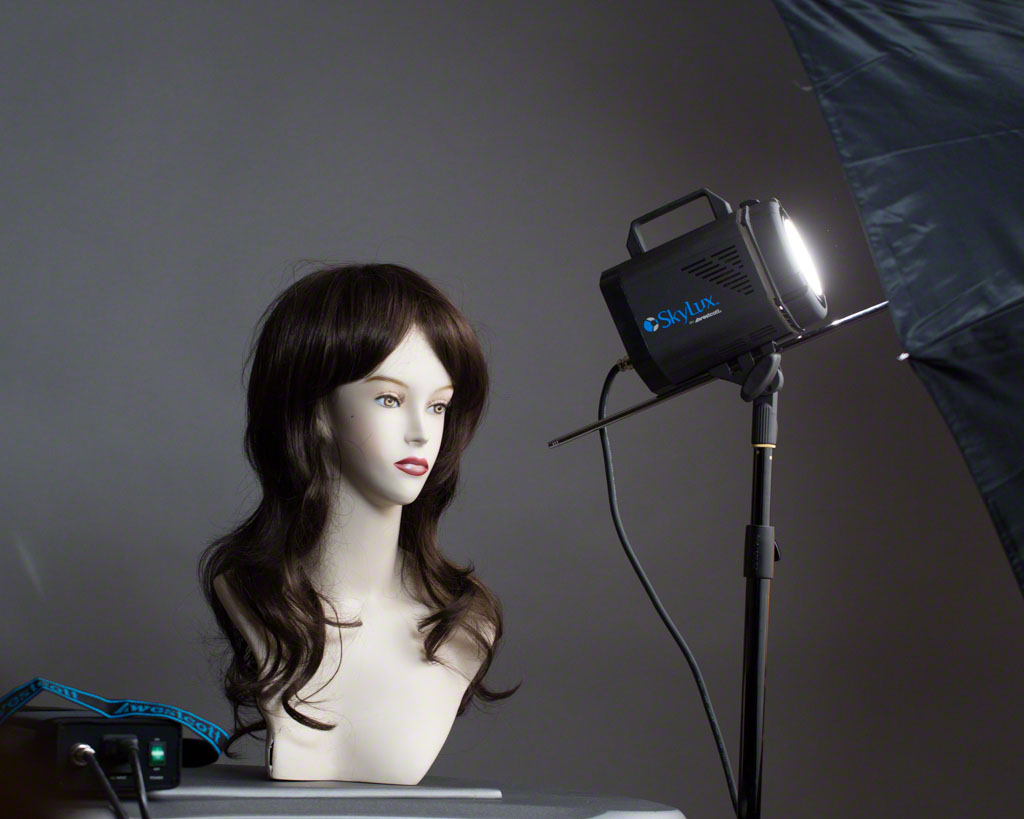
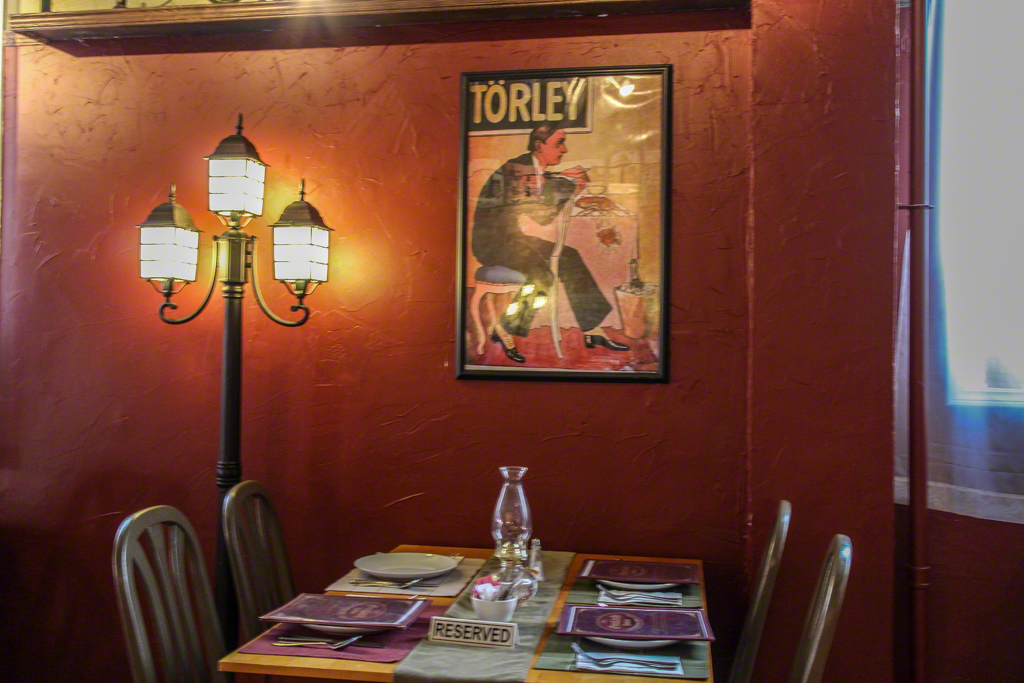
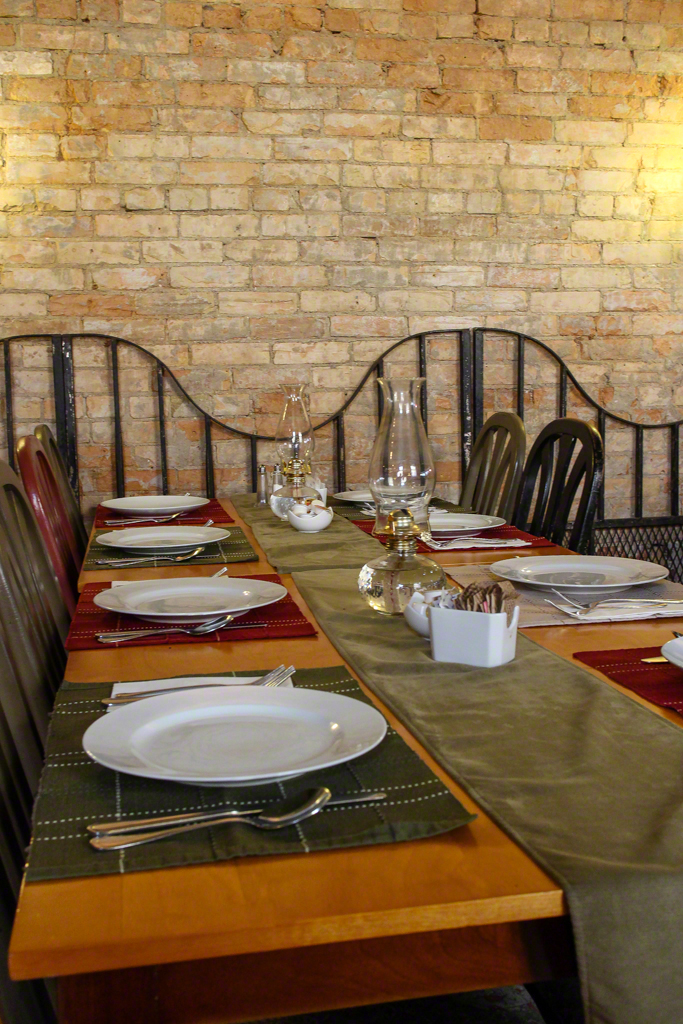
The real question is how does it light?  The answer is pretty darn well.  I came away impressed and admittedly I was asking myself what kind of desperate person would pay $1200 for a single continuous head.  I set up my usual config with the light, some modifiers, a table and my habitual model Sondra.  She looks annoyed because the aforementioned soft box detached itself and landed on her part way through the shoot mussing her hair.  Exposures are not optimal in the attached shots, mostly because I was trying to balance the light from the Skylux and still show the surroundings.  The background is an 18% grey roll, the model lighting is by the Skylux and the room illumination is by my tried and true KinoFlo Tegra 4-Bank.

So what's the verdict?  I came to the review with plenty of skepticism.  Price was the main driver, and in fact I still think that the device is much too expensive for most people.  I like the continuous power control, but wish it would go below 30% power.  I am guessing Westcott holds it here to maintain colour temperature consistency as you manipulate the power.  Turned up full, it's quite bright but it's not going to give you flash head levels of depth of field.  Shooting with the 100/2.8 Macro, I was able to get the aperture down to f/5.6 maximum running at 30% power before I would have needed a tripod.  That's a good indicator of where you're going to be with this light.  Since it is pretty well suited for flash hating children and pets, understand the limited depth of field and remember that you are going to have to get the light in close.  My meter readings at full power firing into the umbrella at ISO 400 were 1/40 @ f/5.6 evaluative, with the focus point on Sondra's near eye.  This produced a very pleasant exposure but it's hardly action stopping.  The inside of the umbrella was about 3' from Sondra at this reading.

I like the Skylux very much.  I don't like it $1200 worth though.  For the same kind of money, you can get a pair of Bowens 400w/s heads with stands and modifiers or the 400w/s Elinchrom D-Lux 4 system.   I'm really very excited about the potential for studio head style continuous lighting.  If you are doing videography as well as still photography, there is a benefit there if you cannot afford to get into two different lighting systems, or don't have the space for all this stuff.  Westcott is funny from a pricing perspective.  Their Rapidbox offerings are very price competitive and an excellent value.  Their first portable continuous light, the ICElight is dim, expensive, has short battery life and did I mention it was dim AND expensive?  The Skylux is absolutely the direction to be looking.  If it had a bit more power, a wider dimming range and sold for about $600 with a stand, it would be perfect.  As it is, it's a very nice light, easy to use and quite flexible, but priced too high to get real market traction.

Specs are below and are courtesy FJ Westcott.

Product Specifications

SKU 4850
Warranty One year against manufacturer defect
Material All-metal construction

Item Specifications

Color Temperature 5500K
Mount Built-in Tilter Bracket
Lux 2250 Lux at 6' (1.8m)
Lamp Type LED Array (94 CRI)
Footcandles 209 at 6' (1.8m)
Dimming Control 30%-100%
Beam Angle 60.1-degrees
Lifespan Over 50,000 hours
Softbox Mount Bowens S-Type Mount Speedring (sold separately)
Power Cord 20' (6.09 m) attached
Reflector Diameter 4.84" (12.3 cm)
Length: Light Head 10.8" (275 mm)
Width: Light Head 4.8" (124 mm)
Height: Light Head 8.5" (124 mm)
Weight: Light Head 4.2 lbs. (1.9 kg)
Length: Ballast 10.2" (260 mm)
Width: Ballast 3.5" (89 mm)
Height: Ballast 2.0" (51 mm)
Weight: Ballast 3.3 lbs. (1.5 kg)
Packaged Width 11.8" (299.4mm)
Packaged Height 11.6" (293.4mm)
Packaged Depth 8.4" (214.4mm)
Packaged Weight 7.5 lbs. (3.4kg)

The Photo Video Guy Podcast - Episode 67

Canon testing 75MP DSLR.  Canon patents 50/1.8IS.  Canon financials released, PSmarket crashing.Nikon patents new sensor design.  Nikon 200/2 ED VR II sharpest lens ever tested by DxO.  Hassleblad releases the Stellar.  SANdisk announces wireless flash storage.  Fuji roadmaps XC50-230/4.5-6.7 and updates X series firmware with a patch.  Manfrotto supports Arca Swiss plates.  Photoshop World attendees get 1 full year of Creative Cloud free.  Breathing Color paper available in Canada.  Set My Camera DF iPhone app.  Westcott Skylux now in Canada at $1200

Need Vitriol? Admit subscribing to Creative Cloud

I was seriously disappointed when so many people started ripping Scott Kelby for trying to explain Creative Cloud.  He didn't tell anyone to subscribe, he was trying to explain what he saw.  I have a very good sense of what he felt like now. I announced yesterday on Google Plus that I had received an offer from Adobe targeted at CS6 Master Collection licensees and that following a phone conversation with Adobe, I decided to subscribe.  For me, the annual fee is less than half of what I have consistently paid for upgrades over the various iterations of Master Collection and even before that when Macromind and Adobe were different companies. 

Today, I am stupid, Darth Vader, a sellout, a transacter of souls, easily fooled by people with clipboards, a drinker of Koolaid and an abandoner of principles.  Like Mr. Kelby, I did not tell anyone to subscribe, but I did relate that I had chosen to, because I have been vocal on why I don't like leased software in the past.

I still don't like leased software.  I still own CS6 Master Collection and if my experiment with Creative Cloud doesn't work out, I still can use CS6 in perpetuity.  Would I prefer it if Adobe treated the Master Collection as they have Lightroom 5, that is to make it available as a subscription AND as a perpetual license, buyer decides?  Absolutely.  They didn't.  Sometimes business makes decisions we don't like and we can follow or not, our choice.

I was pleased that Adobe reduced the subscription cost to a price/value ratio that is acceptable to me.  Many are saying Adobe flinched and is in the process of caving in.  Maybe so.  There has certainly been a lot of negative flashback at Adobe for their decision but the data shows that over 1M customers have subscribed to Creative Cloud.  I assure you, if the price/value ratio was not acceptable to me, I wouldn't have done it, and time will tell whether it's a good buy.  The net is that I get to use all of Creative Cloud for one year for about the same cost as a one year membership to the Professional Photographers of America, a membership I have maintained for some time.  I can assure you that I will get more value from Creative Cloud in terms of tools and revenue, but that doesn't make the PPA membership useless.

Having spent more than fifteen years of my life working for software companies, I understand the piracy challenge all too well so I discount some of the complaining about Creative Cloud because it makes it harder for people to steal software.  Some complainers still have a principle argument against Adobe and despite their insults, I still support their arguments.  In the end my data is my data, and as I use tools to get to finished product, and after analysis have determined that I go back and revisit a work to enter the edit process midstream later occurs nearly never.  A finished photograph or a finished video are for me at least, finished.  In some ways it's like renting a tool from Home Depot.  Even when the tool is gone, I still have the cabinet I built with the tool.

I would definitely prefer if Adobe offered a license choice for Master Collection CC.  If they change their mind, I will likely go that route.  In the interim, I will try the components in Creative Cloud and make ongoing business decisions from there.   For those who care to heap insults on me for my decision, whatever.  You are entitled to your opinion, but in this case it's my money, my work, I don't tell anyone else to follow me.

The Photo Video Guy Podcast - Episode 66

Canon to replace 430 EX II by year end.  Magic Lantern firmware for 5D Mk III and 7D increases dynamic range to 14 stops.  Canon 8D is not real.  Fuji to add focus peaking to coming X series firmware update.  Nikon updates distortion control to v 1.0009 for most all DSLRs.  Nikon issues patents for two new zoom lenses with diffractive optics elements.  Leica M 240 wins TIPA Best Camera award.

Looking for video rigs

I went out shooting with buddy Jay Stinson today and on the way home we stopped by the downtown Vistek store, just to have a look around.  As some of you know, I have been studying videography/filmmaking and I've recently been looking at rig systems for my video camera.  I had seen the Redrock Micro stuff at a trade show and one of their inside sales people (Rachel) had helped me build a configuration for budget purposes over a period of several days.  She was very helpful, but I have to say that picking the right parts for this "adult lego" system was pretty confusing.  By the time I was done with the exercise, I sat back to retrench because the config was into multiple thousands of dollars that I don't have and cannot justify. Robert Cole is my video consultant at Vistek and he suggested taking a look at Shape products.  They're made in Canada and they in fact have a complete bundle for the Canon C300.  Shape is, I think, a small company, but I like the idea of potentially supporting fellow Canadians.  I cannot talk to them until August 4th because they are closed for vacation, but I'm hopeful.  They are based out of Montreal.  Have a look at their kit here.

What was even more interesting was the introduction to a Turkish company called edelkrone.  There's an accent missing on the last e so please bear with me.  He could only show me digital brochures but is going to see if they can accommodate my use cases as most of what they show on their website while extremely comprehensive, is primarily oriented to having a monitor mounted on the rig.  When I got home, I spent some time viewing their videos on their website.  The founder does most of the presenting, and the videos are pretty well done.  You see that the products are not only well built, the engineering is very thoughtful and the packaging is very lovely, very Apple-esque.  If you want to learn more about this now available in Canada product, or if you just want to see some video rig kits that are incredible and priced for real people have a look here.  I was particularly impressed by the thinking that went into their two follow focus devices.  They are designed for the one person cameraperson/director/dp and have things like reversing gearing (to work with Nikon lenses that focus backwards) and unlike most other follow focus units are not height dependent.  Very cool stuff.

The Photo Video Guy Podcast - Episode 65

D400 this fall.  Live RAW video from D7000.  Nikon VR performance charted.  Nikon Pres is worried.  EOS-M dead?Dual Pixel AF may open the doors for more DSLR video.  New Canon TS lenses enroute.  7D Mk II in 2014.  RX100 II.  Sigma ships 120-300.  Leica can ship M accessories just not cameras.  Pentax renamed and new firmware.  Olympus releases body cap lens and courts release former execs.  Panasonic updates firmware on GH3 and G5.  Liking isn't helping.

How to drive users away from DSLR video one accessory at a time…the Zacuto Striker as poster child

I own the Zacuto Z-Finder and think it is a terrific tool and a must have for me for DSLR video.  Ok end of full disclosure and on to the post. In prepping to teach a workshop called Introduction to DSLR Video, I've been looking into some of the very useful and often delusional accessories that are labeled must haves for DSLR users getting in to video.  Holding up a DSLR for handheld work can get tiring especially if you don't have a Z-Finder or other loupe to make your head a point of contact.  Tripods and monopods are great but DSLR video allows for a kind of run and gun shooting that makes you want to work without a net, or brace, or something.

24 03 20101269430694zacuto_Striker[1]

So at some point, people start thinking about a shoulder rig of some kind.  There are all kinds of solutions in the marketplace but I thought I would look at the Zacuto because a) they have a great reputation in the cine world b) they are somewhat readily available and c) I could get my hands on a kit for testing.

What's in it?  There's an aluminum hollow rod 15mm in diameter with three clamps, each clamp having two 15mm holes and clamping fittings to connect two rods together.  There's a Zacuto Gorilla plate that attaches to your DSLR and that has a hole and an aluminum tube.  There's a sort of shoulder stock on a locking ball joint with an aluminum 15mm tube.  And finally there's a grip handle with a locking ball joint with a 15mm aluminum tube.  The image in this post shows you what comes in the box.

With a bit of futzing around, you can make yourself a shoulder stock for your DSLR camera to make it more stable for run and gun style video and ostensibly less fatiguing to hold over time.  Seems like a decent idea.  Then you look at the price sticker.  On Zacuto's web page this sells for $855 USD.  The retailer I was working with sells the kit for $1049.99 or more correctly DOESN'T sell it since the unit I got had plainly been around the block and visited re-pack city a few times.

Let's suppose you own a Canon T4i or 60D or even a brand spanking new Nikon D7100, all decent DSLR video cameras.  You've invested between $650 and $1200 in an awesome camera that does great stills and great video.  And there's this vendor that wants to charge you nearly what your incredible camera cost you for a box of aluminum tubes, clamps and plastic.  You might then be inclined to say this DSLR video idea is a scam, a stupid idea and even get pissed off about your excellent camera.

There are vendors building video accessories at a more reasonable cost, but even the low end stuff is WAY overpriced for what it is.  $230 for a Sevenoak slider that is basically a piece of aluminum track whose claim to fame is being too flexible and not all that slidey?  Try an aluminum track with a bogey box and four skate wheels.  Should be able to build and retail for $65 and still have outstanding margins.

It's no wonder that DSLR video cannot get any respect.  Video is a very different game from stills with new terms and the more that vendors and sellers try to make add-on sales with overpriced toys, the higher the probability it never hits its stride.  Many of the manufacturers involved, like Zacuto, Cinevate and Redrock Micro made their bones in big time cinema where budgets are ginormous and money apparently grows freely at the side of the road.  Maybe the enthusiast DSLR video market isn't the right place for them because to price hobbyist products reasonably would hobble their overinflated prices to industry.

The majority of us are not studios with huge budgets or buckets of time to learn all the nuances of every little piece of kit.  While I would love a Kessler slider, odds are against it because of the return I would get for the investment, and I am an admitted gear hound and try to do things right, often to my personal detriment.  It's ridiculous to believe that regular buyers with kids and family and jobs and real life debt are going to drop $1000 on a freaking shoulder rig to be able to get more stable video of Sally's soccer game.  A smart person with access to a simple mill and some basic tooling will be able to create an entire market.  So if that's you, could you get on with it please?

Just don't create a $50 bean bag.

A Tale of Two Sigmas - the new and the old Sigma 120-300/2.8 OIS

120-300mm-f2.8.jpg

I bought my Sigma 120-300/2.8 OIS lens last fall, literally three weeks before Sigma announced it's replacement was coming in their new lens architecture.  I contacted the Canadian distributor for more information and for a month the reply was "we don't know what you are talking about" even though there was plenty of information becoming available on the web.  -10 points for being obtuse. Bryan Weiss, owner of Daytripper Photo has an excellent relationship with Gentec Canada, the local distributor for Sigma lenses.  They provide him samples to use on his day trips for his paying clients to use and hopefully fall in love with and buy.  As Bryan is a full time seller at Henry's Camera, the client has a very simple path to follow.  He graciously offered to let me try out the new Sport series of the 120-300/2.8 OIS as he had received it for a day trip.

I bought the 120-300/2.8 after using Sigma's 300/2.8 on a similar trial period based on the fact that I could buy 2.5 lenses for the purchase price of a Canon 300/2.8 and because I really did not have that kind of coin available.

The 120-300/2.8 OIS I own is a very good lens with excellent sharpness, quick AF motors and limited distortion.  It's also a pig, meaning shooting it handheld is an exercise in weightlifting and carrying it around will fatigue you in due course.  The colour rendition of the lens is not as good as what I find with Canon L glass, although some allowance must be made for cost and it's common that different vendor's lenses have a different colour rendition.  Canon is consistent throughout the L range.  Sigma probably is too throughout their DG (full frame) line, but I have no real experience with multiple lenses to provide guidance.

Here are a images of the two lenses.

Sigma Sport 120-300/2.8

Sigma 120-300mm_os

The new lens increases the number of switches on the barrel to include a focus limiter to reduce focus range and ostensibly improve AF performance in poor contrast conditions.  It also has a switch to invoke custom lens profiles that the owner can construct using Sigma's USB based lens adapter and software.  Otherwise the switching is consistent between AF/MF and three OIS settings, although the layout is different from lens to lens.

Both lenses have tripod collars as expected and needed.  The new lens has strap lugs on its collar, a useful addition.  The new collar loses the finger ledges in favour of a heavier design.  As I use RRS plates on my lens collars, there was no real difference to me, although the knob to lock the collar on the new lens is considerably less knurled than on mine and in hot and sweaty conditions will be more difficult to grip.

The new lens feels heavier than the one I own.  Not by much, but heavier nonetheless.  The filter diameter is 105mm and there is still no option for drop in filters as in the Canon line so buying that polarizer is going to feel like a mortgage payment.  Sigma does have filters available for the lenses.

Balance is similar between the lenses, with acclimatization achieved reasonably quickly.  Immediately after that comes the realization that you have to have at least a monopod to shoot this if your name is not Kal-El.

The Sport line has a pretty S in a silver inlay on the lens barrel.  Autofocus was no faster or slower on the new lens than on the one that I own.  Both lens have a bit of slop in the mount that I find extremely annoying, neither feels rock solid when mounted.  In some very rudimentary shooting tests with a Canon 1Dx on high and low contrast subjects, neither lens appeared to outperform the other.  Viewing shots on the computer screen, I could not see any difference between the two.  Focus is not consistent across the zoom range, so focus at 120mm requires adjustment when you zoom in to 300mm and vice versa.  This is not entirely uncommon so more a nuisance than a bug.

The lenses do not differ in their ability to work with Teleconverters.  Sigma (understandably) specifies that to use a teleconverter, one must use only a Sigma teleconverter.  This is not necessarily true as I found both the Canon 1.4x III and 2x III teleconverters to work just fine, although the Sigma branded converters will be black tubed and less expensive than the Canon white tubed versions.

I was perturbed at having spent so much money on a lens only to have it replaced in less than a month and more perturbed by the seeming ignorance out of the Canadian distributor.  I am grateful to Bryan for the loaner because now I know I am not missing anything.  The USB dock / profile thing is of no value to me.  I can set individual lens profiles in camera and do not need to code them independently.

Should you buy one?  Certainly you will save a lot of money over the Canon or Nikon 300/2.8 variants and there is real flexibility in having a zoom instead of a prime where you may not be able to control your placement and that of your subject.  For OJHL hockey I find myself between about 210mm and 280mm on the 1D Mark IV and for the recent Polo for Heart the zoom really allowed for more flexibility in image capture.  List price is around $3800 so not cheap by any stretch but if you need 300mm and f/2.8 this makes a credible entry point.

First Impression : Introducing the Canon 70D

IMAGE_70D-EFS18-55_01_BI.jpg

The Canon 70D After literally months of speculation, Canon has announced the 70D, the evolution of what they have been doing successfully for a long time in the X0D series of cameras. The 60D has been a real workhorse for enthusiasts wanting great stills and strong video options, without entering credit hell to pay for things. The 70D looks like a big step forward for Canon customers and I expect a rush when the product hits stores in September 2013. Why is this so? Because of the phenomenon created by marketing professionals about being a hybrid photographer. Let me cover that first.

There are a number of vendors blatting on about how today's serious photographers need a hybrid camera. The reality is that most DSLRs are hybrids already, the definition specifying the ability to capture stills, video and audio. While most cameras "can" do these things, not many do these things well.

Stills have specific requirements including excellent low light capability, access to a wide variety of great lenses, a short learning curve and speed of use. A camera that is hard to use or overly bulky often becomes a closet queen, a term most often used to describe vintage guitars that never see the light of day. That camera is a bad investment. The best camera is the one you have with you. Any vaguely serious DSLR offers at least 8 bits of depth in the images and better units offer 12 or 14 bits of depth, critical for accurate tonal response. Even the "consumer" level T5i now offers 14 bits. But, while many DSLRs are actually hybrids, a disturbingly low percentage ever get used for any kind of hybrid work. The rationale for this reality is that it's harder to do video on a DSLR than on some alternatives.

Most DSLR owners don't know that the sensor in their camera is massively oversized for the requirements of Full HD video. A 20.2MP sensor delivers a lot more photo site coverage (5472x3648) than the 1920x1080 coverage needed for Full HD. DSLR vendors often use a technology called line skipping (Canon has in the past, I don't yet know about the 70D), to use as much of the sensor as is possible for video capture without overloading the capability of Full HD. Unlike traditional video cameras, that have tiny sensors, the larger sensors have larger photosites and therefore do better in low light. Typically though, because the autofocus works when the mirror is down, autofocus in video has been a non-starter for DSLRs. In fairness the T4i, T5i and 60D all support autofocus with video and it works but it is very slow and if you don't use Canon's STM (stepper motor) lenses, the audio track sounds like a Terminator flexing its digits as motor noise is horrible. Users become accustomed to Autofocus and when they discover that it generally is not there for video in their DSLR, try it once and never go back. The data shows that this is accurate across the board. DSLM (Digital Single Lens Mirrorless) cameras have no mirror and so most of them will do autofocus in video but it has never proven to be as fast as AF for stills, although I will give some credit to Sony for the video AF in their NEX series and also in their higher end SLT line, such as the A99 which is very fast.

The third leg of hybrid is audio and this is where most cameras fall down. They have built-in mics and automatic gain control, just like their video camera counterparts, and just like their counterparts the audio would need to improve a lot to achieve the level of terrible. So smart manufacturers add a microphone input. Smarter manufacturers add a headphone output to monitor the audio and the smartest ones allow manual audio level control in camera. You can shoot the greatest video in the world but if it has bad audio, no one is going to bother watching it and you are going to get flamed by viewers. Many amateur videographers use external recorders and better quality mics to get the audio tracks down and then combine them in post with either a clapper event or using software such as Pluraleyes to match the internal audio to the external audio and then mute the internal track. Bad audio makes for bad video.

If these three things are the hallmarks of a hybrid camera, and many DSLRs are already hybrids let's look at why the 70D is going to be a market leader.

It is a hybrid camera out of the box. Great stills are a given, because the heritage is already there in the 60D and its predecessors. A high default ISO of 12800 (pushable to 25600) means shooting in super low light produces good results. Canon has a built-in system for infrared control of flash that is functionally the equal of the Creative Lighting System from Nikon but really needs to step up their marketing of the functionality. Many existing Canon owners don't know it is there and think that to get "it" they need to move to Nikon. No need, it's good and with the popup flash you can control external speedlites with ease making this a solid portraitist's camera. While I personally tend to stick to the centre focus / recompose model, 19 points of cross-type autofocus make this a very solid all around offering. And of course you have access to all the Canon EF and EF-S lenses but do yourself a favour and buy it with an STM lens because...

The whole major point of the 70D is the enhancement to Canon's video capability.  Until Sony's release of the A99, Canon stood alone in this space.  (Please don't write me to tell me that other brands have had video. I know that.  I also know that Canon unloaded a can of whip-ass on them from the get-go)  Many pros use T4i cameras as their B cameras because the camera is so good for video. The 70D will drive an upgrade push.  It has a brand new Dual Pixel CMOS autofocus that makes AF in video not just practical for most users, but useful!  If audio is going to be recorded, you'll have to go with the silent STM lenses. The T4i does autofocus in video, but the system is slow and does a focus past and then back up execution model. Based on promotional content from Canon, the new system gets to focus much more quickly, quick enough that it is tolerable in a clip and without all the hunting back and forth. Serious videographers are going to use manual focus anyway, but the 70D is not targeted to be the A roll camera for a serious shoot. The prosumer user is going to love this new AF. Also absolutely critical is the flippable and rotating LCD display. It's not just for overheads or low angle shots, you can see what's happening on a bigger display when you are in front of the camera. For family and small productions where the director is also the actor, this is not an option and I don't understand why other manufacturers don't do what Canon has figured out up front. Look at the flip screen this way. It saves you $400 by avoiding having to buy an HDMI shoe mount monitor.

What I am not yet clear on is what the audio story is going to be. I have seen a mic input, no headphone output (yuck) but the big question is whether there will be a manual level control option to avoid the usually execrable automatic gain control (AGC). If it doesn't have manual audio levels, there are devices mountable to the camera that will do the job very well like the Tascam DR-60D although too often I see misadvised videographers bolting on some piece of junk from Beachtek that costs too much, comes with lousy preamps and does a terrible job of defeating AGC. Friends don't let friends buy Beachtek but apparently some photo retail employees do not have such scruples.  I hope Canon is smart enough to give us manual level control and make this a non-issue.

Thinking of specs, let's take a look at what Canon has to say about the new 70D

  • 20.2MP APS-C 'Dual Pixel CMOS AF' sensor
  • AF down to f/11 maximum aperture
  • DIGIC 5+ image processor
  • ISO 100-12800 standard, 25600 expanded
  • 7fps continuous shooting, burst depth 65 JPEG / 16 RAW
  • 1/8000 to 30s shutter speed, 1/250 flash sync
  • 'Silent' shutter mode
  • 1080p30, 1080p25, 1080p24 plus 720i60, 720i50 video recording, stereo sound via external mic
  • 19-point AF system, all points cross-type, sensitive to -0.5 EV
  • 63-zone iFCL metering system
  • 98% viewfinder coverage, 0.95x magnification, switchable gridlines and electronic level display
  • Fully-articulated touchscreen, 1040k dot 3" ClearView II LCD, 3:2 aspect ratio
  • Single SD/SDHC/SDXC card slot
  • Built-in Wi-Fi
  • Single-axis electronic level
  • Built-in flash works as off-camera remote flash controller
  • AF microadjustment (can be set individually for up to 40 lenses, remembered by lens serial number)
  • In-camera High Dynamic Range and Multiple Exposure modes (JPEG-only)
  • 'Creative Filter' image processing styles, previewed in live view

So if these specs look like they kick the 7D's butt, you'd be correct.  Of course Canon will respond with the long-rumoured 7D Mark II at some point but as of right now, the 70D wins out.  The camera uses the proven LP-E6 battery but in classic Canon fashion has a new battery grip meaning the grip from your 60D won't be an upgrade path.  The new grip, called the BG-14 no longer loads the batteries from the rear but instead from the side into a removable tray a la Nikon.  The WiFi and iDevice remote is as is found in the current 6D.  I am glad to see Canon put WiFi into more DSLRs, now if they would just drop the exorbitant price on the WFT-E6A WiFi adapter for the C300 I'd be happier.  The remote isn't CamRanger feature rich but definitely gets the job done and doesn't pick your pocket for an extra $300.

Compared to what else is in the market today, the 70D looks like a real winner and the only viable step up from the T5i for the general user.  Make no mistake, this unit is designed to knock down the barriers found to DSLR video and it does this with the new Dual Pixel AF system.  I had an opportunity to read a technical analysis and assessment of the design and process and believe that Canon will be able to make autofocus video in a pentaprism mirrored body not only usable but acceptable.  The promotional video made available to me showed AF in video to be 5x faster than what we see out of today's products.  Of course as noted at least twice, if you will use AF in video you MUST go with an STM lens.  I am not personally gaga over the 18-55 variant that Canon is showing that arrived with the T5i so I would suggest if you are going with a zoom, select the optically superior, and more expensive, 18-135mm f/3.5-5.6 IS STM.  This is a great walking around lens and definitely a go to range for video.  If you need lens speed, spend $250 or so and add the 40mm STM pancake to your kit.  I have tested this lens extensively on crop sensor bodies and it's really very sharp and dead silent focusing in video.

Here's a shot of the back of the camera.  It looks very similar to the 60D, meaning a slightly smaller frame than the 7D and the same control layout as what is familiar to 60D users.  Note that this LCD has higher resolution than its predecessors and it too is a touchscreen.  That's a love it or hate thing for you to decide on your own.

IMAGE_70D-BODY_05_BI

Here is the pricing information provided by Canon.  The EOS 70D will be available in September 2013 for an estimated retail price of $1299.99 for the body alone and $1449.99 bundled with an EF-S 18-55mm f/3.5-5.6 IS STM lens or $1649.99 bundled with the EF-S 18-135mm f/3.5-5.6 IS STM lens. Also available is a new Battery Grip BG-E14 that conveniently accepts up to two LP-E6 battery packs or a set of six AA batteries for an estimated retail price of $329.99.

I look forward to getting hands-on a 70D when they become available and shooting some tests.  I also want to specifically thank Erika from Edelman Canada for sharing the press release and official images with me on the day of announcement.  Certainly made my job a bit easier.

Is it better? Reexamining the Canon EOS-M with the 2.0.2 firmware

I think that I've mentioned that I like this little camera. Construction is solid, control layout is decent, images are good out of both the 18-55 kit lens and the 22/2 pancake. Video is quite good with no AF noise (EF-M lenses are all STM type), although the built in microphones give you what you expect - utter crap. The camera fits the hand well is only marginally bigger than the Sony RX-100. But the camera as shipped had a real problem. It's autofocus performance could be described as slower than molasses flowing uphill in winter and that would have been charitable. Compounding negative speed, it tended to hunt back and forth in low light resulting in most reviewers desiring to see how well the device bounced. Consequently, Canon couldn't give the darn things away to the point that when the original kit came out with the 18-55 lens and the 90EX micro flash at around $900 it was laughed all the way back to the warehouse. Today that same kit, less than one year later still languishes on dealer shelves at $499 (sale price, reg $699) collecting dust, that's how bad a reputation the camera has. Canon has not helped by shipping only two EF-M lenses until the recent debut of the 11-22 zoom which is afflicted by the same slow lens speed as the default 18-55. Can anything change the tune for the little mirrorless Canon?

Canon this past week releases a major firmware update for the camera. While they chatter inanely about better foreign language support in the menus, those issues weren't stopping sales. The new firmware purports to significantly improve autofocus performance so I arranged with Chris Atkinson at Henry's in Newmarket to borrow their demo, upgrade the firmware and see what's new. The camera is very familiar, it's the SAME one I tried out over six months ago...

I fired a few frames with the default firmware, charged the battery and ran the firmware updater. It completed successfully.

So the big question. Is autofocus performance improved in terms of speed? Yes, it is better. Is it a lot better (as in NEX-5n better)? No, but it is Fuji X better. An NEX-5n or OM-D will still kick its butt around the corner and I won't even talk about the size of the can of whup-ass the RX100 would open on it. But it's better. Usable better. In good light outdoors, focus lag was not noticeable. Indoors, particularly with the 18-55 at the 55mm end (resulting in a max opening of f/5.6), there had better be mucho de contrast or the camera will hunt and then give up cold. AF performance on the 22mm f/2.0 is better overall.

The lenses are very sharp but as the barrels are REALLY narrow (like the Sony NEX barrels) and they are not brilliant optics when it comes to vignetting and distortion. Using the lens profile correction in Adobe Lightroom 5, the corners in shots taken with the 22/2 brightened up nearly 2 STOPS, which is not horrible but not very good either.

Since internally this is basically a T4i, it should be a lot better than it is. My daughter has a T4i and it's plenty quick to focus and does pretty well in crappy light. She uses it primarily for video and like the EOS-M the internal microphones make you yearn for manual audio controls or a sharp needle to destroy them forever. Good video with bad audio is bad.

The firmware update doesn't change the fact that you have to do most everything through the touchscreen. Touchscreens on my phone are ok, not ok on cameras. The update also didn't add a viewfinder so you still look like a dork holding the thing out in front of yourself like some lost tourist, with all the inherent stability loss that goes with hanging your arms out into space.

So what's the verdict?

I've attached a gallery of images that were shot as either RAW or JPEG in camera, imported to Lightroom 5 and given my basic workflow (less than 30 seconds spent per image). Using the lens profile correction is REQUIRED, but after that what comes out of the box is pretty darn good, certainly as sharp as anything else in this DSLM APS-C sensor space, with good contrast and typical Canon colour fidelity. If you've never experienced Sony autofocus you might be just fine with the enhanced AF brought about by the firmware update. It's not a good ambassador for the DSLM space though, with shoddy AF in poor light, a touchscreen dominated UI, small battery and no viewfinder (that LCD is nice but glares out fast in sunlight) and even at the sale price of $499 you can do better. There's allegedly a newer EOS-M enroute, but this critter definitely feels like Canon's version of the red-headed stepchild. Maybe if they dropped the price to $249….

The Photo Video Guy Podcast - Episode 64

Canon updates C100 firmware. Reviews are in on the 200-400 and 600/4 II.Specs have leaked for the Canon 70D. Canon ships 2.0.2 firmware for the EOS-M. Fuji announces new X series firmware, a new 27/2.8 lens and the X-M1 camera. Panasonic will update the 20/1.7. Sony releases a new flash as well as the RX1R and the RX100 II. Carl Zeiss is now just Zeiss

REVIEW : The Westcott Rapid Box Octa 20" and 26"

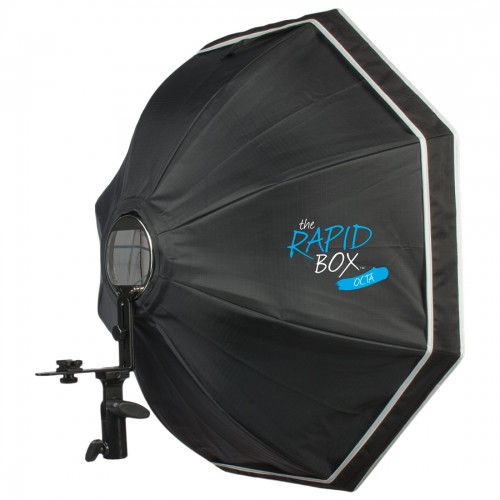
RapidBox26OctaFJ Westcott has been doing umbrella frame softboxes for a while, and I like their Apollo line EXCEPT when you want to wirelessly control your flash with infrared. Because the flash is "in the box" infrared control fails most of the time. Westcott recently released a new family of products called Rapid Box. There are two octagonal softboxes and a small strip light. All use an umbrella stay collapsible system to make the units transportable, but most importantly, place the hotshoe flash on an included bracket outside the box. With the support of Chris and Louise at Henry's in Newmarket Ontario, I was able to do a test of the Octa versions of the Rapid Box units.

Assembly of the box itself is a no brainer if you have ever used an umbrella. Then simply attach the bracket on the box to the flash bracket that comes in the box by rotating the bracket arm and screwing in the flash arm. The only way it could be simpler is if it came fully assembled but that would defeat the superb portability of the unit when packed into the included travel bag. Total set up time including putting the whole thing on a light stand is less than five minutes if you pace yourself.

Mount the flash on the bracket and adjust the height so the flash head just fits inside the opening so all the light from the flash gets into the box. The octal and strip boxes are lined with a high quality silver foil for lots of efficiency and there is a simple diffusion panel that velcro attachs to the edge of the box at the front.

Using either the Nikon Creative Lighting System, Canon Creative Flash System (Infrared) or Canon RT Flash System (Radio) is a breeze. Set the camera flash to be master and to act solely as a trigger. Set the flash attached to the Rapid Box to Slave mode and start shooting. In order to confirm ease of use, I tested in eTTL, eTTL II modes on Canon and iTTL on Nikon. The exposures were excellent without any real need for compensation, leaving control in the hands of the artist. I even made some test exposures using old Canon 580EX units at my friend's home and the shots were beautiful right off the bat with soft clean light that wrapped very well when the light stand was placed properly.

The general rule for any soft box is to put it as close to the subject as possible while keeping it out of frame. Used in this way the Rapid Box is a great choice. Regular readers know that my raved about offering is the Lastolite Joe McNally Signature soft box and I still prefer it for portraits because its light is so creamy. However, I would say that the Rapid Box is as good as the regular silver interior Lastolite and much nicer than the Westcott Apollo collapsible softboxes. The 20" octal sells for around $169 and the 26" octal for around $199. The strip box is 10" x 24" and sells for around $199. There is also an internal reflector disk available to force more internal bouncing around for about $25. I have one of these for my Elinchrom Deep Octa and it does serve to reduce hot spots, although I did not try the Westcott Rapid Box version.

You can find Westcott products online or at Henry's locations in Canada. Support them if you would in thanks for providing evaluation products to me to test.

The Photo Video Guy Podcast - Episode 63

Nikon firmware updates and new software. Canon releases patents for new lenses. JVC has a 4K camera that takes Nikon F mount. Sigma sets the price for the 18-35. Pentax announces new DSLRs and Q7. First look at Pentax MX 1. Leica M delayed significantly. Hasselblad ships the Lunar. New RAW from Microsoft and Apple. Photoshop CC debuts

First Look : Pentax MX 1

MX 1 ChromeI remember the Pentax MX from about 30 years ago. It was a good quality SLR. Pentax has gone through a lot since then, most recently being acquired by (and in some opinions, saved by) Ricoh. My friend Steve Davies has been with Pentax Canada for a long time and when I saw him at a trade event this week, he asked me what I thought of the MX 1. I, as one might expect, gave him the dumb look, since I did not know what he was talking about. Never to let a challenge go unpunished, I determined that the MX 1 was stocked at the camera store where I work on a very part time basis, and with the assistance of the most awesome Louise Booth, obtained one to do a first look with. The first thing you notice about the MX 1 is the weight. If you've handled other larger sensor point and shoot style cameras, the first difference you feel is construction. With top and bottom plates of brass, finished in either gloss black or retro silver, the MX 1 feels built tough. The lens is a 4x zoom measuring from 6mm to 24mm with an aperture of f/1.8 to f/2.5 That translates in 35mm language to a range of 28mm to 112mm so wide angle to short telephoto, with an aperture range of f/8.4 to f/11.6. This is decent range for a pocket camera, but isn't really going to rock low light. ISO runs from 100 to 12800 but I found it gets noisy around ISO 1600. Still, certainly more than some other cameras of this type. It incorporates a CMOS sensor noted as 1/1.7". I confess that this tendency of most manufacturers to play silly buggers when quoting sensor size makes my teeth hurt so some basic math says the sensor is about 0.68 inches on the diagonal. Certainly larger than the generic point and puke, but less than the much loved (by me) Sony RX-100, but similar to Canon's S110, Olympus' XZ-2 and the Lumix LX7. The sensor delivers files of maximum 12MP.

Like other cameras of this type, the camera captures not just in JPEG but in RAW format as well and a big clap on the back to Pentax for selecting the open standard DNG format for it's RAW files, so you don't need some wonk-ola software to get at your RAW files such as one encounters with oh say Fujifilm. Don't kid yourself though, the in camera JPEGs are generally the way to go until Adobe, DxO and the rest of the lens profile magicians get profile corrections available because when I shot RAW+JPEG fine on the MX 1, the RAWs were, to put it softly, showing a bit of the old barrel distortion. The in camera JPEG builder applies the needed lens correction so the JPEGs look pretty decent, albeit without the colour depth because of the JPEG "parsley to throw away" storage model.

By the way, if that phraseology doesn't mean anything to you, go find the episodes of The Flintstones where Fred and Barney buy a Brontoburger stand.

Charging the battery takes just over two hours and you can charge the battery out of the camera because it comes with an external charger, like any intelligent camera should. Manufacturers who are too frakking cheap to put an external charger in the package and then require that you charge the battery in camera, need to have Mr. Bat meet Mr. Kneecap. Pentax says you should get about 290 shots on a charge, putting the MX 1 in the same park as its competitors.

The menu system reminds me of most Japanese camera menu systems, meaning it looks like it was built after the architect just came off a three week long sake and Suntory bender. Adding insult to injury is a font style that brings back memories of the long dead and unlamented MGA from the original IBM PC. I would have hoped that Ricoh would have had some influence into the menu system. It's confusing because different presses do different things for different areas. This can be addressed in firmware so I hope that Pentax listens to buyers and hires a good UI company to redo the menu system. Button layout is pretty straightforward. Shutter is on top with a zoom rocker around it, video start / stop is a separate button, There is a shooting mode dial and a separate exposure compensation button giving ±2 stops in ⅓ stop increments. The power button is easy to find without hunting for it and it glows a bright green when the camera is on.

Modes include GREEN, Auto Pict, SCN, HDR, USER, M, Av, Tv, P and Movie. I expect many buyers will use GREEN or Auto Pict and for the most part they are pretty darn functional. You have to manually popup the flash to do any flash function selections and it emerges on a little cantilever arrangement like many other cameras of this type. The switch is on the upper left side of the camera. It's bright enough for basic work but it is very small and so harsh shadows and blow outs should be expected. There is no hot shoe, so this is what you get. It offers a couple of red-eye modes, as well as slow sync and "second-curtain" sync.

The back has a rotary wheel that does different things depending on the mode you are in. There's an AE lock button and the usual four way rocker. The rocker labelling needs work. The flower that everyone naturally believes is macro mode actually takes you into the different selectors for focus mode. Not all that intuitive. There's also a Play button, a Menu button to open that door to hell mentioned earlier and an Info button whose function varies depending on mode from doing nothing at all to popping up a Hollywood Squares style grid to select different configuration options. The Play button also empowers the rocker to move back and forth but if you rocker down, you get access to all the "fun" stuff, like in camera filters, HDR simulation, toning, Instacrap style things and a bunch of other junk I would never use, but that's probably needed for someone, though I cannot imagine who that might be.

The LCD display is large and bright. The image quality displayed is very good and I rate the LCD as one of the best elements of the little camera. It tilts up or down via a cantilever arm system that while solid is not all that smooth. The other side of that is that it doesn't flop all over the place.

The tripod socket is metal and screwed into the brass base plate so while a little thing, it indicates that some engineer has been thinking about the more demanding user.

Image quality is easily as good as any of the cameras in the price range, which is about $450. The lens is sharp and contrast is good, but beware the tendency to barrel distort. A close in shot in wide angle mode definitely made the upper right of Sondra's face start to wander into the corner. I won't publish that one, to avoid getting yelled at but trust me on this, you don't want to be taking head shots with this thing in anything but full telephoto.

The 4X zoom is adequate. There is also intelligent zoom available when shooting in lesser JPEG quality that basically reduces the MP count so as to use more of the sensor for zoom. A peer at the store says that doing this doesn't diminish quality. We're going to agree to disagree, I think there is a visible quality drop. The camera also has digital zoom, which as all readers should know is basically a simple way to make a decent shot look just like cat vomit.

I shot a small range of images with the camera because I only had it for a short time. I think that the JPEGs are quite good and expect the RAWs to be more usable when there are lens profiles available for Lightroom etc.

The Pentax MX 1 is a fine camera. I did not find anything that really set it dramatically apart from its competition in the price point except that it has much sturdier construction. Certainly it's very usable and the lens is very sharp. The menu systems need work, but in fairness, most menu systems look like they were designed by rats on typewriters. I think it's a strong contender in a field of good options. Certainly the price point gets it into the hands of people who might otherwise look at the excellent Sony RX-100 or the laughably sad Nikon Coolpix A.

The Leica X Vario. Mini M?

8246-e1370992716957.jpg

Leica X VarioAs regular readers will know, I am a Leica owner.  I shoot an M9 now, have an M240 on seemingly endless backorder and my first Leica was an M4-P with motor winder and 35mm f/2.0 lens.  I still miss the M4-P even though the only film I shoot these days is in my Sinar P. There has been a LOT of noise about this new Leica that has been referred to as the Mini M.  But that's not right.

It's an X, but Leica refers to it as the Mini M.  Confused yet?

Specifically it is the X Vario and fits into what for Leica is the point and shoot marketplace.  I have shot the Leica X1 and really liked everything about it except the price and think that the X2 was a major step up.  Except for the price.  Now M cameras are really stupid expensive but there is just something about a real manual focus rangefinder...

Anyway about the X Vario.

Off the top, it is an X series camera, so that means autofocus, non-interchangeable lens on with a larger sensor than a traditional Point and Shoot.  Internally known as the Type 107 it is a CMOS APS-C sensor based device capturing 16.2 megapixels.  Captures can be RAW in the open source DNG format or Leica's 4 JPEG resolutions.

The lens is a Leica Vario-Elmar 18-46mm f/3.5-6.4 ASPH.  This translates to about a 28-79 in the full frame world and it incorporates 2 aspherical elements.  That will mean great sharpness and resolution but not exactly buckets of lens speed.  It may not be an issue as Leica has gone with newer CMOS sensors with superior low light capability instead of their older CCD sensors that had the Leica "look" but fell apart badly above ISO 800.

ISO range on the new camera is ISO 100 to ISO 12500, so that should have you covered.

The camera will shoot HD video at 1920x1080 and 1280x720 both at 30fps.  So high quality but not much in the way of framerate flexibility.  Video is stored in the higher performance MPEG-4 format.

Still shooting modes are Program, Aperture preferred, Shutter preferred and Manual.  Bracketing is built in over a three shot range and EV increments start at 1/3 stop to a maximum of ±3 EV.  Shutter speed range is from 30s to 1/2000s.

White balance features the usual suspects of Automatic, Daylight, Cloud, Shade, Flash and Halogen, which I presume is what the rest of us think of as Tungsten.  There are also two user configurable WB settings, manual WB and fine adjustment controls.

In addition to single shot there are two burst modes, at 3fps and 5fps respectively with a buffer capable of handling 7 burst shots in DNG+JPEG fine.

As one would expect there is a popup flash unit, and as one would expect it has a Guide Number of 5 so it's not very powerful.  It does allow for lots of controls though including Auto, RedEye reduction, always on, always off, slow sync (dragging the shutter) and slow sync with redeye reduction.  Since it's on camera and on axis, it's going to look like the flash from any point and shoot.  What is nice to see is that there is a REAL hotshoe on the camera so you could go with a Leica shoe mount flash that bounces if you need one.  That Leica flash is TTL and looks suspiciously like a Metz (cannot imagine why that might be :D).  And, it's expensive.

So what does this lovely bit of kit set one back?  Well it is an X so presumably it is not restricted access as are M and S series cameras.  According to the web B&H has the camera for $2,850 USD with availability around June 18th.  No pricing at Vistek for Canadians at time of writing but figure it will be close to that.   If you want to preorder, please consider buying through the link to B&H posted below.

I don't know if I will get a hands-on test option with this critter.  It's about $800 more than the X2.  Where it is interesting is that it is priced right in line with the Sony RX-1.  I have shot the RX-1 and while opinions vary, I really did not like the handling.  The images were excellent, but the fit in my hands is very awkward.  Will the Leica be better?  Don't know but if you are the person set to drop three grand on a top end point and shoot, you would be well served to check out the Leica X Vario.


EXERCISE : Learn to "See" Like Your Lens

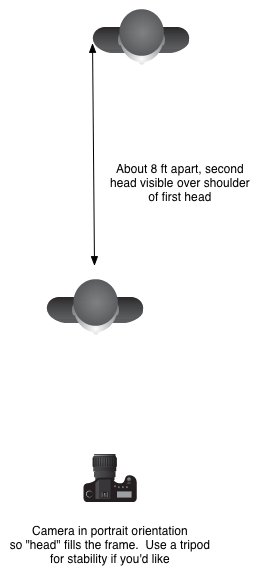
This is a pretty simple exercise that you can do with your lenses be they prime or zoom. First get two objects that are three dimensional that are about a foot tall and half that wide. Or two mannequin heads.  Make sure your objects have obvious markings or protrusions at different distances from the front.

Second, set your subjects about 8 feet apart front to back and nearly side by side left to right as in this little diagram.

Lens Exercise


Now position the camera lens combination so that with the camera in portrait orientation (vertical), you fill the frame with the first head and can see all or part of the second head over the the shoulder of the second head.

Open the lens to its widest aperture and shoot a frame.  Close the lens down to its smallest aperture and shoot a frame.  (This is where that tripod is going to come in handy).  Check your white balance and ISO so the shots don't look like mush.

Repeat for your different lenses.  For zooms, do the two shots at a variety of focal lengths.  For example, if you have a 24-105mm take shots at 24mm, 35mm, 50mm, 75mm and 105mm.  If you have a 70-200mm take shots at 70mm, 100mm, 135mm, 150mm and 200mm.

Import your shots into your editor of choice and make a layout so the wide open shots are in a line from widest focal length to narrowest focal length.  Add a second line of shots to your layout from widest focal length to narrowest focal length at the the small apertures.

Congratulations, you've now created your personal focal length / depth of field guide.  By memorizing the look of the shots you will be able to look at a scene and "see" how it will be through the lens, before you put the lens on and make a frame.  It's a critical piece of becoming a better photographer, learning to "see" like a lens.