Tips to Make Better Images : RAW Actually Does Rule

With thanks and apologies to Rick Sammon, Ive lifted and readily use a phrase I learned from him, and that is that RAW Rules

If youve seen the television show I do with my friend Bryan Weiss, or taken a private workshop with me, or done a workshop with me at The Newmarket Camera Club, you know how often I say this.

So for those who dont know or those confused by a load of bafflegab, what does this actually mean?

RAW, as the name implies means uncooked.  The image that is captured is precisely what the sensor saw in all its glory or lack thereof.  That little screen on the back of the camera does not show the RAW image, it shows a JPEG and while JPEG does have a real name, I refer to the process of making a JPEG as microwaving.  You cook the image really quick and pretty much from the inside out.  A cooked image can look great, but its been cooked by someone elses recipe and things get lost in the cooking.

When people start to shoot and edit in RAW, they invariably say it didnt look like this!  This is flat and boring, and the colours dont pop, and I thought the detail was crisper and that there was more contrast and they go on and on and without support eventually say, screw this, Im going back to JPEG, because the pictures looked better.   They arent wrong, those JPEGs did look better, but what if you wanted to cook the photo yourself.

Picture this.  You want a hamburger.  You want that hamburger to be cooked medium and charred on the outside.  You want it to be juicy but not runny, maybe a tiny bit pink but not bleeding.  You get your hamburger and its pretty darn good but it isnt what you really wanted and you know that if you had started with the raw ground beef, you would have gotten what you really wanted.  Exactly correct.

Most higher end DSLRs capture in 14 bit RAW.  Capture in JPEG and they drop to 8 bit.  What does this mean?  Consider the following table, where each column shows the number of variant tones at each level.

Bit


What does this mean?  Fundamentally 8 bit images provide fewer tonal variants than 14 bit images.  So when we look at the whites, we go from 8192 levels of white to 128 levels of white and down in the blacks we go from 256 levels of black to 4 levels of black.

And you may say, so what.  Lets suppose that the image is not perfectly exposed.  Its a bit underexposed, say by a stop and you need to brighten it up.  There is a significantly lower amount of data to work with, in the example above, 64x less data to work with from a tonal perspective.  Oh and did we mention that when you save as a JPEG at the default settings you are throwing away at least 30% of the pixels you captured?  Yes this is done mathematically and for the most part it looks ok, but if you spent the money on a D800 with 36MP and save everything in large JPEG, you are getting at best 24MP out of the camera you spent so much for.

When you work with JPEGs you are working with less content.  And every time you export as a JPEG, you lose some more.  Work with the highest bit depth and the maximum amount of data through the entire edit process and make exporting as JPEG the VERY LAST THING YOU DO, not the first thing even before the image leaves the camera.

Now if you are shooting sports for a wire service or you are a photojournalist on deadline, your mileage may vary and you will need to do JPEGs, but thats not most of us.  If all you want are snapshots, JPEGs are just fine there too, because we are less likely to spend time working in the digital darkroom on snapshots.  But for your serious work, or when you are trying to grow as a photographer, RAW Rules.

The Photo Video Guy Podcast - Episode 50

CP+ abounds with point and shoots and it doesn't really matter.  It's mostly a firmware fest.  Nikon updates the firmware on the D4 and announces the 18-35/3.5-4.5 and the 800/5.6.  It's the 80th Anniversary of Nikkor lenses.  Canon updates the firmware on the 1Dx and will release a 70D soon.  Pentax updates the firmware on K series bodies and hopes that colouring the Q10 will prompt buyers.  Sigma announces the 60/2.8 macro for E and M4/3s mount.  Olympus announces the 75-300/4.8-6.7 for 4/3.  Sony update firmware on A and E mount bodies and some lenses.  Fuji updates firmware on the XPro-1 and XE-1.  Quick review the Think Tank Glass Taxi.

Tips to Make Better Images : Tripod Leg Options

Following the interest generated by the post on tripod heads, I was asked to talk a bit about leg sets.

Ok, here goes, with plenty of upfront warning about bias and personal preference.

Tripod Leg Sets which may or may not include a centre column come in a variety of materials including but not limited to;

  • Wood
  • Steel
  • Aluminum
  • Basalt
  • Carbon Fibre

Lets look at the pros and cons of each material.

Wood

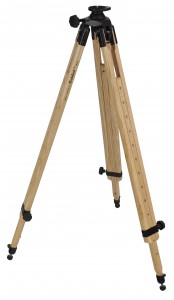
BerlebachWood tripod leg sets have existed for years and still do.  On the Pro side, they are relatively easy to service and if they use good hardwoods, tend to last a very long time.  Ash, Maple and Hickory are good wood choices.  On the Con side, wood tripods are often bulky and often very heavy making transport unpleasant.  Because the wood wears, they dont retain perfect orientation but the use of proper ferrules and grommets can make a solid difference.  Wood is also reasonably vibration resistant until you hit the resonant frequency at which point its making music.  We rarely see wood tripods in the field these days except in the hands of old view camera afficionados who like to be consistent in their approach.  Berleback of Germany does some beautiful work.

Steel

Steel tripods are rare.  They are extremely stable and extremely heavy.  They are barely portable and most often found in fixed studio locations.  Steel is reasonably vibration resistant and when rubber damped can be wonderful, so long as you personally dont have to lift it.   Unless you are Bruce Banner or have a comportment of personal shrives, avoid steel.  Plus it corrodes readily.

Aluminum

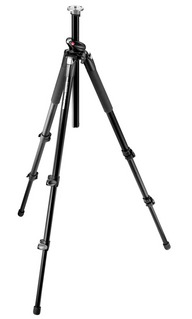
manfrottoThis is the material we run into most often.  Aluminum can be excellent but more often than not the tube walls are too thin, or the U channels improperly formed.  This bad design coupled with crappy leg locks has given aluminum a bad rap.  Aluminum is reasonably light, but be cautious that the legs do not flex when you put the weight of your camera and lens on them.  More photographers have bought and regretted too light aluminum tripods, often at the advice of store staff looking to earn a $5 spiff than any other type.  If you go aluminum, check the legs for flex and the locks for slippage.  The better aluminum leg sets will last you for decades.  I have a set of Manfrotto legs on a V design with centre braces that I have had for 32 years and they are still excellent and hold my Sinar 4x5 with great stability.  Not very light though.

Basalt

GitzoThe nice folks at Gitzo wanted something stiffer and less vibration prone than aluminum but less expensive than carbon fibre, so they developed the Basalt series.  Basalt is volcanic rock and like carbon fibre this is a weave system.  Basalt is significantly lighter than aluminum and has great torsional rigidity.  The walls can be thinner than aluminum without giving up strength.  I had a Gitzo leg set for a while and it was terrific.  Its now owned by my buddy Bryan who calls it The Rock because it is so stable.  To the best of my knowledge only Gitzo offers a Basalt based leg set at this time but thats no reason not to go take a closer look at them.


Carbon Fibre

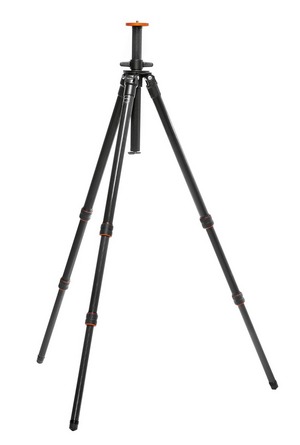
TVC-34LCarbon fibre leg sets are often seen as the ultimate in legs.  Be careful though, because the quality of the carbon fibre weave has a lot more to do with the stability than the material itself.  I have seen a great many low end carbon fibre tripods from name brands and unknowns alike that were worth far less than the purchase price.  Unfortunately good carbon fibre legs still cost money.  Manfrotto does some decent ones at reasonable price but I personally prefer the Really Right Stuff or Gitzo options.  The RRS weave is unsurpassed in my opinion.  I even moved from the excellent Gitzo legs to get this capability.

But wait, theres more!

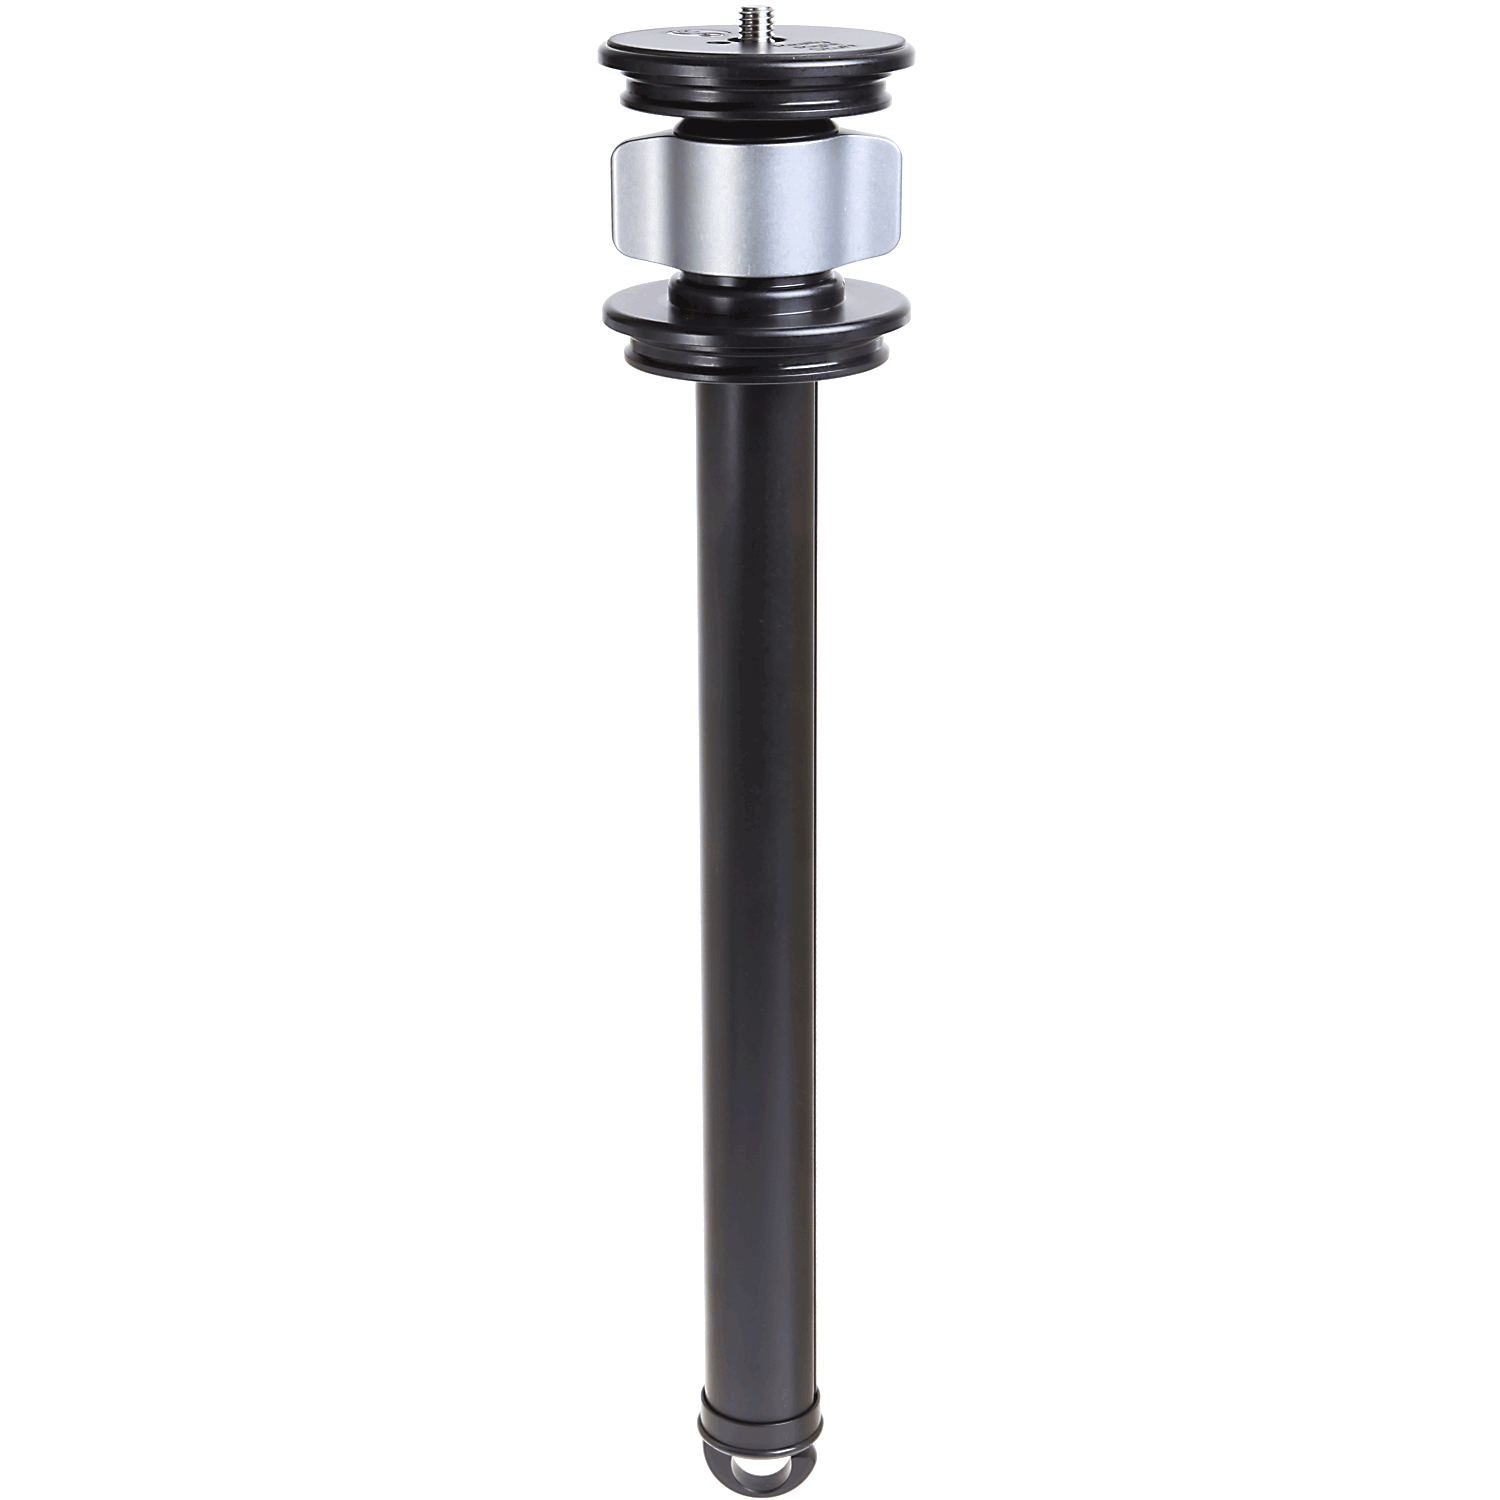
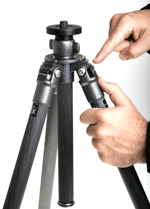
RRSYou want to look at a few other things when picking a leg set.  Many less expensive tripods include a centre column that goes up and down and provides for more height.  You are far better off to buy a longer leg set than depend on the centre column.  A longer leg set is just more stable.  If you do want a centre column, and its often useful DO NOT buy one of those types that uses a crank to go up and down.  They are a pain to position correctly and create instability in the platform unless you are paying through the nose for one.  Youll not that none of the leg sets I recommended have geared centre columns.  If you do select a tripod with a centre column, make sure it is reversible so you can hang the camera on the bottom for closeup work.  The column should also have a hook on it to hold a weight or a sandbag.

You also want to consider how many sections the leg set has.  For example a 3 section leg will always be more stable than a 4 or 5 section leg but the tripod will be longer when collapsed and therefore perhaps a bit more onerous to transport.  The more sections, the thinner the final tube and the less stable the whole thing becomes.

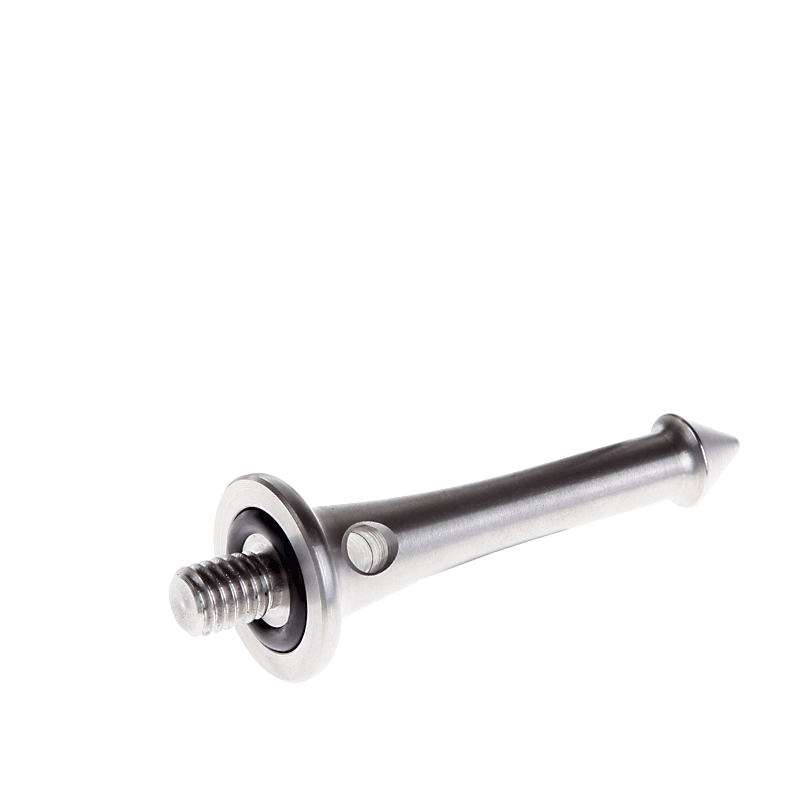
RRSIf you are going to be working on different surfaces you might want a leg set with interchangeable feet.  My Gitzos and my Really Right Stuff legs both came with non-marring rubber feet but I could easily swap them out for spikes if I was setting up on a hillside.  Some leg sets have retractable rubber feet that screw up to reveal spikes.  This is an ok compromise but the spikes arent really long enough to make a big difference.

The locking system for legs is always a point of argument.  Some like the lever lock kind of legs because they are very fast.  I dont like them because I find that they can break and when they do you are SOL.  Some people hate the twist type locks.  I prefer them because I have variable control over the locking tension and as they wear, I can also tighten them a bit more.  They are a tiny bit slower than levers but not enough to be a problem.

RRSThe next thing to think about is variable leg angle.  Better tripods allow you to set the leg angle independently for each leg via use of a simple locking system.   The Manfrotto 055 gives you four angles.  The Gitzo basalt and the Really Right Stuff leg sets give you three.  This allows you to splay the legs to get low to the ground or to get more stability on a hillside.  Newer tripods offer this but the splay angles are restricted.  I dislike Manfrottos 290 series for this reason.  Watch the hinge systems on the variable leg angle models.  Youll find that Gitzo and Really Right Stuff have thought this through and build the best hinge designs.

Sometimes a leg set that comes with a centre column also includes reinforcing rods that run from the leg to the centre column.  This is critical on a light stand or even on a tripod for very heavy gear like an 8x10 view camera or pro video.  You DO NOT want this on your still camera tripod.   First they negate the ability to vary the leg angle.  Second they provide a wonderful way to pinch the ends of your fingers in the field, and third they are most often found on really crappy tripods as a means to make junk less unstable.  In general if you see this kind of support, its telling you that the tripod is junk.

A good leg set will last a lifetime, so buy your last leg set first if you can, and yes it is worthwhile saving and waiting to get the right legs and to not settle for something cheap today.

New bags from ThinkTank

Hey gang, Our buddies at ThinkTank have introduced two new bags that are going to be shipping soon.

http://survey.constantcontact.com/survey/a07e6z6eaj5hchye2kj/start

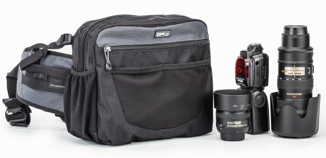
ChangeUpFirst up is version two of the Change Up which is a nice compact bag

Its essential features include:

  • Can be worn either as a shoulder camera bag, belt pack, or chest pack
  • Tall design accommodates DSLR equipment easily
  • Soft, lightweight materials contour to the body
  • Compression straps to adjust fit
  • Attachment rail for modular components (6” width)
  • One-handed zipper opens wide and provides quick access to gear
  • Easily accessible front organizer pocket
  • Stretchable side mesh pockets for water bottle or strobe
  • Durability that you’ve come to expect from the Think Tank brand
  • Highest quality YKK zippers
  • Seam-sealed rain cover included

Change-Up V2.0 enhancements include:

  • Increased height to fit all 70-200 2.8 lenses
  • Increased depth of top of bag to fit standard-size bodies
  • Added compression straps
  • Increased padding of back panel for added comfort
  • Belt strap tuck-away function improved by creating two separate pockets
  • Decreased weight and increased flexibility
  • Removed rear zippered pocket to allow fit for body while keeping bag slim
  • Change zipper application to “clam-shell” one handed application (one slider)
  • Rain cover moved to new zippered pocket on the bottom edge of the front panel

TT SuburbanThe second offering is the new Sub Urban

Gear Profiles

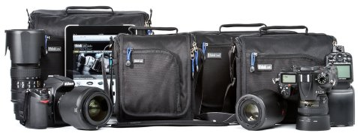
  • The Sub Urban™ Disguise 5 holds a regular size DSLRs with one to two small telephotos or primes, or a D700 with a 18-200 attached.  It also accommodates Micro 4/3rds, Leica and Sony NEX systems. Great for Strobists as it fits two to three pro-size flashes.
  • The Sub Urban™ Disguise 10 holds a regular size DSLRs with two to three small telephotos or primes, or a D700 with a 18-200 at­tached.  It also fits three pro-size flashes.
  • The Sub Urban™ Disguise 20 holds regular size DSLRs with three to four small telephotos or primes or a D700 with a 18-200 at­tached.  It fits four to five pro-size flashes.
  • The Sub Urban™ Disguise 30 fits a regular size DSLR and two to four standard telephoto lenses, or a D700 with a 24-70 2.8 attached.  It can also hold an iPad or similarly-sized tablet.

Key features include:

  • Flip top lid opens away from your body, providing easy access to gear
  • Cleanly styled design, does not look like a traditional camera bag
  • Highest quality materials


  • Designed to easily fit DSLR equipment
  • Large padded front pocket
  • Easily accessible front organizer pocket
  • Stretchable side pockets fit a water bottle
  • Padded zippered pocket to accommodate an iPad or similarly-sized tablet (Suburban 30 only)
  • Padded non-slip flexible shoulder strap
  • Poly-ballistic fabric ensures durability
  • High quality YKK zippers
  • Seam-sealed rain cover included in front pocket
  • Business card slot


Please support the Photo Video Guy by using our links when purchasing your Think Tank bag.  http://survey.constantcontact.com/survey/a07e6z6eaj5hchye2kj/start

Tips to Make Better Images : What Tripod Head Should I Get?

By the tone of the question, you might conclude that I dont recommend the idea of a tripod without the ability to remove the head.  You would be right.  Dont do it.  Youll only regret it later.

There are three major types of tripod heads.  They are:

  • The Pan Tilt Head
  • The Gimbal Head
  • The Ball Head

The Pan Tilt Head

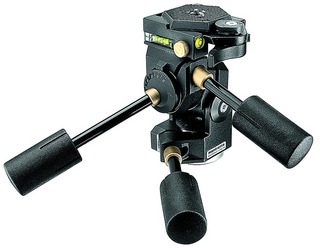
ManfrottoYouve seen these heads.  They come as the fixed on every cheap-ass unsteady tripod youve ever seen.  They have three independent adjustments.  One for horizontal pan, one for forward / backward tilt and one for orientation for portrait or landscape.  Even though they have been sold for years as perfect for stills, they are actually a lift from the cinema industry which required very precise 3 axis orientation.  They didnt flip from portrait to landscape but used the third access for levelling out.  This head is perfect for video work.  Its precise and the good ones are all damped, mostly fluid damped to make movements extremely smooth because no cinematographer wants a bunch of jitter during a pan or tilt. In fact the really good pan / tilt heads dont flip for vertical orientation at all, they use a levelling system at the attachment point to the leg set.  If you are using a pan / tilt head for stills, you probably dont use the tripod a lot because all the levers turn out to be a real pain, really fast.

Manfrotto is well respected for their higher end pan tilt heads.

The Gimbal Head

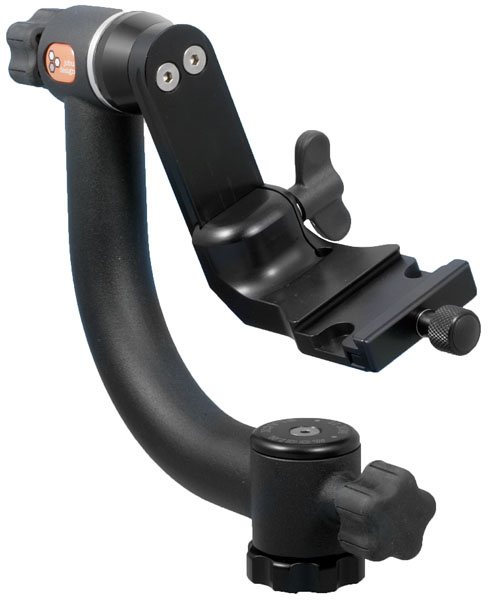
JobuYou have a very heavy, very long lens.  If you mount the camera to the tripod head you end  up with a very out of balance condition.  If you use the foot on the lens to the tripod head you are in better shape but pans and tilts become exercises in muscular strength and lots of back and forth.  In this case, you want a Gimbal head.  The Gimbal is often L shaped and uses adjustable plates so you can balance the camera lens combination to be level when the Gimbal lock for tilt is released.  This makes smooth tilts very easy and makes it easier to hold a position to make a shot without locking everything up tight.  The pan is a separate locking control and is more often used as a friction control than a lock so you can pan quickly and smoothly.  If you are shooting wildlife or birds with a big lens, you deserve a gimbal head.

Really Right Stuff has a great selection of Gimbal heads and the Wimberley line is really well respected.  Canadas Jobu is also doing a really nice gimbal and is a great value.

The Ball Head

BH55LRThe ball head is the simplest head.  Its a ball with a post that you attach the camera to.  The ball in the better heads is coated to move smoothly without catching and in practice one knob locks and unlocks all movement in all three axes.  Its incredibly fast to use and perfect for stills.  If you shoot mostly stills, your default head should be a ball head, without question.  The bigger your camera lens combination the larger the ball you want to have.  A larger radius ball gives you better fine movement.  Some ball heads have separate friction controls so you can regulate how fast the ball moves with different camera - lens weight combinations.  Some ball heads also include a separate release for pans, so you can keep the ball orientation tight and still pan the head.  Your choice here, but there is real advantage to a single locking mechanism.  Youll find good ball heads cost more than decent pan tilt heads and they should be.  With only one major locking control, they are dependent on high quality.

For ball heads, go with Manfrotto at the low end, Gitzo or Really Right Stuff at the high end.

Using the right head for the kind of shooting you do will make your photography more fun, youll get better use from your tripod, and you might even start making better images.  Enjoy!

The Photo Video Guy Podcast - Episode 49

Canon and counterfeits.  New 1Dx firmware.  Nikon 85/1.8 best 85mm?  D7000 rides into the sunset.  Capture NX doesn't work with Color Efex Pro 4.  National Geographic celebrates 125th anniversary.  Leica M9-P Hermes stolen.  Sony e lens announcement.  DxO updates.  ThinkTank SubUrban.  DP Review RAW Converter review.

Tips to Make Better Images : Post Processing is Incredibly Valuable

For many of us, the digital darkroom remains an intimidating place.  There are so many tools, and so much power and so much apparent complexity, that many image makers are content with the JPEG that the camera spits out.

Nothing wrong with that.  You paid good money for your camera and its designed to make the experience simple and positive for you.  In fact so many people are into photography these days there are literally hundreds of simple post processing apps to get to good enough very fast.

The full story is that the digital darkroom brings us more capability, more simply and with less toxicity than the chemical darkroom ever did.  And if you are concerned about wrecking your images, heres what to do.

Instead of importing, ingesting or whatever term your software uses to get the images into itself,directly from the card, copy them from the card to a hard disk first.  These are your master originals and you wont work on them at all.  Once done, now do the import process into your editor of choice.  Some editors have catalogues like Lightroom and iPhoto.  Others dont, they work directly on the file itself such as Bridge to Photoshop.  I prefer proper catalogues, but they are your images, do whatever you want, just only work on copies of the originals.

Editing can be destructive, such as when working on the Background layer in Photoshop, or non-destructive, such as anything you do in Lightroom.  Because you are never working on your master original, this doesnt matter.

In any case, nothing you do in these editing tools is permanent until you commit the change, and even then our good friend Mr. Undo can get us out of all kinds of trouble.  He has two aliases Ctrl-Z on the PC and Cmd-Z on the Mac.  He is your friend.

You can take public courses, online courses, watch Youtube videos for the rest of your life or even hire <insert plug for self here> a private coach.  Whatever works for you.  But, and this is critical, remember that the source may have a different desired outcome than you do.  If the source is a paid professional photographer, experimentation is not on their radar.  They are about speed and throughput.  If you are a happy amateur, and even if you sell some work, you just may not be in that big a hurry.  Take your time.

Now once in the editor be aggressive.  Push the sliders to their stops and watch what happens.  A lot of the time things will look like crap, but only by pushing the envelope of each slider do you start to see what the slider can do.  Once you are comfortable with one slider, make notes on what it does.  Your memory is not perfect and there are hundreds of things to play with.

Learn each slider individually before you start stacking things up.  Every educator has a preferred working order.  Copy one that makes sense, but alter it if it helps you make a workflow that works for you.  Your goal is to get to the point where you can look at an image, see a single change you want, and know which slider to go to and where you might want to start with the adjustment.  You wont need 20 applications.  If you actually do this, you will be astounded by what you can do with the things you already own.

Experimentation will take some time.  Its also a huge amount of fun, and always remember, you arent ruining anything because you always have your untouched originals.

Tips to Make Better Images : Cropping

I like to think that we all work hard to get the image right in the camera.  Sometimes we are more successful than others.  Sometimes what we see at the time of capture just isnt what we want when we come to the editing step.

Over the years working with students, weve all learned that one way to re-see an image is with a set of cropping tools.  You can do this with cardboard, paper or whatever but my recommendation is go to the art store or framing shop and buy an 11x14 matte with an 8x10 opening.  I prefer black, but you pick whatever you like.  When you get home, cut the matte in two on the diagonal.  Now you have two L shaped pieces of hard card to play with.  Display the image full screen and hold your matte pieces up to it, moving them around until to you create a composition you like.  Now make that crop in software.

But wait!  If you are using an editing program that allows you to make a virtual copy do that before you apply any crop.  A virtual copy takes negligible space and basically makes a new working platform.  I use Virtual Copy all the time so I can experiment, a big part of my digital darkroom life.

Now when you crop a virtual copy, you have both the original and the cropped version.  In some recent sessions with some photographers who have selected me as their mentor, weve discovered multiple crops that all worked better than the original, in the opinion of the photographer.  And thats the only opinion that really matters.

So try this at home.  Find an image that you expected more from.  There was something special when you captured it but the computer version just doesnt have it, whatever it was.  Make five virtual copies and use your new highly sophisticated and oh so expensive cropping tools and make five crops that please you more than the original.  Cant find five?  Find two.  And remember this secret, you already have one, the original frame.

I will go so far as to say every image benefits from cropping, without exception, and if you understand what I said earlier, you realize that I am right.  So before you discard that image that you really thought would be something, try cropping it.

The Photo Video Guy Podcast - Episode 48

Reactions to predctions.  CP+ coming soon, Nikon new lens?  Canon opens dedicated storefront in Calgary.  Capture One adds support for Fuji X-Trans senser.  DxO Optics Pro adds support for Sony RX-1, Canon 6D and Nikon 1 V2.  Pentax releases new firmware for K5-II and K5-IIs.  Recommended reading, The Camera by Ansel Adams.  Snapshots vs Photographs.

What's Black and what's White?

As some of you know, I recently bought myself the gift of an old 4x5 film camera, and in order to refresh my knowledge and to rejuvenate my enthusiasm I went back to basics.  I'm still there of course but wanted to share a couple of things I relearned. One of the many places I chose to look was to the writings of Ansel Adams, in this scenario, his book The Camera.

As I rejuvenate my knowledge of the Zone System, I'm reminded of the reality of black and white.  i don't mean film or as colours but as representation of tone.  I'm bridging the world of film to the world of digital and there is a clear parallel here.  In the Zone System, Zone V is what we think of as the mid tone, basically 18% grey.  Zone 0 is black.  And in this case, this means there is nothing there.  It's just like an RGB rating of 0,0,0.  In digital we can and should leverage the ability to manipulate exposure in post processing, which is analogous to push or pull processing with film negatives.  The challenge is that if the histogram for the image in review is up against the left border, and we drag the histogram to the right, we aren't recovering anything, because there's nothing there to recover.   Similarly if we pull the histogram to the left and it starts touching the right border, we aren't reducing the highlights on anything because there is nothing there to see.

In film, black and white define the presence of no emulsion at all on the negative (black) to no removal of silver at all (white).  Adams noted that because we see more "zones" than our cameras / film can that the full range of zones should not be used when thinking about exposure.  He also proposes not to put a lot of investment in Zone I or Zone VIIII because of the limitations in rendering this wide a range.  This makes a great deal of sense in digital as well since our best sensors can only see 6.5 stops.  If we agree with Adams' premise, we make the decision not to be dependent on the full ten stop range of zones, leaving out pure black and pure white and avoiding expectations of content in Zone I and Zone VIIII, then we are really only depending on a six stop range and we have a very solid opportunity to maximize our tonal range.

When we do this, now we have the choice to push or pull our histogram without starting on one of the sides, meaning that there is content that we can make darker or lighter for some level before it drops out or blows out.

Why does this matter?  When we see an image, prior to capturing it, we make decisions as  to where the midpoint in the range should be, because some times what we want at the midpoint is not what is actually 18% grey.  If we maximize the mapping of exposure zones in our image collection, we leave ourselves more latitude in the digital darkroom, which is very much like how Adams and the masters of film used the Zone System to give themselves more latitude in the chemical darkroom.

In the end our point and fire metering gives us pretty good images the majority of the time, but what if we could actually do more at the time of capture to improve our post processing experiences?  Think about it, because we can.

The Photo Video Guy Podcast - Episode 47

CES not a big deal.  D5200 ava, Nikon radio wireless.  Broken Night shot on D800.  New Canon cine lenses.  Sigma delivers.  Fuji updates. Pentax enthusiast. XQD.  Printing and 2013 predictions

20 for 2013 Photography Predictions

I like to let the other guys get their predictions out of the way first, so by the time you get to mine you're either a) completely cynical or b) looking for some honest non-vendor serving opinion. Whatever works for you :)

In no particular order...

  1. Instagram will continue to be very popular despite its complete flaunting of privacy and intellectual property because a) lots of people only take pictures to share and get compliments and b) lots of people like to take okay pictures and make them look old and crappy and call it art.
  2. The Point and Shoot camera market is dead.  The manufacturers know this and are hoping that you don't.  Mobile devices are now well beyond "good enough" for snapshots and the point and shoots have such tiny sensors that they can never achieve the image quality that a DSLM or DSLR can deliver.  P&S will continue to sell in vertical markets such as for those who don't have / want a smart mobile device, those who want a pocket camera solely for snapshots to share electronically or as 4x6 prints, for element protection, and for serious photographers looking to capture ideas for serious photographs.  But overall volume will plummet.
  3. Crossover cameras will continue to drag.  Nikon's Android experiment failed to launch.  The coming not really Polaroid, Polaroid won't be a huge success.  Android is a very powerful OS, perhaps overkill for a camera, and creates a lot of security risks because it is so hackable.
  4. DSLM cameras will be successful when they focus faster and more accurately particularly in low light.  Manufacturers will be working on improving power efficiency because right now, none of these devices are particularly battery friendly, certainly insufficient for a busy photo day.
  5. There will be more super high megapixel cameras this year.  Not because photographers actually NEED more megapixels but because manufacturers liked the success that they had in the last megapixel race.
  6. Printing will continue to be a small part of the photographic experience as tablet and web delivered portfolios replace prints more frequently.  The contrast to this will be those who pursue photography for personal joy who discover how wonderful a physical print is.
  7. Despite drops in wireless costs, and the increasing availability of very low cost WiFi interfaces, manufacturers will not drop the astronomical prices of their WiFi adapters for their high end cameras, preferring to rip off those customers who must have WiFi connectivity.
  8. WiFi will become a de-facto standard on all cameras, much like video.  And, much like video, while many will ask for it, complexity and inconsistency will make adoption very low.
  9. We will see an influx of next generation prime lenses to take advantage of the high quality, high megapixel density sensors appearing in mid to high end cameras.  Many of the primes in the market have been around for over ten years and won't deliver on the capabilities of the sensors.
  10. Medium and large format digital sensors will continue to act as a synonym for Highway Robbery.
  11. While most all cameras will have video, adoption of video will continue to be slow, albeit not as slow as in the past few years as accessory vendors stop dropping acid before setting ludicrous prices on milled aluminum gewgaws.
  12. As cool lighting continues to evolve, expect more powerful CFL bulbs to fit the existing enclosures to push more light and reduce issues with slow shutter speeds.
  13. Google+ will continue its march to become the de-facto social media outlet for photographers.  Despite changes at Yahoo, Flickr will not gain it's prior position and serious photographers will be jumping off Facebook and its properties through the year.  Twitter is already over.
  14. Manufacturers other than Sony will embrace the concept of "in app purchase" to add services at a surcharge to their camera.  Sony already have a slew of features for the NEX-6 that are not included with the camera but can be purchased as electronic downloads.  It's a practice that works and it is direct incremental revenue that completely bypasses the reseller channel.
  15. Individual photography stores will become more dependent on manufacturer funded rebate programs in lieu of internal "specials" as margins on gear erode and the last margins from photofinishing dry up.
  16. Photofinishing (the developing and printing of traditional film) will continue to disappear with the service becoming hard to find anywhere by the end of the year.  Even micro labs cost a lot money to run so prices will increase and turnaround times will also increase.
  17. Manufacturers will go with smaller production runs of models, shortening product lifecycles so they can get new gear out sooner, without having a glut of outdated gear on shelves.  An example of this problem held up the North American release of the Nikon D5200.  Expect lifecycle maximums of 24 months for DSLRs, sub 12 months for Point and Shoots.
  18. Memory card manufacturers will continue to release higher performance read/write capabilities on their cards, resulting in customer issues when their older cameras cannot use the newer cards.  This has already happened with Lexar's 800x and 1000x cards.
  19. Shorter lifecycles in products and rush to market will create an increase in electronic related failures in new products, particularly in the lower end making extended warranties on bodies a bit more viable, but falling prices will discourage buyers who come to see the devices as "disposable"
  20. Demographic differences will continue to fracture the feature delivery resulting in devices that only appeal to a certain demographic, creating model glut and customer confusion over too many models that are "almost" identical.

Ok that's it for now.  Speak soon.

Ross

The Photo Video Guy Podcast - Episode 46

Amazing rebates are now over.  Petapixel story on a black bear being the photographer.  Nikon DSLR rumours.  Nikon J1 #1 DSLM in Japan.  Canon officially ends the 5D Mk II.  Canon confirms 200-400/4LIS 1.4x this year.  Intro to web review of Olympus OM-D E-M5

REVIEW : Olympus OM-D E-M5

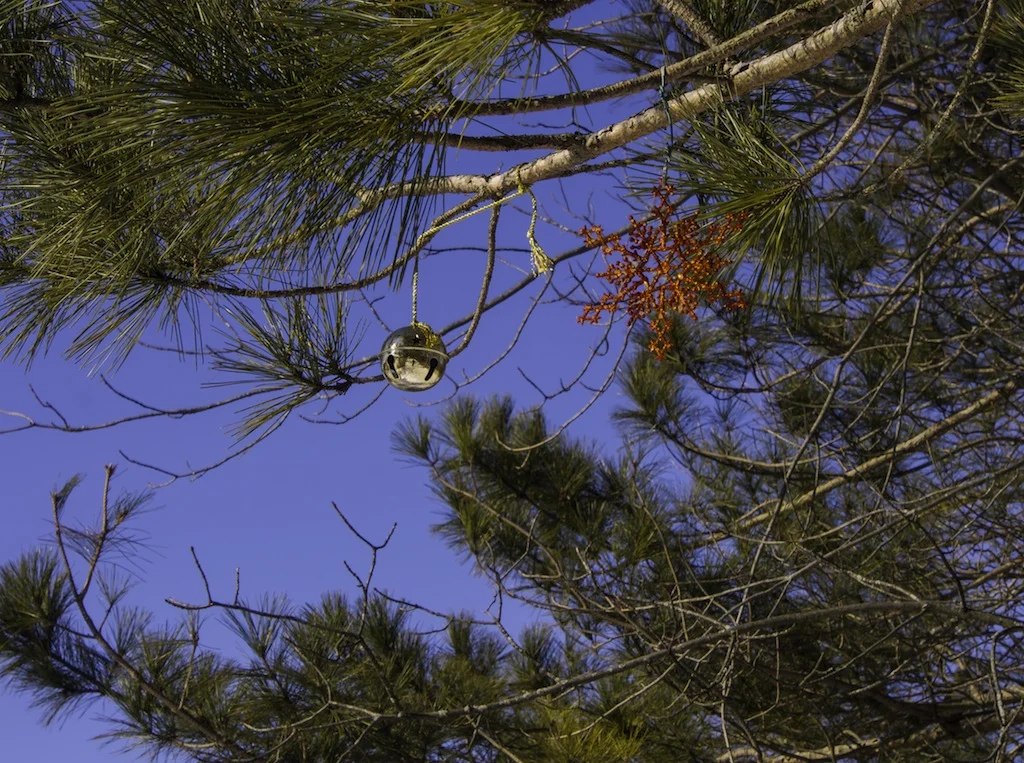
OM-D-32Bit-HDR-Ornament.jpg

A number of photographers have been asking me to take a closer look at the latest Olympus M4/3 camera, the OM-D E-M5 so with the support of Nathan Reeder at my local Henry's Camera store, here goes. What Is It?

Olympus along with Lumix really started the entire mirrorless marketplace a few years ago and while many vendors have entered the space and done well (Sony, Fuji) and others have entered the space with underwhelming offerings (Canon, Nikon) the bellwether vendors remain the originators.  The PEN series from Olympus look pretty much like everyone else's entry but the OM-D E-M5 (hereafter referred to as the OM-D) is a very different cat.

It really defines the whole idea of Digital Single Lens Mirrorless.  It looks like a DSLR even including the pentaprism housing (sans pentaprism) but is a mirrorless using the now standard micro 4/3s sensor.  When you first look at the OM-D and first pick it up, it's like a DSLR that is malnourished or forgot to eat its Wheaties for those readers old enough to remember those ads.

So M4/3 sensor, interchangeable lens, electronic viewfinder, touch screen OLED, battery grip, good lens assortment, HD video, TTL flash, full Auto to full Manual in a very small package.

Basic specs are as follows, detailed specs at the bottom of the post.

  • M4/3 16MP Sesnor
  • 5 Axis image Stabilization
  • Full HD Video 1080/60i
  • 4:3, 3:2,16:9 Aspect Ratios
  • EVF with previews for exposure compensation, white balance adjustment
  • 3.0 inch 610K dot articulating OLED display with touch capability
  • 1/4000-60s plus B Shutter speed range
  • 200-25600 ISO Range
  • Metering range from EV0 to EV20
  • Single Shot, Continuous, Manual, Manual +AF focusing
  • TTL Flash including GN 7 flash in kit
  • Exposure compensation and up to 7 shot bracketing

So at a glance, it looks like a decent mid level DSLR from a feature / function perspective.  And that's really what it is but more on that later.

Unboxing and First Impressions

Olympus still hasn't figured out the Apple boxing principle, but the kit that includes the 12-50mm power zoom is easy to unpack and thoughtfully laid out.  The battery came with about 60% charge in it and is good sized Lithium Ion cell.  Olympus doesn't provide an average shot count, but in my own tests it takes about four hours to charge and while I surely didn't drive the shutter count up super high, mathematically it looks to me like the battery might last to 300 shots.  Others are experiencing a bit less.  So a potential downside will be the need for more batteries if you will use the camera heavily.  Upside is that the battery charges in an external charger, so you can use the camera with a second battery while the first one is recharging.  I wish Sony would learn that lesson.

The camera is light, under 1lb with a memory card and a battery in it.  The upper left deck has the mode selector dial with PASM, plus SCN, Movie, ART and iAUTO settings.  Top deck right has two unmarked wheels, the rear one adjusts the aperture or shutter speed depending on mode and the front one provides for exposure compensation.  You can program the dials as you like, but the defaults are pretty usable.  Far right is the programmable Fn2 button and the separate video start/stop button.  The shutter release sits atop the front adjustment dial.  Middle top deck has the hot shoe and a removeable section cover to allow mounting the including tiny flash or Olympus shoe mount accessories that also need access to the camera electronics.  Layout is simple and easy to follow.

Looking at the rear, the OLED is big and bright,  Although the fonts are very small, it's still very legible. Left of the eyepiece is the diopter adjustment and to the right is a push button that controls Live View.  Further to the right are the Playback button and the programmable Fn1 button.  Immediately below them is the needed thumb rest but it does make hitting the buttons a dexterity test as they are tiny and recessed.  Below the thumb rest are the usual suspects of Menu and Info buttons then a multi-axis controller with selector in the centre and below that a trash button and the on-off switch.  The switch is flush to the back and recessed so you won't be turning the camera on and off by accident.  As noted the screen is articulating for overhead or low shots, but it does not swing away from the camera to face front as found on some DSLRs.

The left side of the camera has a USB port and micro-HDMI connector hidden under a rubber cover.  You have to move the rear display to be able to free the rubber cover.  There are three tiny holes for the built-in speaker in front of the cover.

The right side has the door for the SD card slot.  A push rearward releases a very positive catch.

Looking at the bottom we find the metal tripod screw socket threaded for 1/4-20, a removable rubber plate for when you are connecting the accessory battery grip and the hinged door to the battery compartment.

From the front, there's a decent grip built into the right side, and the lens release button occupies the left side.  There's a tiny self-timer lamp / focus assist lamp on the top front panel.  Otherwise the front face is very clean and clutter free.

Of course the camera has strap lugs on either side and the first thing I noticed holding the camera is that the right side lug is in a position where it's ALWAYS poking me in the hand.  This placement makes the camera unpleasant to hold and if it were mine, that three sided strap holder would be gone and I'd be using a Black Rapid strap right away.  It's too bad because the strap lug placement really farks up the whole feel for me.

The Kit Glass

The kit lens in the unit I looked at is the new Olympus 12-50/3.5-6.3 Digital Zuiko.  It takes a standard 52mm filter, something the Fuji gits could learn to emulated.  The lens is plainly not optically fast, but is small and lightweight and provides a full frame equivalency to 24-100, a very nice working range.  Particularly attractive about the lens is that it has three modes of operation.  Keep the zoom ring to the rear and it's a smooth manual zoom. Push it forward and the zoom ring no longer rotates but engages a smoothly operating power zoom function.  It's a bit easy to knock it from mode to mode, but I think that's an acclimatization thing.  The macro mode is quite brilliant.  Press in the Macro button and move the zoom ring forward and the lens locks into macro mode and I must say it works pretty darn well.  There's also a window that advises you which mode the lens is in.  The only downside to me is the slow lens speed.  If I were buying, I'd likely opt for the 17/1.8 and the 45/1.8 in addition so I had some nice high speed glass.  I did borrow the 45mm and will discuss it further on.

The FL-LM2 flash that's included is not built-in, you remove an access cover and slide it on.  Like the popup flash on your DSLR, use it only under protest.  With an ISO100 Guide Number of 7, you won't be bouncing this light anywhere.  The best thing that can be said for it is that it comes in the box.  If you want proper flash, you'll be buying one.  Just like with any other decent DSLM.

Now that we've had a quick look at the unit, let's move on to its usability, starting with the menu system

The Menus

Olympus deserves credit for not making the menu system so convoluted you want to stick a fork in your eye.  The pages are mostly a single screen long and it's fairly intuitive with the more common functions nearer the top.  It took me a long time to find the Format card function because unlike most other cameras, it's at the top of the list not buried in some deep layer.  Gold star for that.  All the menu items have integrated help panels which are very useful as you are getting comfortable with the camera.  I expect you can turn this off at some point but did not look to find out if this is possible.  I was able to use the menus without referring to the docs.  Speaking of docs, the printed doc is a VERY short quick start guide, the real documentation is provided on the CD.  I would have looked at it, but my MacBook doesn't have a CD drive.  Fortunately the manual is also available for electronic download and is searchable as it is a PDF.  The version I looked at was in English and I found it easy to read and search.  Loading it into iBooks on the iPad and iPhone keeps it handy, although a bit hard to read on the small screen.

Shooting the Camera

When in shooting mode, the OLED display has three basic configurations.  Off, meaning black, meaning battery efficient, Full Info meaning ALL the information, much of it not specifically relevant to a given shot and intermediate giving you exposure info along with an  innovative level system.  Pressing Live View, does what you expect, with the similarly expected battery suckage.  The EVF is bright and easy to use and I like the layout very much.  I'm really enthused by the live presentation of how the exposure will look at different compensation settings or in manual mode.  This one function alone is killer in my book and it's so simple that you'll want it on all your cameras.

The shutter release is smooth to the half press where the autofocus kicks in.  Hold the button for auto-focus lock, and there's Fn1 whose default programming is Auto Exposure Lock.  Press it again to release the lock.  Pressing all the way through the shutter button captures the image.  Initially I found the shutter button throw to be very long, but after shooting the camera for a while, I got used to it.

in my first test shots, which were literally snapped at random, I was quite pleased with the automatic white balance correction, specifically how nice a job it did making the whites white.  I had a large Elinchrom softbox off to one side of the frame and with a proper exposure, it was white, not grey, blue or orange, despite horrible mixed lighting.  In my initial shots I left the ISO in Auto mode and set the upper threshold to 3200.  The ISO traversal is transparent but you always know where you are because of the information in the display.

i know that users don't read manuals.  I have spent over three decades in the computer industry and work part time in a photography store and this fact is reinforced for me every day.  So I tried to use the camera at first without reading the manual.  It worked fine but until I figured out how the touch display does and doesn't work changing the ISO was a pain in the butt.  Put the camera Info selection into full mode and tap the area of interest on the rear monitor.  It turns green.  Press the OK button at the centre of the multi-axis controller to drill down.  Now use the MA controller to move around and click OK to lock a setting.  If I'm supposed to be able to drill down with the touchscreen, I could not get that to work for me at all.

Frankly I gave up on the whole touchscreen idea pretty quickly.  I find the all info screen cluttered and having it turn off and on as I move my eye to and from the eyepiece got old really quick.  Instead I set the display to the basic exposure mode where a quick tap of the OK button in the MA controller brings up the full info screen and you can navigate around and drill down without hassle.  I'm still not convinced that touchscreens have a place on a camera rear display.

Practical Use

It was a beautiful morning so after the home chores, I took the camera and lenses out into the -10 celsius bright winter day.  I have large hands and shooting the camera wearing gloves was a non-starter for me, so I had to work with my right hand uncovered.  The first thing I noticed is that walking around with the camera is easy because it's so light.  I didn't connect the neck strap because the unit was borrowed for testing only, and just carried it in my left hand.  I would not care to walk around for ninety minutes holding my 1Dx or Hasselblad in my hand but the OM-D was hardly noticeable.  Serious points for light weight!

The camera focuses very fast and very accurately.  I was glad of the diopter adjustment and I was able to get to very usable images very quickly.  I shot in both aperture preferred and manual mode.  I did try to use the power zoom but for stills I found the manual setting preferable for me.  The macro configuration is super easy to use and makes the lens much more versatile.

Because the light was full sun with heavy shadows and not soft in any way, I made shots using exposure compensation most of the time.  White balance was excellent even in the highly reflective snow conditions.  I found that the usual guidelines for compensation in snow worked well with this sensor.

While I am not a big fan of the over the top implementations of HDR, there is a Lightroom / Photoshop trick that creates a 32 bit TIFF with incredible dynamic range.  Basically you select your images, choose Merge to HDR Pro in Photoshop and when the ACR window displays the image, select 32 bit, remove ghosts and then File Save.  You don't do an HDR tuning in Photoshop, and when you go back to Lightroom you have a TIFF file with up to 11 stops of dynamic range.  To make these images simply, I used the excellent bracketing capability in the OM-D.  The camera can automatically do a 3, 5 or 7 stop bracket with separations at 1, 0.7 and 0.3 stop intervals.  (Note that the 1 stop intervals are limited to 5 stop brackets).  Putting the camera into high speed burst, capturing 7 stop brackets is a breeze and handheld brackets are no problem at all in daylight.  In fact, I think that if I owned the camera and was shooting landscapes with it, this configuration could become my default practice, it's that simple and that effective.

Processing

Once I got home, I put the card in a reader and copied the Olympus RAW files to their own  dated subdirectory on a drive.  Once they were copied, I ejected the card and then opened Lightroom and imported the files to my library using my customary Copy as DNG mode.  Olympus' RAW has some minor level of compression but there was no discernable loss of image quality.  There is a converter in Lightroom so the files were read without issue.  Each file is around 15mb in size at full RAW in 4:3 aspect ratio.  I was a bit disappointed that there are no Olympus lens profiles in Lightroom.

Processing the images is the same as any other digital file.  I was very pleased with the results whether working on a single image or on a round-tripped 32 bit HDR.  The level of image quality produced by the OM-D is excellent and there is lots of good data to work with when editing the images.  I did not test JPEGs out of the camera.  I subscribe to the Sammonism that "Raw Rules" and in my work I don't use JPEGs, so they weren't part of my tests.  Neither were any of the Art modes built into the camera.  So I have no idea of whether they're any good or not.  The RAW images are excellent.  I have found that the EVF is a bit warm but I also discovered adjustments can be made for the display.

Despite being outside in the cold for over 90 minutes and shooting about 130 images, the battery indicator still showed a full charge.  After I'd been inside for a couple of hours, I fired it up to do some flash tests and the battery showed two-thirds and since then has fallen off slowly.  There is a battery guide calibration capability but I have not done it.

I also made time to shoot the 45mm f/1.8 prime lens.  With a 35mm full frame equivalence of 90mm, it's ideal for portraiture and of course short telephoto.  The lens is physically very small, about the same size as a Leica M series 35mm.  Filter size on the lens is 37mm.  While the 12-50 really needs a hood to manage flare, the 45mm was not so prone to flareout.  I did not get a chance to try the 17mm f/1.8 lens this time but other tests show it to be really nice and I would definitely have it in my kit.

Who's This Camera For?

All other notes aside, all cameras have a logical user fit, with some better suited to beginners than to pros.  The OM-D is not a beginner's camera.  That's not to say you cannot get great images out of the camera without knowing much about photography, but it's serious overkill for the person who really only wants an interchangeable lens point and shoot.  Get an NEX-F3 for that purpose, you'll be happier.  In my opinion, the OM-D is for the advanced amateur or professional.  It's not about being that good, but about being that capable.  Indeed, most recently, I have seen noted professional photographer Scott Bourne sell all his pro Canon gear and move entirely to the OM-D family.  I won't be doing the same but after shooting the camera for a few days, I have become more and more impressed with the usability and image quality.

There are still minor annoyances, as I still have not figured out where to set the post capture rear display duration, and that right side strap lug is infuriating me.  I suspect that if I bought the unit, I'd order the battery grip just to give me more to hang on to.  I'd also pass on the 12-50 lens.  Despite a nice range, it's slow and the macro feature while cool is not enough to warrant the purchase.  Since I don't shoot a lot of video, the power zoom is of no value to me.

I did not test the 4/3 adapter to use other Olympus AF lenses.  However, my friend Khalil has, and his kindest adjective was "slow".

My Kit If I Were To Buy One

  • OM-D E-M5 Body
  • HLD-6 Battery Grip
  • FL-600R Flash
  • BLN-1 Spare Battery (2)
  • ED 14-150/4.0-5.6 Zoom and Hood (28-300mm equivalent)
  • 17/1.8 and Hood (35mm equivalent)
  • 45/1.8 and Hood (90mm equivalent)
  • ED 60/2.8 Macro and Hood (120mm equivalent)

Sample Images


Detailed Specifications

Full credit for these specs goes to the very excellent http://www.omd-em5.com/

TYPE Type Micro Four Thirds interchangeable lens system camera
a Media SD Memory Card (SDHC, SDXC, UHS-I compatible, Eye-Fi Card compatible)
Lens Mount Micro Four Thirds mount
IMAGE SENSOR Type 4/3 Live MOS Sensor
Image Sensor Size 17.3mm x 13.0mm (in 4:3 aspect ratio)
Total Pixels 16.9 Megapixels
Camera Effective Pixels 16.1 Megapixels
Processor TruePic VI
Color Filter Primary color filter (RGB)
Dust Reduction System Supersonic Wave Filter (dust reduction system for image sensor)
RECORDING SYSTEM Aspect Ratio 4:3(Default) / 3:2 / 16:9 / 1:1 / 3:4
Still Image Size Max resolution : 4608 x 3456 Other : 4608 x 3072, 4608 x 2592, 3456 x 3456, 2592 x 3456, 3200 x 2400, 3200 x 1800, 3216 x 2144, 2400 x 2400, 1824 x 2432, 2560 x 1920, 2560 x 1440, 2544 x 1696, 1920 x 1920, 1440 x 1920, 1920 x 1440, 1920 x 1080, 1920 x 1280, 1440 x 1440, 1104 x 1472, 1600 x 1200, 1536 x 864, 1584 x 1056, 1216 x 1216, 864 x 1152, 1280 x 960, 1280 x 720, 1296 x 864, 960 x 960, 720 x 960, 1024 x 768, 1024 x 576, 1008 x 672, 768 x 768, 576 x 768, 640 x 480, 640 x 360, 624 x 416, 480 x 480, 384 x 512
Motion Image [MOV] Full HD : 1920 x 1080, 59.94i Recording HD : 1280 x 720, 59.94i Recording [AVI Motion JPEG] HD : 1280 x 720, 30fps VGA : 640 x 480, 30fps
IS System Type Built-in (5-axis Image Stabilization)
Modes 3 modes (IS1, IS2, IS3), OFF
Electronic Viewfinder Eye Level Finder Type approx. 1.44M
Eye point / Diopter adjustment range Approx. 100% / Approx. 0.92×1 – 1.15×2 (-1m-1, 50mm lens, Infinity)
Live view 100% field of view, Exposure compensation preview, WB adjustment preview, Gradation auto preview, Face detection preview
Monitor Specs 3.0-inch tilting OLED monitor, Approx. 610k dots, Touch control
Tilting angle Upward tilting angle : up to 80 degrees Downward tilting angle : up to 50 degrees
FOCUS Type Contrast Detect
Focus Mode Single AF (S-AF) / Continuous AF (C-AF) / Manual Focus (MF) / S-AF + MF / AF tracking (C-AF + TR)
AF Mode Face detection / Eye detection / AF Tracking / 35-area multiple AFAll target, Group target area (9-area), Single target
AF Detective Range EV 0 – 20 (at normal temperature, 17mm f2.8, ISO 100)
AF illuminator YES
Metering System TTL Image sensor metering Digital ESP metering (324-area multi pattern metering), Center weighted average metering, Spot metering, Spot metering with highlight control, Spot metering with shadow control
Metering range EV 0 – 20 (at normal temperature, 17mm f2.8, ISO 100)
Exposure modes i Auto, P: Program AE, A: Aperture priority AE, S: Shutter priority AE, M: Manual, Bulb, Time, Scene select AE, Art Filter, Underwater wide / macro
ISO Sensitivity AUTO: ISO 200 – 25600 (customizable, Default 200-1600) / Manual ISO 200 – 25600, 1/3 or 1 EV steps selectable
Exposure compensation 3 EV in 1/3, 1/2, 1 EV steps selectable
AE Lock Locked at 1st release of shutter button (can be set to Fn1/Rec button)
Shutter System Type Computerized focal-plane shutter
Shutter speed 1/4000 – 60 sec. (1/3, 1/2, or 1EV steps selectable.) Bulb: default setting 8min.
Self Timer Operation time: 12 sec., 2 sec.
Bracketing Exposure bracketing 2, 3 or 5 frames in 0.3/0.7/1.0EV steps selectable, 7 frames in 0.3/0.7EV steps selectable
White balance bracketing 3 frames in 2, 4, 6 steps selectable in each A-B/G-M axis.
Flash bracketing 3 frames in 0.3/0.7/1.0EV step selectable
Flash System Flash intensity control method TTL Auto, Auto*, Manual, FP-TTL AUTO*, FP-MANUAL* (* Available on the external flash)
Built-in flash No
Bundled flash (FL-LM2) TTL flash, GN=10 (ISO200) / GN=7(ISO100)
Compatible external flash FL-50/FL-50R, FL-36/FL-36R, FL-20, FL-14, FL-300R, FL-600R
Art Filter Mode Pop Art, Soft Focus, Pale & Light Color, Light Tone, Grainy Film, Pin Hole, Diorama, Cross Proscess, Gentle Sepia, Dramatic Tone, Key Line
Art Effect Soft Focus Effect, Pin-Hole Effect, White Edge Effect, Frame Effect, Star Light Effect
Level Gauge Detection 2-axis
Digital Zoom Magnification x2
Playback Functions Playback mode Single-frame, Information display, Index display, Calendar, Enlargement), Movie, Picture rotation, Slideshow
Information display Histogram, Highlight/Shadow point warning, AF frame, Photographic information, OFF
Input / Output USB/AV/Remote controller connector USB: USB2.0 High Speed, Video: NTSC/PAL selectable, Optional Remote cable RM-UC1 can be used.
HDMI connector Micro HDMI (Type-D)
Flash attachment Hot shoe
Accessory Port 2 Available for VF-2/VF-3, SEMA-1, MAL-1 and PP-1
Micophone/Speaker Stereo/Mono
Power Requirements Battery BLN-1 Li-ion battery (included)
Power battery holder (Option) Power Battery Holder HLD-6
AC adaptor (Option) AC adapter AC-3
Dimensions / Weights Dimensions 4.8 x 3.5 x 1.7 inch (W x H x D)
Weight Approx. 15 ounces (with battery, Memory card) Approx. 13 ounces (body only)

The Joys of Being Frustrated - Developing as a Photographer (pun intended)

I think I may be one of the most frustrated photographers around.  Of course, it's probably not true and many of the photographers I admire and respect say the same thing,  I think it's important. There's a developmental philosophy that espouses that to grow, you should be open to frustration, what I call being "hopefully discontent" (with all thanks to Neil Peart).  I believe that this can really work when you want to grow as a photographer.

I noted in my 2013 challenge that I am frustrated.  I've been thinking on this and have identified a number of "itches" that if worked on, could make me better at my craft.  I have the luxury that photography is not my job, as it once was.  It is now a pastime, and without the monetary pressures and fiduciary responsibilities that depending on photography for one's livelihood, I have more latitude than some.  I am fortunate in this regard.

So without further ado, here's my frustration list

1.  When I go out, I capture lots of images, many of them identical.  Subtle exposure differences or minor repositionings make the editing process longer and more tedious.  Can I make fewer captures, without fear of "missing" something and spend more time working on things I like?

2.  Gear does not make one a better photographer, but proper use of gear can help a photographer make better images.  I'm fortunate that I have pretty much all the gear I need, although the want list is lengthy.  Am I getting a good return on the gear that I own?  Do I use it properly?  Am I leveraging the effectiveness of the tool?  When I was doing cabinetry I forced myself to cut dovetails by hand, because it was harder and required more attention, instead of using a more accurate and faster jig.  Should I take this approach with photography.

3.  I was working on landscapes and then got caught up in the whole HDR thing.  I've had an intervention fortunately and now am much less inclined to HDR images since it actually gets stale pretty quick for me.  As a decent generalist, can I pick one or two specialties and focus on them for a year without being distracted by the next thing?

4.  I'm not a people photographer.  Yet, that is an area I want to get better at.  I've taken the courses in portraiture and lighting, and been successful at it.  What steps can I be taking to do more people work?

5.  I capture shots that I think will be good, but upon review, end up deleting a lot because i don't care for the composition, or because I have missed some critical element.  Shooting film was very much a process, digital has become less so.  Should I force myself to go shoot film in a very workflow intensive manner to build my eye and ability to see properly?

Being frustrated should create a vehicle to become a better photographer.  I'm going to work to answer my own questions, as another photographer, why not take a shot at answering your own questions.

Peace.

A Proposal for your 2013 Photography Project - 10 Steps to Photos That Matter

Yeah, it's that time, the time for resolutions and self-promises and all manner of other stuff that generally develops a best before date of February 3rd. My proposal to you.  Build a plan to become a better photographer.

Sounds simple huh?  Really it is.  And like many ideas, it has been influenced by a number of sources and reinforced by the opinions of others that I will listen to from time to time. So here goes.

1.  Repetition is the mother of skill.  That's why you practice the same kata a thousand times in martial arts.  Even if you aren't making a photo, practice changing the key settings on your camera without taking the camera from your eye.  You'll be surprised what a huge difference this will make for you.  Repeat daily.  Test yourself.  Change the ISO without taking your eye from the viewfinder.  If you cannot do it, then you had best do some practicing.

2.  Shoot everything.  We're in this for fun and joy, not necessarily to earn revenue.   If you are really attracted to an idea shoot it a lot.  If you aren't, give it a try to find out if you might like it.  I'm not a fan of watching sports.  When I was first offered the opportunity to photograph Polo, I wondered why the heck anyone would want to photograph this, let alone watch it.  Turns out, I love shooting Polo.  Many of the people I can live without, but the athletes and riders impress me.

3.  Becoming a good photographer requires generalization, you should be able to competently shoot a variety of topics and styles.  Experiment!  The cost is pretty darn low.  Try new things, but expect that one shoot does not an expert make.

4.  Becoming great will require specialization.  Figure out what kinds of photography you really enjoy and invest time in that.  It doesn't matter what it is, but it's very hard to really push the envelope of learning if you are trying to do everything well.  It's easier than you think.  Ask yourself questions about the kinds of things you like and you don't like.  I can shoot weddings.  I don't.  I don't enjoy the process so I don't spend time becoming a great wedding photographer.  I love wildlife.  I buy books, learn biology, look at great wildlife photographers and try to copy what they do, and shoot lots.  Sometimes I even get images I want to keep.

5.  Don't fall into the "daily dose" claptrap.  This is the time of year where people sign up for 365 projects.  Don't do it.  While you may be able to make a decent photograph each and every day, odds are against you so why end up with hundreds of barely passable images.  Make images that matter, not images that fulfill a quota.  Think, plan and shoot.  365s are the equivalent of Fire, Ready, Aim

6.  Look at the great works of photographers in your areas of specialization.  If you are committed to street, look at Cartier-Bresson, if sports, look at Dave Black, if portraiture, look at Yousef Karsh.  Don't know where to look for inspiration?  Go to 500px.com and search your topic of interest.  Be prepared to be amazed and perhaps even a bit discouraged.  Seeing great work is challenging and we get to rise to the challenge.

7.  Seek critiques from photographers you trust.  Non-photographers don't see like photographers and won't be able to help you.  Flickr is not the place to seek help, because all you get is "great photo" suckups.  You can post an out of focus picture of a toilet bowl on Flickr and someone will tell you its great art.  I would not recommend sending images in to Scott Kelby's web show The Grid either unless you want your self-esteem eviscerated.  Mr. Kelby is an incredible instructor and I think he's a very talented and funny guy, but I don't care for his critique style.  The hosts take too much pleasure in being nasty when they don't see something that they like.   However, I'd pay Joe McNally for a critique because his approach is so developmental.  I'd also shy away from the pay by the hour booth style crap such as I've seen at the Imaging show.  I saw and heard a lot of really horrible guidance from alleged professionals there.  A good critique is about you, not about the person offering the critique.  Massive egos make lousy coaches.

8.  Learn to edit viciously.  Just because you went out for four hours to make images doesn't mean you will come back with greatness.  I have spent hundreds of hours shooting, and upon review on the computer, determined that I might be better off taking up wallpapering.  I am constantly frustrated by my own work.  The X key in Lightroom is your friend.  Don't lie to yourself about whether the image is good or not.  If you feel it's not, it's not.

9.  Take classes, workshops, One on Ones, video trainings, shoot days, field trips.  Get books by the photographers you admire, if not to learn their technique, to have something to emulate.  Focus on the things you want to learn.  Basics are fine, but they aren't enough. Be able to articulate what you want to learn and go learn those things.  Don't do a basic field trip if you want to get better at macro photography of wildflowers, unless that's the curriculum.  If you focus on portraits, make it complete and learn portrait retouching.  If you focus on landscapes, learn about the zone system and how to expose in camera and post-process effectively.  If you want to really learn about HDR, take a class, get a book and here's your first tip.  Clouds are NOT black.  If you want to work with studio flash, learn to use a light meter.

10.  Create constriction.  Go out with only one lens, or only one focal length on the zoom.  Pretend your memory card can only hold 12 images and make each one count.  Shoot only from a tripod.  Shoot only from one knee.  Shoot only in portrait mode.  Shoot only at ISO100.  Require motion blur in every image.  Not only think outside the box, smash the box to bits.

So that's it.  Your mission, should you choose to accept it.

Happy New Year!

Ross

The Photo Video Guy Podcast - Episode 45

Nikon says it's ok to breathe.  New 1 series coming at CES.  A patent for a digital back for SLRs.   More Canon rumours for 2013.  Pocket Wizard update.  Leica drops M9-P black and adds coffee mugs.  Instagram change of service isn't.  First look at the Sigma 35/1.4 Art

Tethering your Nikon to your computer

Canon owners are probably aware of the EOS Utility that simply allows tethering of your Canon DSLR to your computer whether running Windows or OS X.  It comes in the box with the camera,  Nikon users have to look further afield and a couple of club members were asking me for a tethered solution for their Nikons if they don't already own Lightroom or Aperture. If you use a Macintosh, the tethering app you want is called Sofortbild.  It's done by a fellow from Germany and he does a great job of keeping it up to date.  You can get it on the Mac App Store or download it directly from here.  It's a simple app that does what it promises giving you simple and efficient tethering from your Nikon to your Mac using a simple USB cable.

If you use Windows, check out Camera Control from www.diyphotobits.com  They have a compatibility listing posted on their site.

Both tools are free.  Be aware that there are a slew of chargeable apps for tethering but I wanted to focus on tools that work and don't hit your wallet.


The Photo Video Guy Podcast - Episode 44

Adobe updates software and screws regular license owners. Apple and Google tag team to acquire Kodak patents. Nauticam makes a housing for the D600. Pre Christmas rebates on the D800 and D600. Canon news and rumours. Sony 4K video price drop. Microsoft RAW catchup and Fuji delays.