

Capturing Motion - A Development Assignment
/
it’s very pretty, but doesn’t really tell the motion part of the story
Hi Everyone. In this development assignment, I am encouraging you to build skills and images in your personal development work around the topic of capturing motion.
Completing the exercise is very simple. Here’s what you need.
A camera with a lens
Built in Self-Timer
Tripod
Your arm and hand
Capturing Motion
We make still images. To make our still images interesting, we seek to add dynamism. Motion is a pretty easy to find element of dynamism.
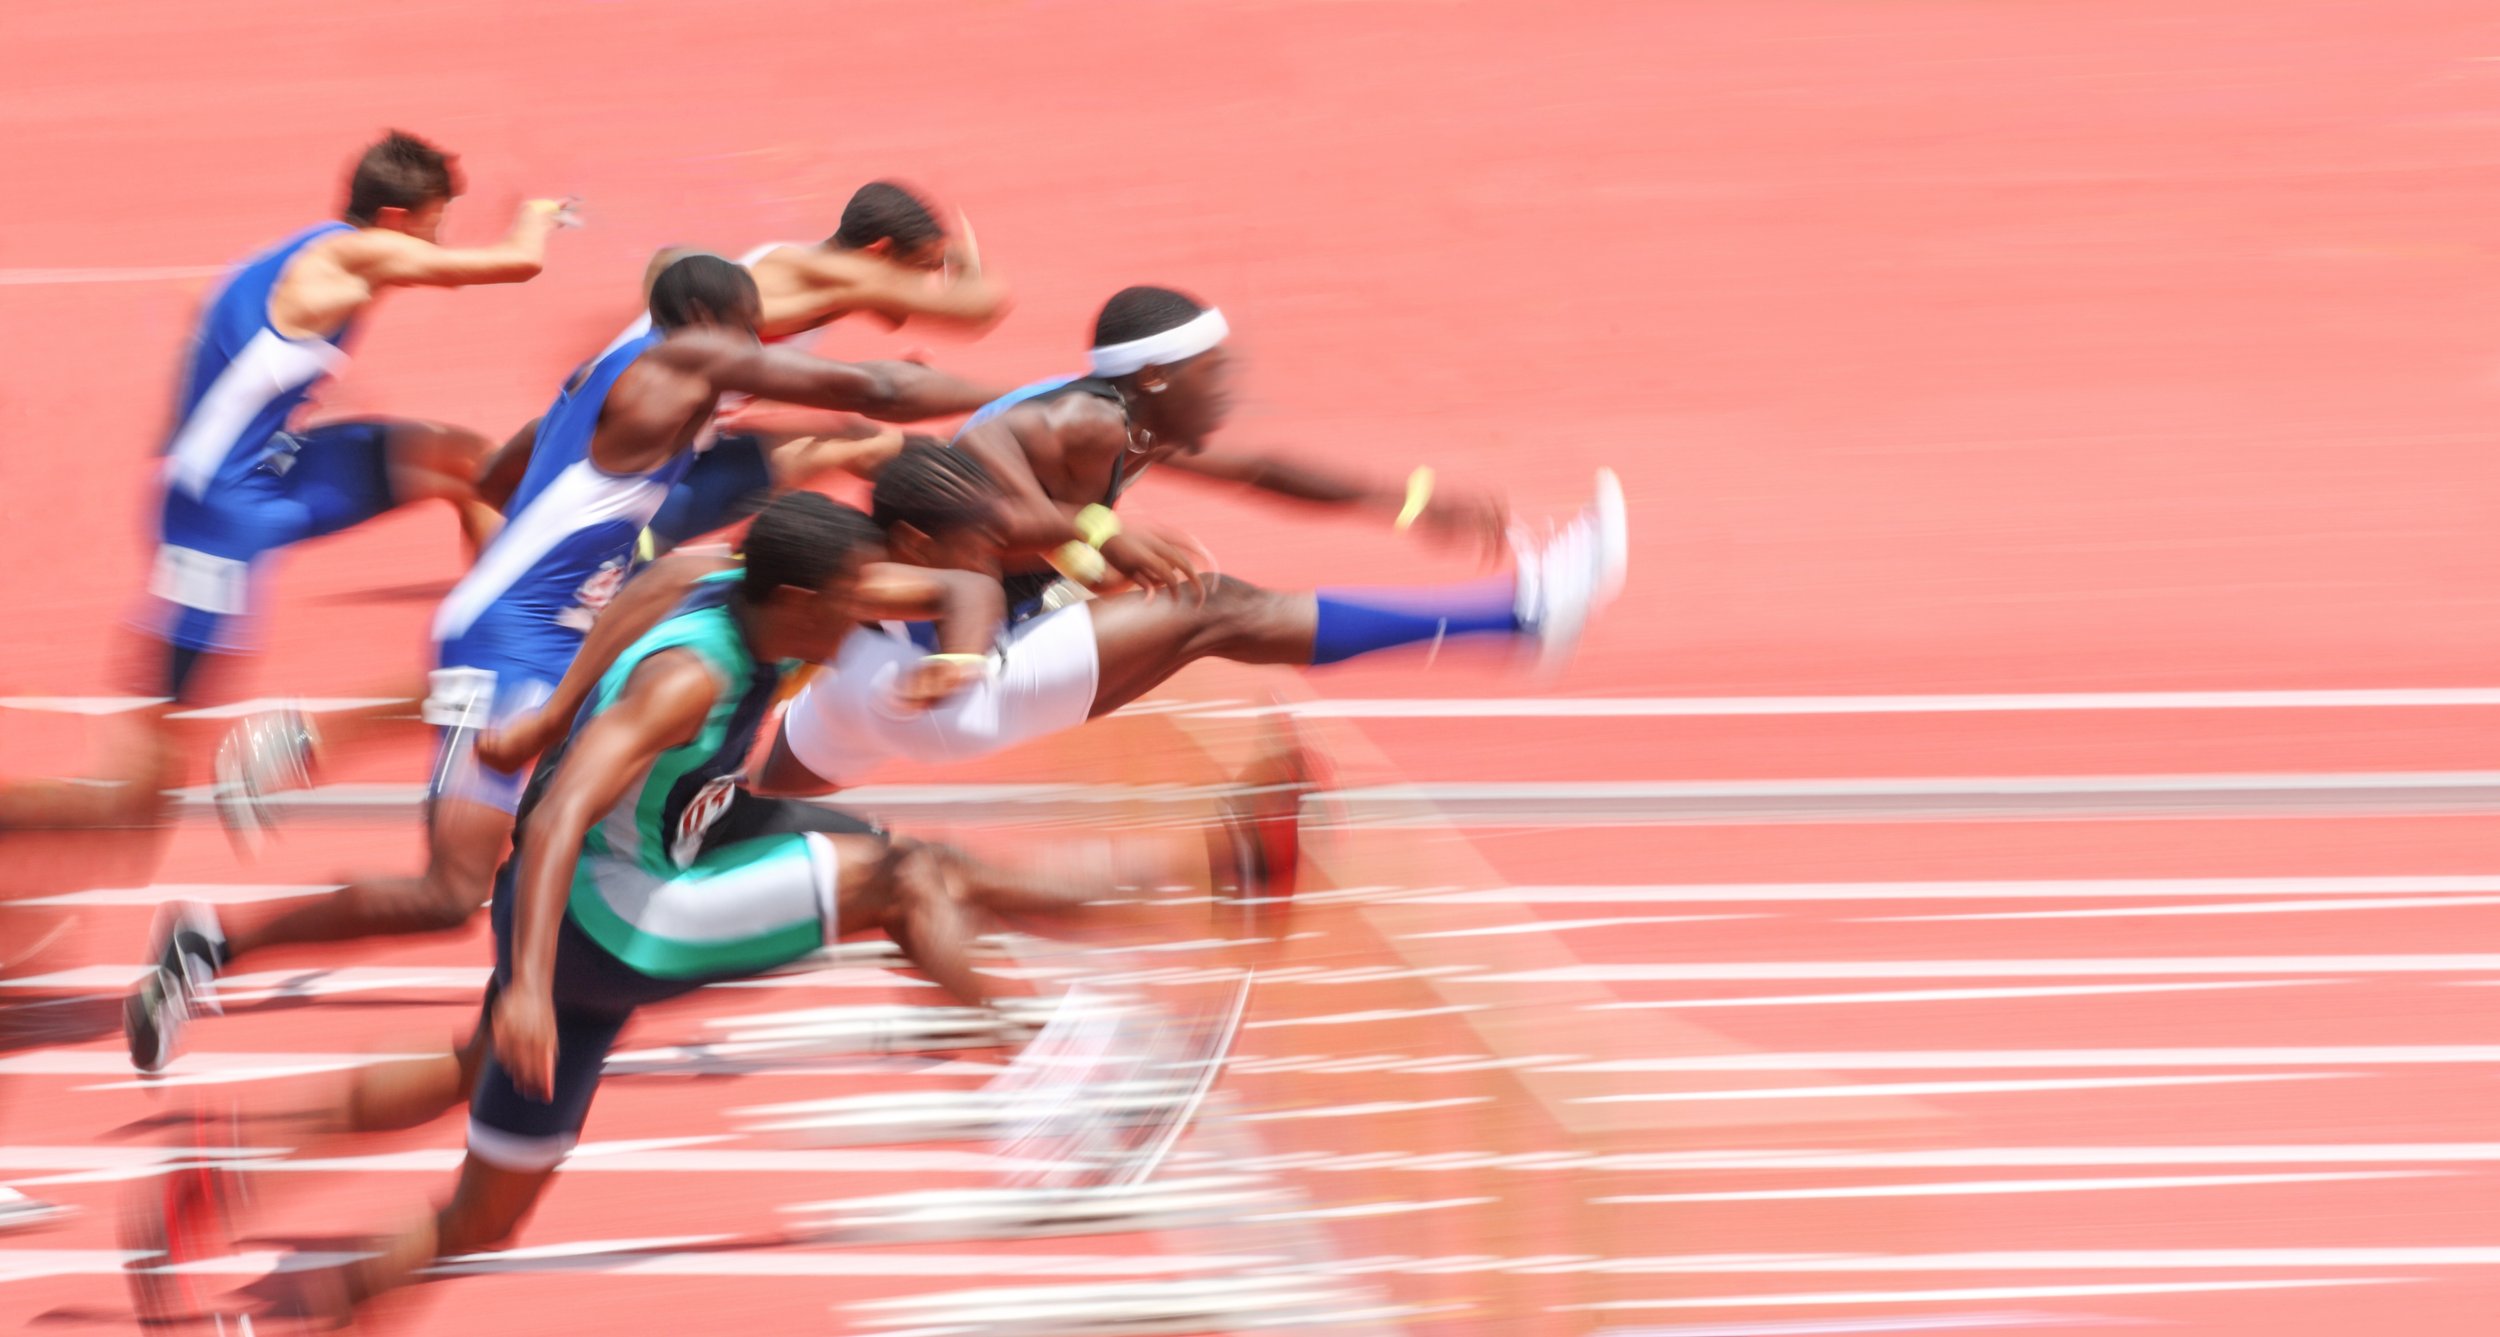
This use of a longer duration shutter speed and proper panning tells the speed story
We know that the primary control element of motion capture is shutter speed. For this assignment you may shoot in Manual mode, or for ease and simplicity, use Shutter Speed Preferred mode, your choice.
If a subject, or element of the subject is in motion, we have a choice. Our choice is how much, if any, motion is captured when we make a photo. The amount of motion captured is a creative CHOICE. It’s not a random act, meaning you the creative decides what your outcome should look like.
Shutter Speed Choice

Short enough shutter duration to freeze the car, long enough to blur the background and show motion
We know that a short shutter open time, also referred to as a high shutter speed is better suited to freeze motion. Modern cameras have shortest open shutter speeds of commonly 1/4000th of a second, but some often even shorter durations. Modern cameras also have very long shutter open durations, often up to 30 seconds. In the assignment we will use these to see what happens.
Lighting for the Assignment
I’m going to suggest either doing the exercise outdoors in daylight or alternatively indoors with some supplemental lighting that will allow you to get some short open shutter times at least as short as 1/1000th of a second. Choose an ISO that will allow for that while maintaining an aperture of at least f/5.6 with a moderate wide angle and f/8 with a standard (for your sensor) focal length. This is not the place for long focal lengths to be used.
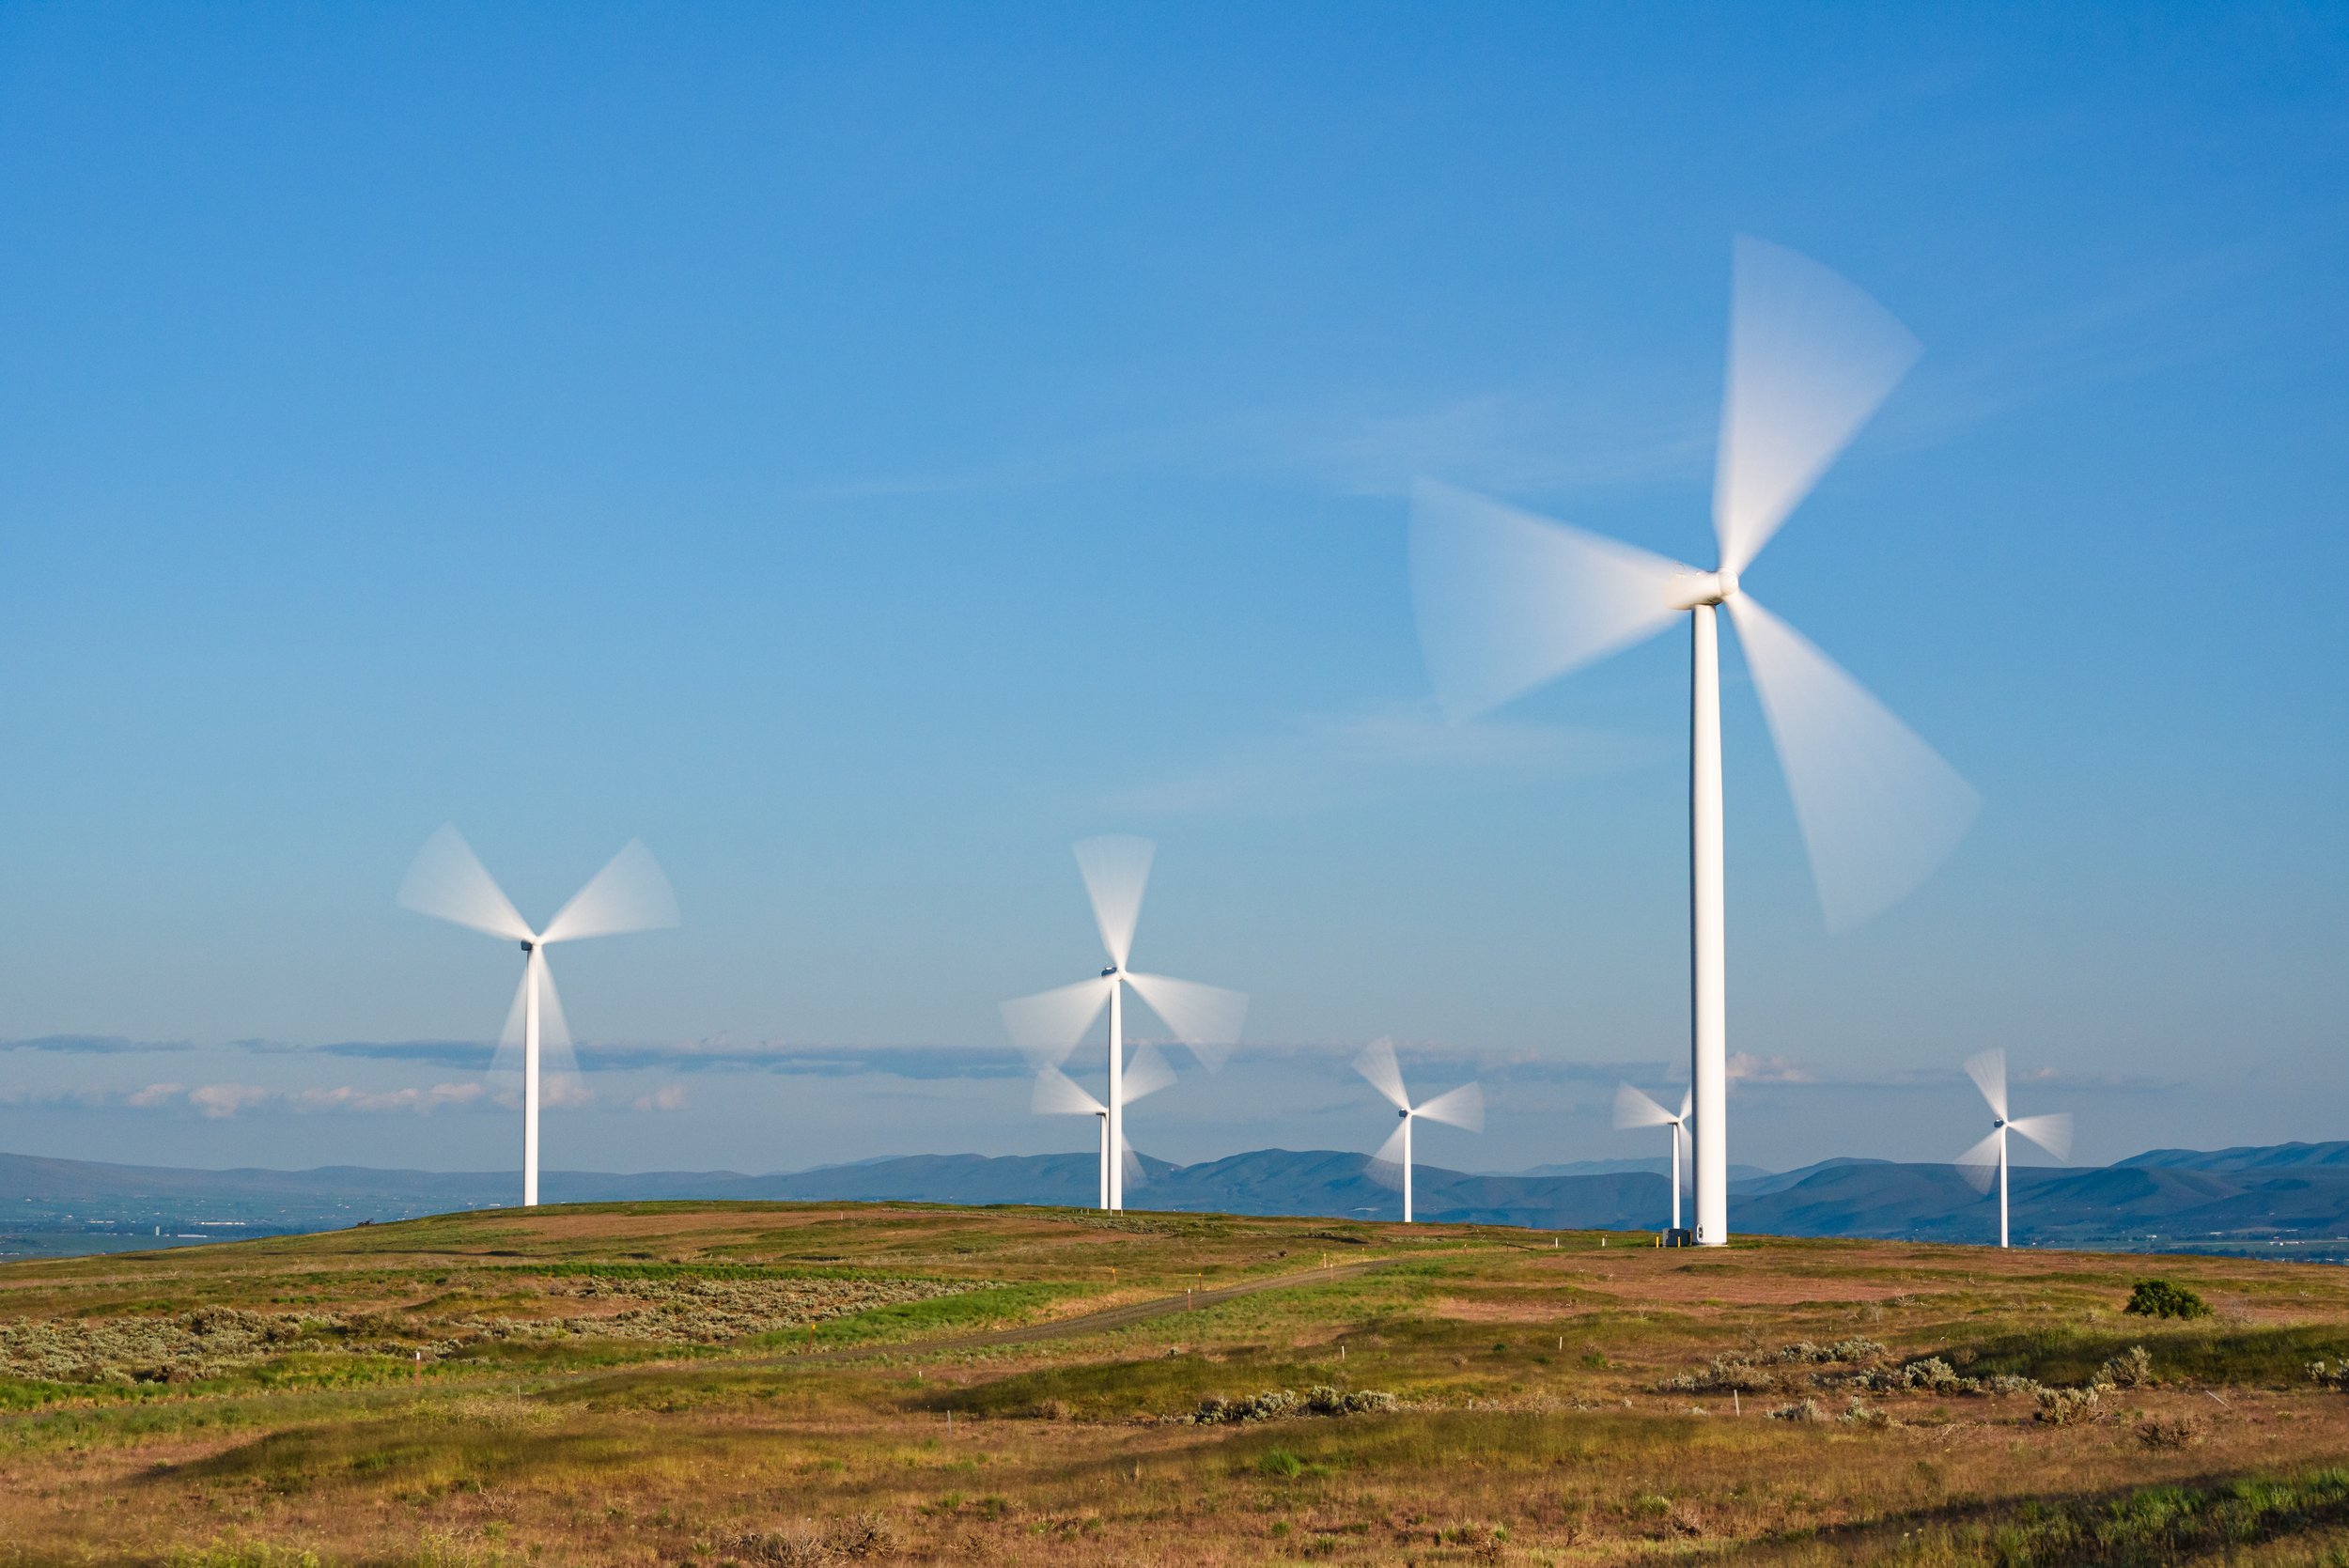
the longer shutter open time shows in this static landscape what we expect these monstrosities to be doing
Setup
Place your camera on a tripod and set a shutter speed to be pretty close to the focal length. In the example of a full frame or crop sensor camera with about a 50mm focal length selected, choose 1/60th of a second. Adjust the ISO to give an aperture of at least f/8 but not smaller.
Prefocus to a position a few feet in front of the camera. You will be waving your arm in this space, so I find a difference of 4 - 6 feet works fine. If using a wide angle lens, less distance is needed. Once you find the focus, set it then turn autofocus off, You do not want the camera hunting for focus during the exercise.
Execution
NOTE : To achieve longer duration shutter open times, you may need to reduce your ISO and / or use smaller apertures. To achieve shorter duration shutter open times you will need to increase your ISO, but do not use an aperture wider than f/5.6
Set the self timer and engage it.
Take your position at the focus distance and begin waving your hand up and down counting to ten such that each count, your hand is alternatively at the bottom and top of the wave.
The camera will go off. Check the playback that your hand is in the frame. Reposition so it is if necessary. That shot should be noted as #1.
Now change the shutter speed to 1/8th of a second and repeat steps 1-3. The shot you keep is #2
Now change the shutter speed to 1second and repeat steps 1-3. The shot you keep is #3
Now change the shutter speed to 8 seconds and repeat steps 1-3. The shot you keep is #4
Now change the shutter speed to 30 seconds and repeat steps 1-3. The shot you keep is #5
For the next step, set the shutter speed to 1/250th of a second, making ISO adjustments so your aperture is at least f/5.6. The shot you keep is #6
Now change the shutter speed to 1/1000th of a second, making ISO adjustments so your aperture is at least f/5.6. The shot you keep is #7
For the next step, set the shutter speed to 1/4000th of a second, making ISO adjustments so your aperture is at least f/5.6. The shot you keep is #8. If your camera does not go to a shutter duration of 1/4000th of a second, set it as short a duration as possible.
That completes the shooting component of the assignment.
Import the images from your card to whatever editor to use.
Get rid of any extras so you have shots #1 through #8.
Make a collage of all 8 shots as you shot them and mark each image so you can determine the shutter speed used easily.
Make a print of your collage and put it in your development exercises binder. You now have an excellent frame of reference for how different shutter speeds determine how motion is captured. It’s not just guessing at this point. Congratulations.

an image of a propeller driven aircraft or helicopter where the blades are frozen is boring. tell your story
Wrapping Up
Thank you for accepting to do this assignment in capturing motion. These small assignments are wonderful simple learning exercises that will help you make better images and to know what to do when the situation arises.
Please become a member on Patreon to help support this channel. A big thanks to all the existing Patreon members! Send in comments or questions, I read and respond to all. If you shop with B&H Photo Video, please use the link on the main page as it pays me a small commission and does not cost you anything to do so. Thanks again and we will see each other again soon.
NO AI CREATED IMAGES WERE LICENSED OR USED IN THE PRODUCTION OF THIS CONTENT. REAL PHOTOGRAPHERS GOT PAID


