

Getting Started with Off Camera Flash
/
Off camera flash is the first step in managing light yourself. It’s a significant step where you are the boss and no longer a slave to the ambient light, and it’s a major step in becoming a better photographer.

This what that one light setup shown above will produce
The fear is that it’s really hard to do, really expensive and horribly time consuming. It’s not hard, and not time consuming. The expense level is your decision, but in this article, I am going to reference some options available from your favourite camera store that will get you going without breaking the bank and still provide you gear that will serve you well for a good long time.
There's also this perception that you cannot get nice light with just one flash and so you need a bunch of extra gear to do so. More gear isn't awful, unless you are on your own and have to carry it all, are fixed tight for space or don't want to make things overly complicated.
Basic OCF Kit
You will need five basic pieces of kit to get started with off camera flash. Unsurprisingly, one of those pieces is the off-camera flash itself. Then you will need a light stand, a tilting umbrella bracket, a basic umbrella and a sandbag. Let’s look at each of these individually.
The Off-Camera Flash
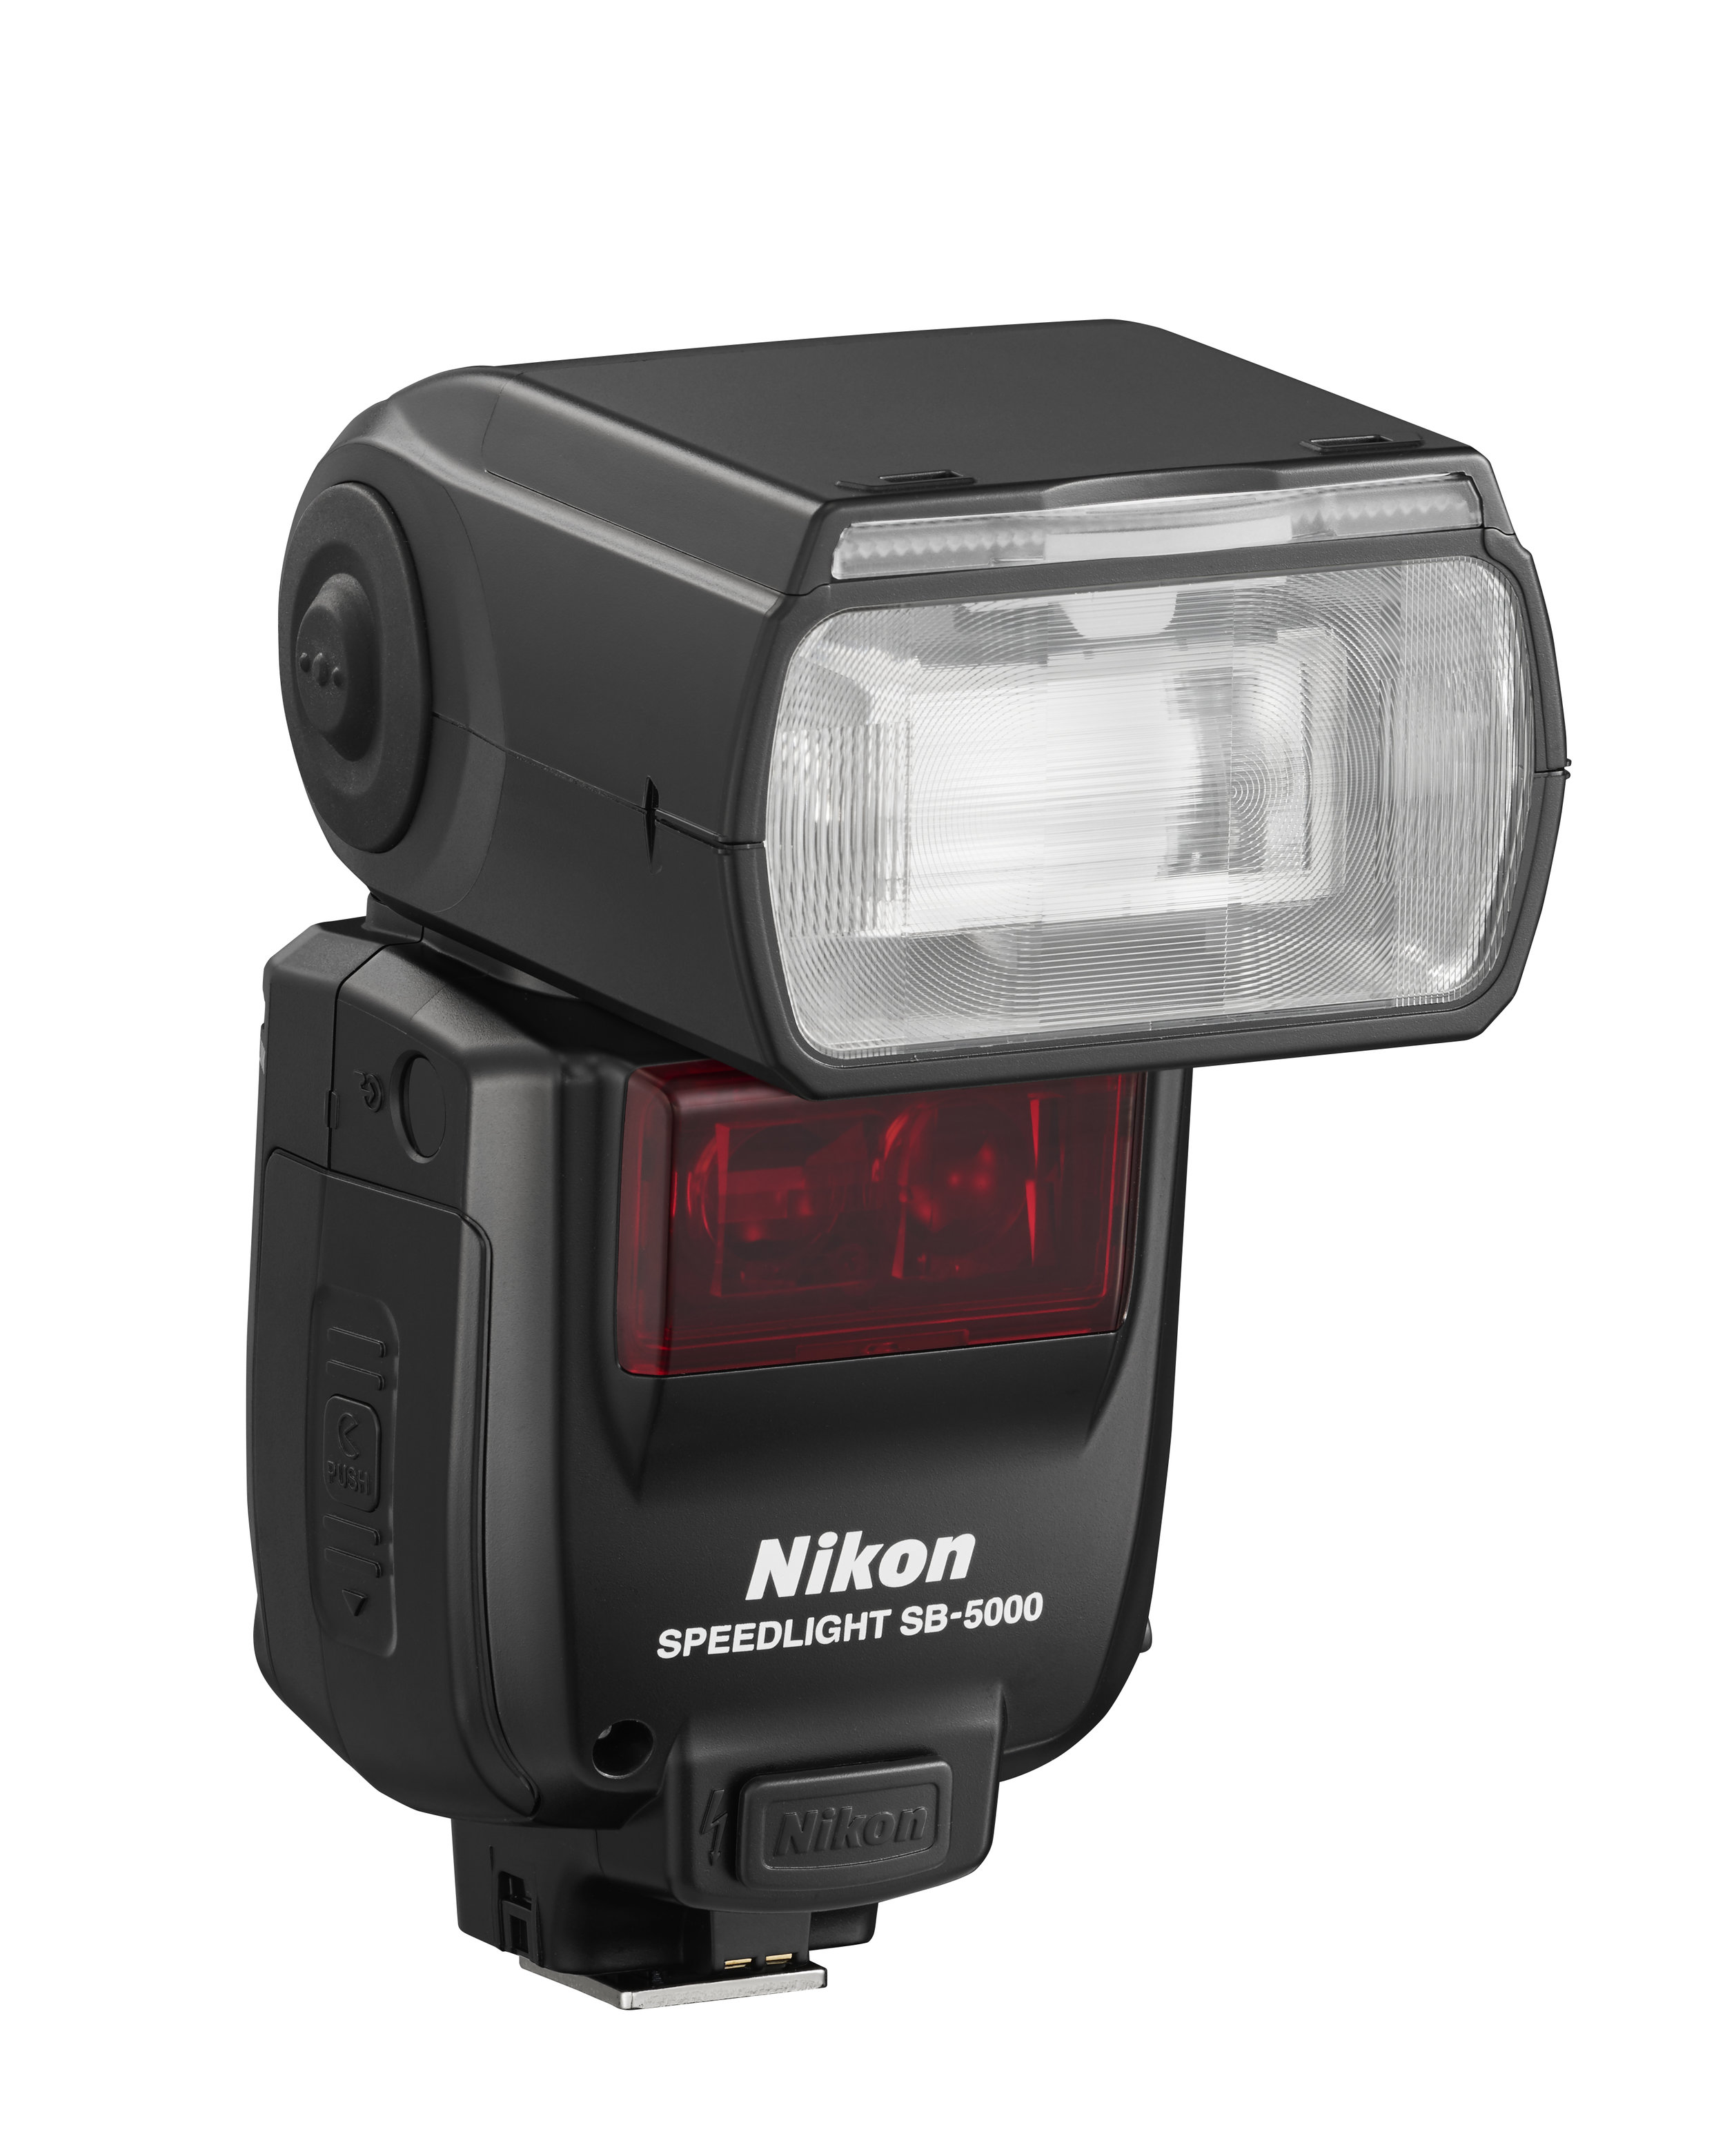
Nikon's radio/optical capable Speedlight, the SB5000
This is often referred to as a hotshoe flash, which is factually accurate, but our goal is not to use it in the hotshoe. Here’s some great news. Most camera bodies have a popup flash and the most useful function of these units, in most cameras, is to act as a controller for an off-camera flash. They use a pulse of light, that looks like a flash but is not, to communicate exposure information to the off-camera flash in real time. Check your specific camera manual to confirm that this is possible. Except for the lowest entry level products, generally this function is built in. Then you add the off-camera flash that works with your system. These flashes are available from the camera maker, and sometimes from third parties. My preference is the maker’s flash because you know it’s going to work, but this is usually the most expensive option. There are alternatives. You need to find a maker that precisely supports your camera system. I use and recommend flashes from Metz and Phottix. I know that they work, are built well and will last. I have Metz units that work perfectly despite being over thirty years old. I am fully cognizant that there are lots of folks who advocate some of the really cheap stuff from China. I won't name names, but if the price looks too good to be true and you cannot find these names in real camera stores, then you have found them. I've seen them blow up, cause batteries to burst, to overheat so much that they melt into slag, and generally perform so inconsistently that the buyer starts to believe that he or she is completely incompetent. We are talking about TTL capable flashes here, not a plain manual unit that is only going to be used as a slave. That's a different kettle of fish entirely. These are shoe mount flashes not studio strobes, that too is a completely different conversation.
The Light Stand
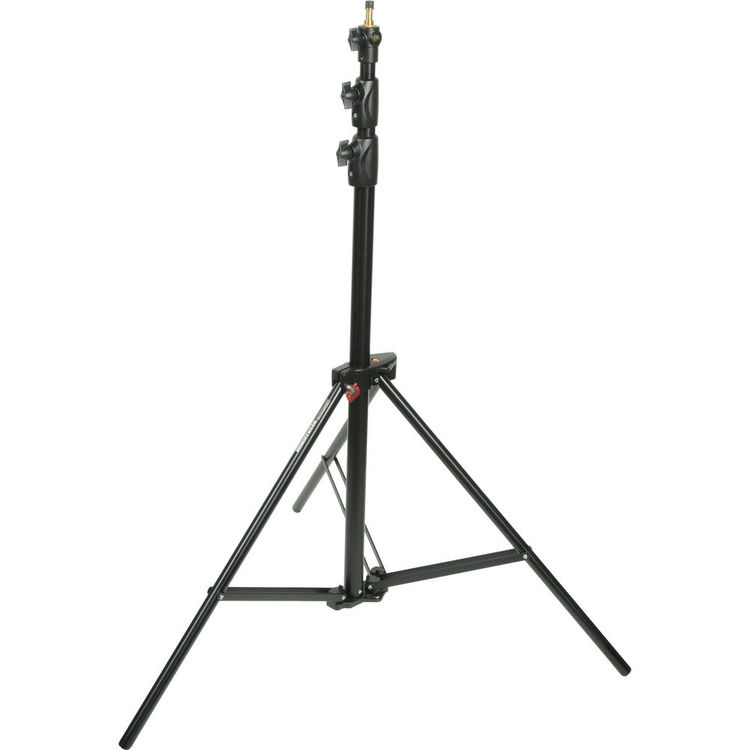
Manfrotto Ranker Stand 1005BAC
You need a place where your flash, umbrella holder and umbrella are going to be stable and reliable. A good light stand will last decades, a cheap one will fold up on you at the worst time like a stick of gum. Most people are well served by the stick style light stands, called this because they look like a stick. They can be found in a variety of price ranges and quality levels. I would suggest purchasing a stand that will go taller than you think that you will need. This will provide thicker walled tubing that will not flex or bend. Aluminum is fine, unless the walls are too thin. I also very strongly advocate for an air-cushioned light stand because they help prevent disaster if you do not lock the sections properly. I have tried stands from a variety of manufacturers and in the stick style, I use Manfrotto or Kupo. Most of what I have is from Manfrotto because for a long while Kupo stick stands were not easy to find in Canada, because most stores had a house brand in this price point. That these house brand stands were complete POS, did not seem relevant. I particularly like the Manfrotto Ranker stands that lock together (1005BAC) for easy transport and storage, as well as their 420B boom stand kit which is perfect if you need to fly the flash over the subject and keep the kit out of the frame.
The Umbrella Bracket

Manfrotto MLH1HS
The bracket is the most dangerous place to underspend. It’s the thing that holds your flash, and your umbrella and attaches everything to the light stand. To my chagrin, I have seen too many flashes tumble to the ground because a poor bracket was purchased. You want a bracket that fits a standard stand pin (5/8”), that has a cold shoe so the pins on your flash’s foot do not short out, that has a shoe that locks your flash in place – this by the way is the biggest failure point in brackets, and that is drilled to take an umbrella shaft, preferably at a minor upward angle, because the weight of the umbrella tends to pull the assembly downwards. I use Manfrotto brackets nearly exclusively. I have a couple of Lastolite brackets that are excellent as well, but they are the old style ones and have changed in the last couple of years. I, like many folks, have purchased third party brackets and every single one has failed in a critical area during testing, specifically not gripping the flash properly. Those got returned or junked because saving $20 on a bracket is not worth the loss of a $400 flash. You can buy the Manfrotto MLH1HS. Not the cheapest, but certainly top line and reliable. I used to use the Manfrotto 026 with the Frio cold shoe, but the company that made Frio went out of business, and the people making them now are using inferior plastics that break readily. That's a real shame because the 026 is a really tough bracket, strong enough to handle a strobe, but doesn't have a cold shoe. Most of the cold shoes out there are junk and do not hold the flashes solidly. If you need a lot of power through a single modifier, I heartily recommend the Lastolite Joe McNally Triflash Bracket. It can take up to three speedlights, locks the flashes in solid and each cold shoe is rotatable to you can position the infrared receiver of the speedlight in the right direction.
The Umbrella
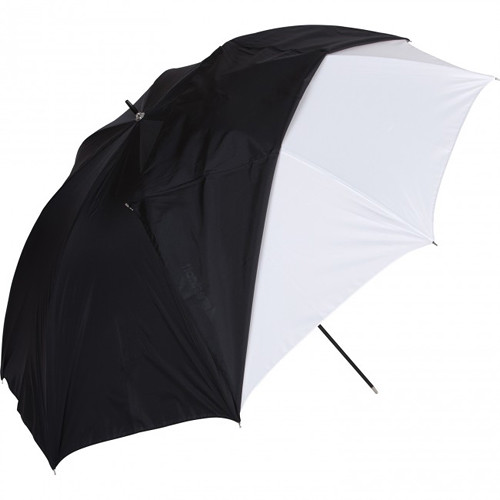
The Westcott 2016 - Simple, basic and well built
When you start looking at umbrellas, it’s easy to become confused by the sheer volume of choice. Let’s presume that you only want to buy one. That means that you want a medium-large umbrella that can be used for most subjects. This implies an open diameter of 42” to 48” This is large enough to make nice light, and small enough that it can be used in an average home. Next look to the construction. My preference is for a heavy-duty aluminum shaft, with a tapered end supporting fibreglass rods to extend the umbrella. The fibreglass keeps the weight down and transports more easily because it doesn’t bend the way that aluminum struts will. When it comes to finishes, I recommend at minimum a two in one umbrella. This means a two level fabric kit. The inner umbrella will be white, and there will be a removable outer cover that is black on the outside and lined with silver. With the cover removed, you have a white “shoot-through” umbrella designed so the flash fires through the umbrella to soften and spread the light out. This is an excellent option when you must deal with larger areas and larger groups. With the cover in place, the translucency of the white liner, is made into a 100% reflecting surface by the silver lining of the black outer case. The outer casing is black to prevent the creation of other sources of light or reflectance that could otherwise impede your image. Most umbrella fabrics are nylon, some are coated with plasticizers to make them more weather resistant and to facilitate cleaning. The last thing to consider is the umbrella shape. A parabolic umbrella focuses the light and is sensitive to flash to bowl distance. A non-parabola is much more forgiving and is usually significantly less expensive, and a better first umbrella for most. I do not recommend all white umbrellas or umbrellas without a removable cover as your first purchase. You give up versatility for very minor cost savings. The FW Westcott company has been doing umbrellas for a very long time and produce high quality and reliable products. The Model 2016 is 45” in diameter, has a removable cover, fibreglass ribs and a 7mm aluminum shaft. It will do a terrific job.
The Sandbag

Basic Sandbag
Simple stuff. A canvas or plasticized bag that you fill with sand and drape over the leg of the light stand to keep it from tipping over. This is the piece most often ignored, and most lamented when needed. If you are working with a subject of any kind, adult, child, pet, sculpture, a sandbag is a must. Don't even think about setting up outside without a sandbag. If you will work outside, check the wind. A 45" umbrella becomes a sail in a split second and a single sandbag may not be enough to hold it in place.
Shooting
To get started, set your umbrella about 45 degrees off the line between your camera and subject. Raise it on the stand so you can angle it down towards your subject like it was the sun coming through a skylight. Move this as close to your subject as you can without it being in the frame. Set your camera flash setting to TTL and shoot. Move the light a bit for different looks.
Summary
This article is not intended to be a lighting course. It exists to get you the core gear for success, and my initial recommendation is to use the built in through the lens flash metering because it works great straight out of camera well over 90% of the time. You also have the luxury of flash exposure compensation in camera, as well as being able to control the output of the flash right from the camera.

The Phottix LASO Radio Transmitter for Canon
The infrared remote control used by many companies via the popup is very easy to use. The popup flash becomes the controller. No extra kit needed. Outdoors, this infrared control becomes much less practical being blinded by the sun and due to limited power, having very limited range. At that point, you revert to cables (yuck) or radios. Both Canon and Nikon still offer optical control but their direction is radio. Sony has radio flash as well recently announced. There are also some very good TTL capable radio systems from independents. I have used and own systems from both Pocket Wizard and Phottix. While different, they make off camera flash at distance and outdoors extremely easy. When getting started, try the optical system in your camera first as if you are using off-camera flash indoors predominantly, it will likely do the job for you.
Note that most Pro bodies have no popup flash at all, so if you own one of those, bypass optical and go straight to radio. You will save in the long run and be happier.
If you shop at B&H Photo Video, please do so through the link on the website. There is no negative impact on your experience at all and you help support my work. If you got value from the article, please consider supporting the site, by buying me a coffee through the donation link. All monies raised get put back into The Photo Video Guy and bringing you new content.
Until next time, peace.


