

REVIEW : Sony UWP-D11 Wireless Communications System
/
I recently had the opportunity to work with a new wireless microphone kit from Sony in order to write a review. I want to thank the awesome people at Henry's for providing the gear.
The kit that I received is the UWP-D11 wireless communications system. It consists of a lavalier microphone, the UTX-B03 transmitter, the URX-P03 Diversity receiver, a number of cables and some mounts. Documentation is provided, but as a result of excellent user interface creation, I didn't need to crack it to get operational.
The lavalier is a very high quality unit and is supplied with a windscreen and mounting clip. The cable feels rubberized so not slippery and did not readily develop kinks in prolonged use. Sony specifies the frequency response as 40Hz to 18kHz, and in real world use, I found the quality of the microphone to be excellent. The cable is long enough so you can fish it under the talent's clothes and still have some flexibility in the placement of the body pack transmitter. As one would expect of professional level gear, the microphone plug has a knurled locking ring to screw it down onto the transmitter to prevent accidental disconnection.
The UTX-B03 transmitter is a body pack design. The casing is all metal and that's critical for production lavalier mics, because the talent or the engineers will from time to time cause them to fall off the belt and bounce on the floor. I have seen too many body packs shatter on first impact. If you will spend the money on body packs, spend the nominal extra for metal cases. Power is supplied by 2 AA batteries. You can use either alkalines or rechargeable Nickel Metal Hydride batteries. There is even a USB port that you can connect to a USB power supply to recharge NiMH batteries or to operate the unit. On the top deck is a single antenna. Beside the antenna is the microphone in jack. On the front panel is a clean LCD display that shows the RF state, the RF strength, battery power, channel and frequency. There is also a very handy little bar graph that displays to show the input signal. The LCD is supplemented by two LEDs. The first is your power indicator and the second is the audio level indicator showing green for good, red for clipping and orange for mute.
This is a diversity system, so while you can set the channel and the core frequency, the system will automatically hop to deliver the best output. This is a very big deal in real life as while you test and rehearse, all plans become very fluid as soon as the LIVE light goes on. Settings are controlled by three buttons. Set allows you to move between settings blocks and up and down allow you to change values for settings. It's all very simple and intuitive. There is a recessed power button on the pack that can also act as a talent activated mute button. The battery door and USB port are on one side and there is an IR receiver for synchronization with a receiver on the other side. I never bothered to try the IR as I wanted to see how difficult the manual process was. It's not so I stopped any worrying.
The pack comes with a removable spring clip for belt mount and is tapped on the back for a small post if needed.
The URX-P03 Diversity receiver looks similar to the transmitter but is quickly discernable by the two position-adjustable antennas. I really like this flexibility, particularly if you are using the receiver in a crowded radio environment such as ENG reporting or in a series of rental studio blocks where the airwaves get cluttered quickly. Between the two antennas on the top deck is the screw lock output jack to run to your mixer on field recorder as well as a headphones monitor jack. The unit comes with both an output cable for 1/8 TRS inputs as well as a proper XLR input. I used the XLR cable exclusively in my testing as that is what my field recorders and studio mixer use as inputs. The headphone jack is a huge bonus if one is working live and needs to monitor the inbound signal as it is being recorded. The field sound engineer in me cheered when I saw this. You can use a belt clip (supplied) or a mount to a cold shoe (supplied) to affix the receiver where you need it. On the side is the battery compartment and IR interface.
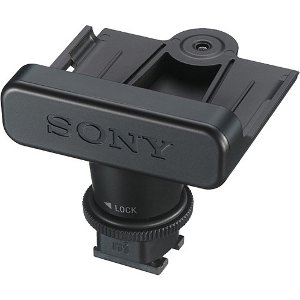
SMAD-P3 connects the receiver directly to a Sony Multi-Interface shoe No cables to tangle!
On the bottom there is a USB jack for power or charging your own NiMH batteries but there is another jack of incredible use, if you are using the receiver with a Sony camera. Many Sony cameras have what they call the Multi-Interface (MI) shoe. This is a proprietary multipin connector that sits in the toe of the hot shoe. With an MI adapter, you simply slide the URX-P03 into the adapter plate and it connects to the plate via the port on the bottom, The MI adapter, called the SMAD-P3 then slides into an MI shoe for a no cable connection. If you are a run and gun team member, you know that short cables are a snag hazard when trying to work quickly and this system eliminates all the cables at the receiving end, although as mentioned, it only works with Sony products with an MI shoe.
On the front panel is a clean LCD display that shows the RF state, the RF strength, battery power, channel and frequency. There is also a very handy little bar graph that displays to show the input signal. The LCD is supplemented by two LEDs. The first is the power indicator and the second provides a colour representation of the RF input level strength. Very handy indeed because they are visible at a bit of distance. Above the LCD panel is the recessed power switch.
Sony has done a decent job on the documentation. It's clear and easy to follow, a step ahead from some of their documentation for consumer products. The kit comes in cardboard box that is quite large, and reality says it's not going to be useful for very long. I personally recommend a small watertight Pelican case for each pair as that's how I store my wireless mic kits.

Here's what came in the box
The D11 kit has the lavalier and bodypack, but there is a D12 kit that replaces the lavalier and bodypack with a handheld cardioid style microphone (UTX-M03) with integrated transmitter. I did not test this. There is also the D13 kit that replaces the Sony microphone with a brand independent transmitter (UTX-P03). While this transmitter package is larger and hangs off the microphone's XLR jack, I personally prefer this idea because you can use it with any microphone that you have that can take an XLR connection. As it should be, Sony sells both the UTX-M03 and UTX-P03 as standalone products as well. So you could use one receiver with multiple transmitters, but not at the same time.
Let's talk cost. The D11 kit that I used retails for about $790. In the realm of pro audio, that's quite reasonable. Comparable kits from alternates are a bit more expensive. There are certainly less expensive kits with far less flexibility and plastic housings. Your budget will help drive your choice, but if you are so inclined, remember my guidance when it comes to gear, buy your last one first. It saves a lot of time, trouble and money in the long run. I like the Sony offering and if you are using Sony cameras, get the MI adapter and you are golden.
Thanks very much for reading, and until next time, peace.


