

Using Back Button Focus
/Back Button Focus
At a few recent photographic events, some of the attendees were struggling with back button focus. Some had misunderstandings of what this is, others had it configured only partway and the idea, while a decent practice, was more frustrating to them than helpful.
What Is Back Button Focus
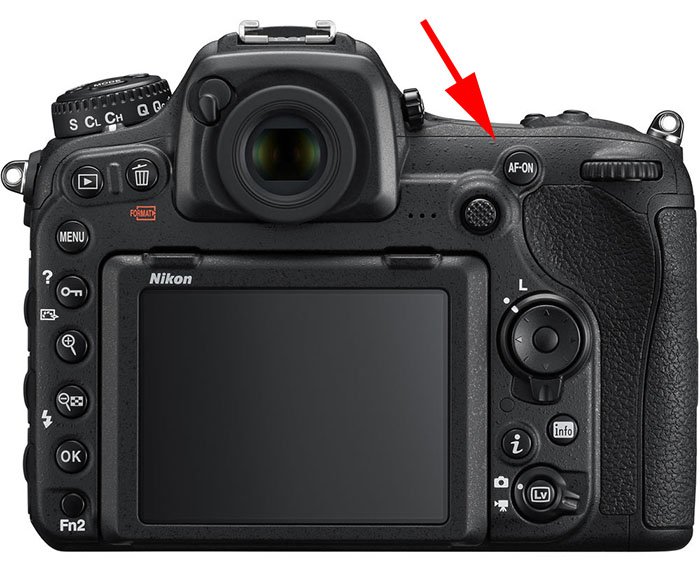
On Nikon cameras, the AF-ON button can be set to be back button focus
At the risk of being highly simplistic, back button focus involves programming a button on the back of the camera, that is reachable by the photographer’s thumb to initiate the autofocus start command. Some manufacturers set the camera up in this manner, others handle the function differently by default. Some others do not offer a preprogrammed option, instead providing multiple programmable Fn buttons that the user can configure as desired.
Why Use This at All?
Most all digital cameras initiate autofocus start with a half press of the shutter release.
Sometimes the release is calibrated to deliver a certain level of resistance once autofocus has started but before the press moves through the shutter actuation. Many photographers are concerned about this method because they have tripped the shutter many times while simply trying to start the autofocus process. By separating the actions, more finite control can be delivered, albeit at the cost of using two digits to manipulate the focus and capture operations.
Does This Just Perform a Focus Lock?
The answer here, is like so many answers in photography; it depends. The dependency is on the autofocus mode being used. Many cameras offer three modes. The default, is most often called some derivate of Auto Focus Automatic or AF-A. In this mode, the camera tries to determine whether to set the AF mode for a static subject or a moving subject. Because it is very much a programmed guess, my recommendation is to avoid this mode, because so many real users have had it guess incorrectly in an unrepeatable shooting situation. This leaves us with Autofocus Single and Autofocus Continuous. These are frequently displayed as AF-S and AF-C for convenience.
Different manufacturers use different names to describe these modes which due to non- standardization creates more customer confusion. Canon refers to these as One Shot and AI Servo as an example. I struggle to understand the point of cryptic naming conventions.
If you are shooting in your camera’s version of AF-S, the autofocus start operation will engage the AF engine, and lock the focus based on your focus area selection, and hold that focus while pressure is maintained on the button. This is very useful as it allows the user to lock focus and then recompose without losing the focus lock. When I teach folks, I refer to this as "floors" because the acronym Focus Lock Recompose Shoot, sounds like floors when said out loud.
If you are shooting in your camera’s version of AF-C, autofocus start will engage the AF engage and obtain focus based on your focus area selection. The focus does not lock, and instead will adjust as the subject inside the focus area moves around. This is a great advantage when your subject moves, such as your child at soccer or gymnastics, your dog running in the yard or a bird in flight.
Some manufacturers will offer more advanced continuous modes such as tracking autofocus or 3D autofocus. These modes while powerful have a learning curve so practice on non-critical subjects is necessary before you go into a critical shoot.

On Canon cameras, button labeled AF-ON can be set to be back button focus
Three Caveats
The first caution if one will use back button focus, is that you really need to go into your camera’s menu settings and disable autofocus start on the shutter release. Otherwise when you press the shutter, you will reengage the autofocus check process, even if you are in focus and may lose the critical focus that you have obtained using the back button. This is the step that most folks miss and the greatest level of frustration found with back button focus.
The second caution is that back button focus, does not make adjustment for the user selection of the focus area. Most cameras these days advertise how many focus points that they have. This can be a real asset, but can also lead to the camera selecting a focus point or set of points not in the place where you the photographer wants to use them. Some professionals, myself included, use only a single focus point or small group of 5-9 points and prefer to either allow for cropping space or to float on and off the button to permit dynamic recomposing. You should choose the area method that works best for you, just be sure that you are getting the control over which points are used other than the camera making a best guess decision.
Finally, some manufacturers set the default function of the button to always be focus lock. You do not want that. If you lift your thumb from the button, you want the focus to stay where set, but to refocus when pressed again, not to hold the focus completely until the shutter is released.
How To Make the Camera Switch
This example uses Canon bodies because that's what I have handy, but the concept is the same in every camera that supports back button focus and decoupling AF start from the shutter release.
The first step is to locate in your camera menu where you can customize the camera controls or buttons. Engage this menu item as you see below.
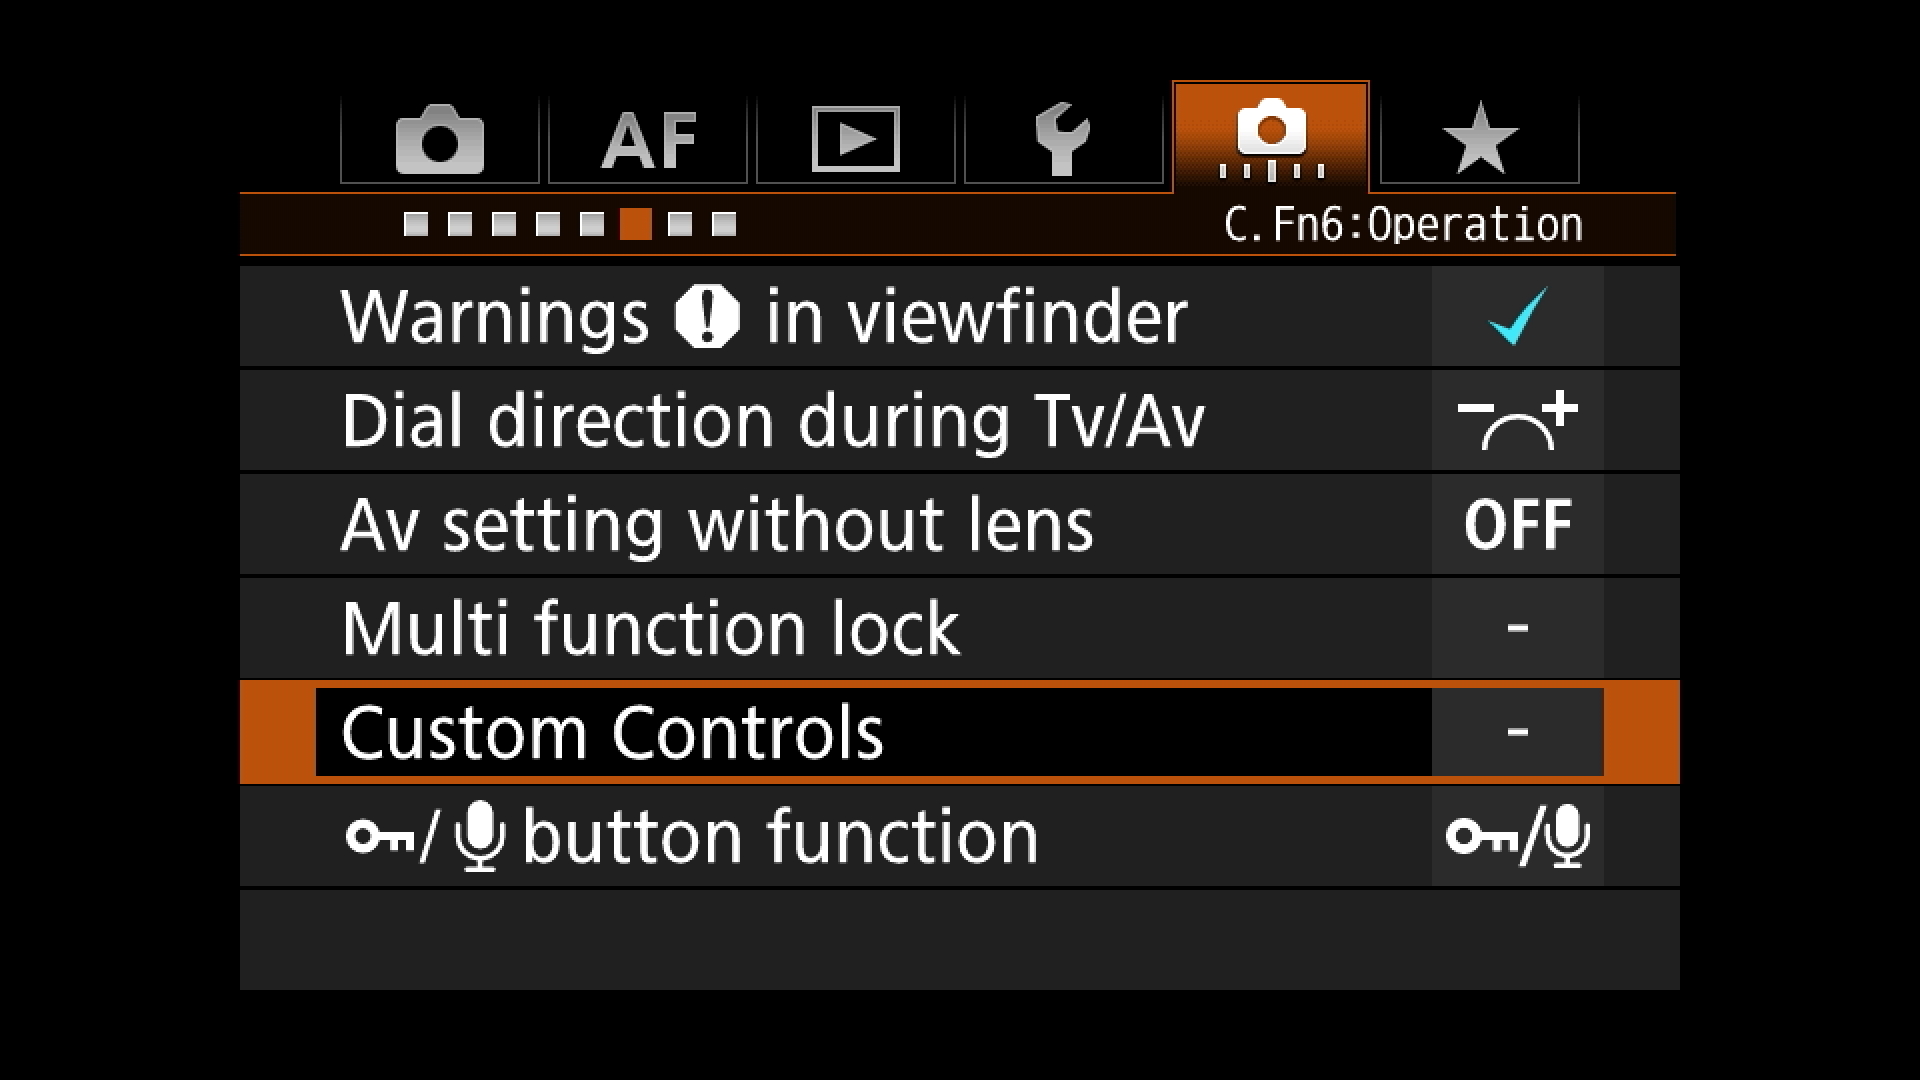
Step One - locate custom controls, button customization
Next enter the menu options and find the settings for the shutter release. In this default example, we see that the shutter release is set to initiate both metering start and AF start.

Step Two : find the setting for the shutter release
Press whatever button allows you to make a change to this setting. On the Canon example it is the SET button.

Step Three : Get to the option where you can set the functions that you want the release to perform
Using the camera controls for making selections, highlight the option that turns on the internal meter, but does not initiate AF Start and then activate it.
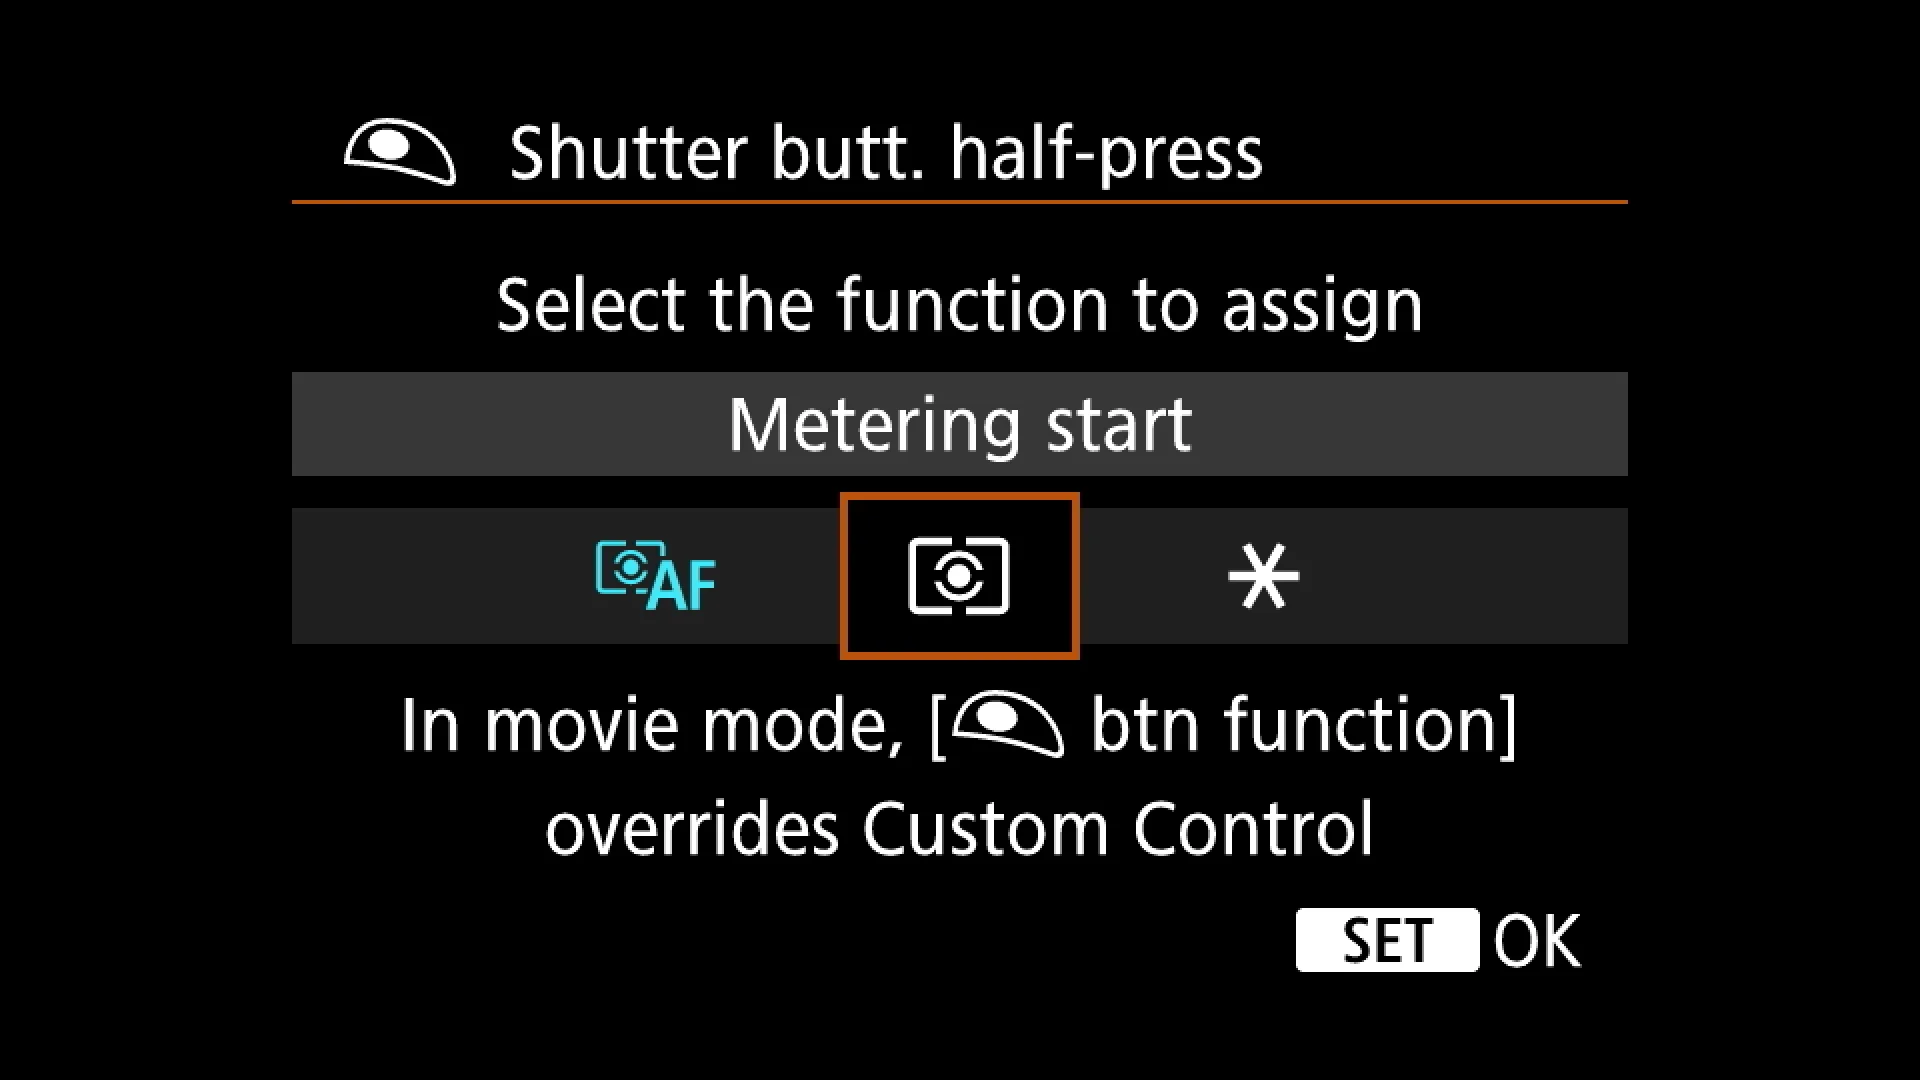
Step Four : Select and activate the shutter release setting that only turns on the meter on
Once you have set the shutter release to only do metering start, you will have decoupled AF start from the shutter release and AF will only start when the AF-On or equivalent button is pressed.
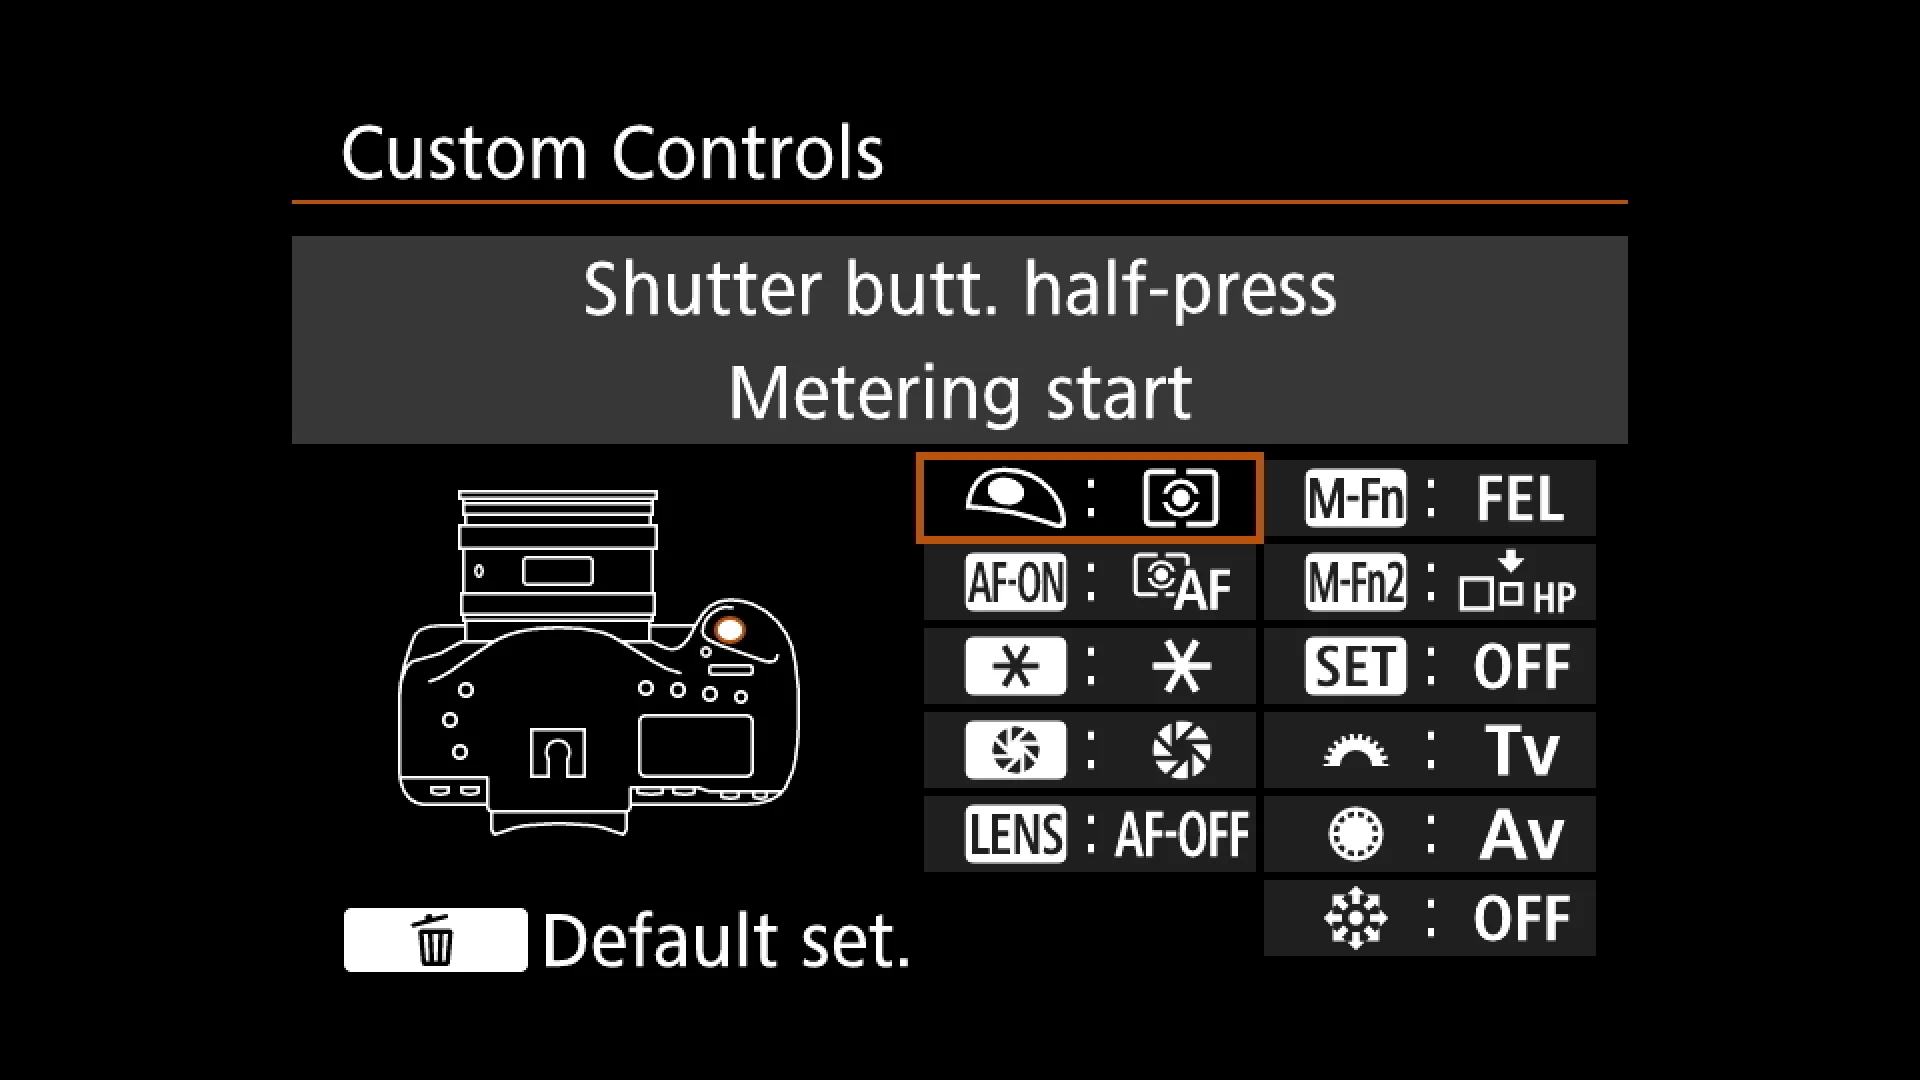
Step Five : You have now isolated AF Start to the AF-ON button and removed it from the shutter release.
The thing to remember is that you have changed how the camera is operating, so you need to remember that a half press on the shutter release only activates the meter, it no longer activates autofocus. Thus if your camera is set to focus priority release, it will not fire if the subject is out of focus because you forgot to press the AF-On button. You will have to modify your own behaviour to not miss shots because of this change. I would not suggest making the change five minutes before an important event, do so several days in advance and practice using the camera in the new configuration to avoid missed shots and frustration. This is especially important if you will be using AI Servo, or AF-C or whatever your manufacturer calls continuous autofocus, because that mode is usually by default set to release priority meaning the shutter will fire whether focus is achieved or not and you could fire off a whole series of frames without AF being on at all if you forget to press and hold the AF-On button while tracking your subject.
Using Back Button Focus
In single shot mode, obtain focus and lock it by maintaining pressure on the button and do not release it until you are finished making images for that focus distance. Whether you are shooting in single frame or continuous mode is immaterial, just hold the back button down until you need to focus again for your next shots.
In continuous mode, hold the back button down and the camera will continue to seek focus on whatever is inside the selected focus points. Some cameras are considerably faster at handling moving subjects than others. That’s a design element in the camera, but for many types of subjects, continuous focus is stunningly good in most cameras. If you release the back button, the focus stops seeking, which means that so long as the camera to subject distance does not change, you can experiment with some recomposition as I discussed in the previous paragraph. Again, this skill requires some practice on non-critical shoots before putting your emphasis on it.

Camera in continuous auto focus, with me tracking the rider and holding down the AF-ON button with a slow shutter speed and a pan to capture the motion of the horse and rider. Without back button focus, this shot would not have happened as successfully.
Practicing
Most areas have the ready availability of seagulls or other larger flocking birds. I like to practice focus with seagulls because the will both sit still as well as fly erratically. They are often attuned to the presence of people and thus you do not have to carry very heavy and very long lenses to conduct this practice.
Summary
Whether you use back button focus or not is a completely personal decision. Do what is comfortable for you. Experiment with it and see if using it creates value in your personal photographic odyssey.
If you shop at B&H Photo Video, please do so through the link on the website. There is no negative impact on your experience at all and you help support my work. If you got value from the article, please consider supporting the site, by buying me a coffee through the donation link. All monies raised get put back into The Photo Video Guy and bringing you new content.
I'm Ross Chevalier, and until next time, peace


