HDR or High Dynamic Range has taken a beating over the last couple of years, and sometimes rightly so, not because the concept is bad, but because too often the execution is so over the top and screams fakerooni. In this article I look at the benefits that HDR can bring and explore the output from Photomatix Pro 5, Nik HDR Efex Pro 2, Photoshop Merge to 32 Bit HDR and HDRsoft's 32 Bit Merge alternatives.HDR images don't have to look overcooked. HDR can be subtle. Before we get there, let's explore what the original point of all this was.
High Dynamic Range - Origins
A long time ago, Ansel Adams defined the Zone System. The principal was to use multiple meter readings to determine the dynamic range of an image to be made, to maximize the exposure and then to work in processing and printing to get the widest possible dynamic range. The Zone System measured from Zone 0 to Zone 10, effectively 11 stops of exposure, although many implementations exist and range does vary.
When digital cameras, particularly digital SLRs came out, the sensors were limited to between 5 and 6 stops of dynamic range, after which content either fell into unrecoverable blacks or blown out whites. This is very much less of a problem today, than it used to be as we see sensors with 11 and even 12 stops of native dynamic range. So what digital photographers would do would be to make multiple exposures of the same subject, using the evaluative metering system and then consciously choosing to under and over expose the subsequent shots. The premise was that the wider range of exposures made, the more content would be there for the next step.
That next step was quite a doozy. Using predominantly Photoshop layers, each image would be imported into its own layer, then layer masks would be created where different parts of the different images would be combined to create a single final image with much wider dynamic range than any one of the shots.
The premise was that if the evaluative meter gave you 18% grey, then a -2 EV underexposure would put whatever the base reading considered to be white, into middle grey, pulling more data out of the highlight areas and keeping them from blowing out. Then a +3EV overexposure would be made to pull the blacks up nearly to middle grey getting more detail into the shadows area that under normal conditions would be black. These under and over exposures would render much of the image either dumped into the blacks or blown out completely, hence the need for masks and layers.
Automation in Capture
Camera manufacturers had long known of the practice of bracketing, the idea to make multiple exposures of the same scene at different EV levels to help the photographer shooting film to compensate for excessive white like snow, or excessive black like a night shot, being pushed towards middle grey by the internal meter that measures reflective light. In the days of film, cameras had manually operated exposure compensation dials. It was an easy step for manufacturers to write subroutines for the computers in the digital cameras to shoot a sequence and have the exposure compensation adjusted automatically.
Nikon really took this to heart offering 3, 5, and 7 shot brackets at full stop intervals. The thought was that the more exposures over a wider range would provide more fodder for the HDR process. Sadly, misinformation and missing documentation convinced legions of photographers that they needed more shots than they may have actually required but at very small exposure increments. Shooting a 7 shot bracket at 0.3EV (⅓) stop increments is a lot of data. Better to shoot a 3 shot bracket at full stop increments. You end up with the same dynamic range but in fewer shots and therefore with faster processing.
A decent enough rule of thumb if you want to get the extended dynamic range that the film masters got, is to do what they did. Autobracketing typically requires the same EV variance to the plus and to the minus, so this is where additional frames can help. With the quality of sensors in the last couple of years, bracketing with anything less than a full stop difference, isn't really helping you much.
And now of course, you don't have to make your own layers and your own masks. There is software to do that for you. In this article I look at four options and offer my opinion where each best fits. The software options I look at are Photoshop Merge to HDR 32 Bit, HDRsoft's 32 Bit HDR, Photomatix Pro and Nik HDR Efex Pro 2.
Before getting into software, it's also important to note that photographic HDR is less high dynamic range these days and more a processing effect. Traditional HDR involves mapping the tones in the histogram to extend the dynamic range. The processing that many people equate with HDR is really a series of effects comprising multiple programmatically created adjustments that extend beyond exposure to include noise, sharpening, softening, saturation, clarity, structure, blend modes and numerous other options.
The overcooked HDRs that some love and some hate place more emphasis on the effect side of the equation than on the tone mapping side. HDRsoft, the company that makes Photomatix Pro calls this Fusion, so that's as good a name as any.
The Software
Photomatix Pro V5 and HDR Efex Pro 2 are 16 bit editors that offer a wide range of presets going from the subtle to the nauseating. Like any preset, they are a place to start in your image processing, and rarely an end in themselves. Followers of Trey Ratcliff have come to recognize the Photomatix look, and indeed until the release of V5 of their software, subtle was really not in the vocabulary. The current version is a significant improvement in usability, image quality and flexibility. I commend the company for the work in the upgrade and if I was driven towards effects oriented HDR, this would be my choice.
When I started doing HDR, I tried the older versions of Photomatix, but never really liked the output, so I went with Nik's HDR Efex Pro, and later Pro 2, before Google bought Nik and made the bundled suite so darn affordable. HDR Efex Pro 2 has definitely been a go to for landscapes, automobiles and other wide scoped themes where I wanted a blend of subtlety and effect. I still like it today, and you cannot beat the price. That said, Google has not offered a major revision since taking over Nik, and the offering is losing its competitive edge.
Last year, maybe the year prior, I learned of the merge to 32 bit HDR option in Photoshop. I had never been really nuts about the Photoshop HDR options until I learned about this from Matt Kloskowski at Photoshop World. By choosing 32 bit mode, with the only other checkmark being ghost reduction, I could have Photoshop do the layer masking work and send the image back to Lightroom without further manipulation. Then I would have this single image with massive embedded dynamic range and I could use the Lightroom sliders of Highlights and Shadows to real advantage. Until recently, this has been my go to for true dynamic range expansion. When Photoshop was updated to CC, the process became a bit more confusing, but I believe that with the latest update Adobe has restored the former simplicity. Shooting cathedral interiors, or flowers or jewellery, really anything with lots of fine detail benefits from the dynamic range extension without the "effects" look.
When I bought the upgrade to Photomatix 5, I purchased the Pro bundle which included a Photoshop Plugin and the 32 bit HDR option in addition to the Lightroom plugin. This new implementation of a 32 bit plugin is stunningly good, and while it takes about as much time to complete as the Photoshop option, you never have to roundtrip to Photoshop and back, with everything happening (ostensibly) in Lightroom. There is no edit window, no settings are required, you simply Export with Preset and in a couple of minutes the image comes back to you with extended dynamic range. At first glance, you might think that you give up a lot of control in this model, but that's not true. The control is in the Lightroom sliders and functions that you already know.
Best Practice for Better HDR
The trick to wide dynamic range is to get images well outside the boundaries of the generic camera. Let's say your camera has a dynamic range of 6 stops. By doing a 3 shot bracket at +2EV and -2EV you will effectively have a 10 stop dynamic range. If you go farther down and farther up to include +3EV and -3EV, you get to 12 stops. You can see then that doing ⅓ or ½ stop increments is kind of pointless and even +1EV and -1EV brackets only extend your range by two stops. Now sometimes, the light that's available simply won't allow for the massive exposure shifts. If the light is low and you try for a 3 stop push, you could end up with subject movement, even when your camera is on a tripod. If the light is super bright, even the lowest ISO and smallest f stop may not allow a high enough shutter speed to give you a 3 stop underexposure. These are probably more exceptions than the rule, particularly the underexposure option, but keep the idea in mind.
Example Images and Processing
In this series of images, I used the same three originals, and exported them to the four different HDR approaches. I took the most neutral selections in Photomatix Pro and Nik HDR Efex Pro 2, and just accepted the 32 bit round trips from Photoshop and HDRsoft. All images were then edited in Lightroom for Exposure, Highlights, Shadows, Whites, Blacks, Clarity and Vibrance. No other corrections were done. Once the Lightroom edits were complete, the images were sharpened in Nik Sharpener Pro 3 (Output Sharpening - Web) and then passed through Nik Dfine for noise reduction.
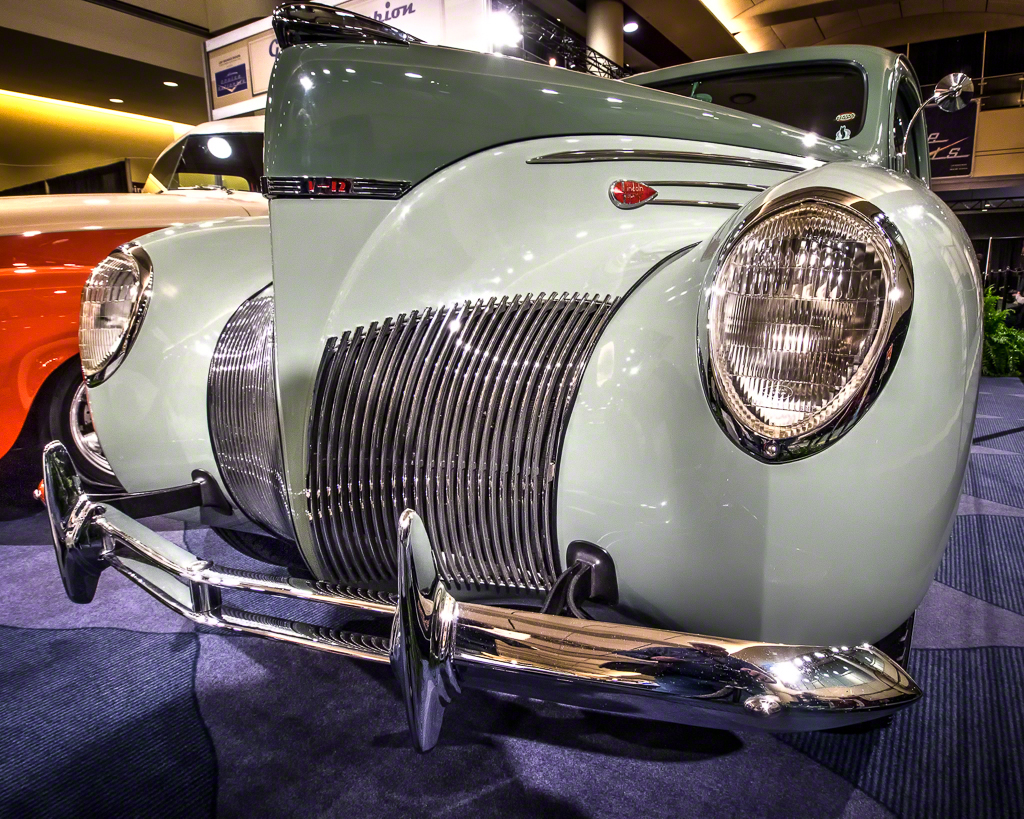
Photomatix Pro 5 Natural
The goal here was a simple HDR process to lift the shadows and put some detail into the highlights. Photomatix has been best known for the HDR look. I really am very impressed with version 5 of the software. Despite being shot at ISO 2500, the images combined nicely and were not made excessively noisy in the HDR process. The Natural look is a default preset and I changed nothing in its settings to produce this output. There is good colour rendition overall and a good representation of the shadow detail in the grill without it looking overcooked.

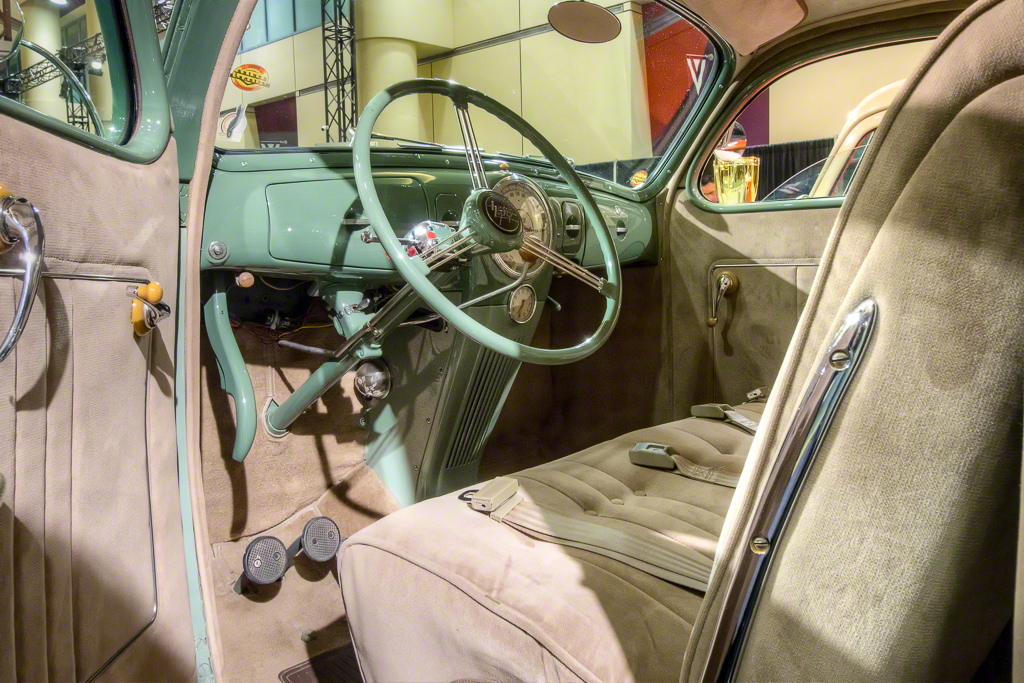
Nik HDR Efex Pro 2
This is the Default outcome from running the images into Nik. I found the original return too warm and had already cooled it down, before I realized I was doing so. It looks nice now and this is the only time where any edit change was done, other than as noted in the précis for this section. Note the increased shadow detail in the grill.

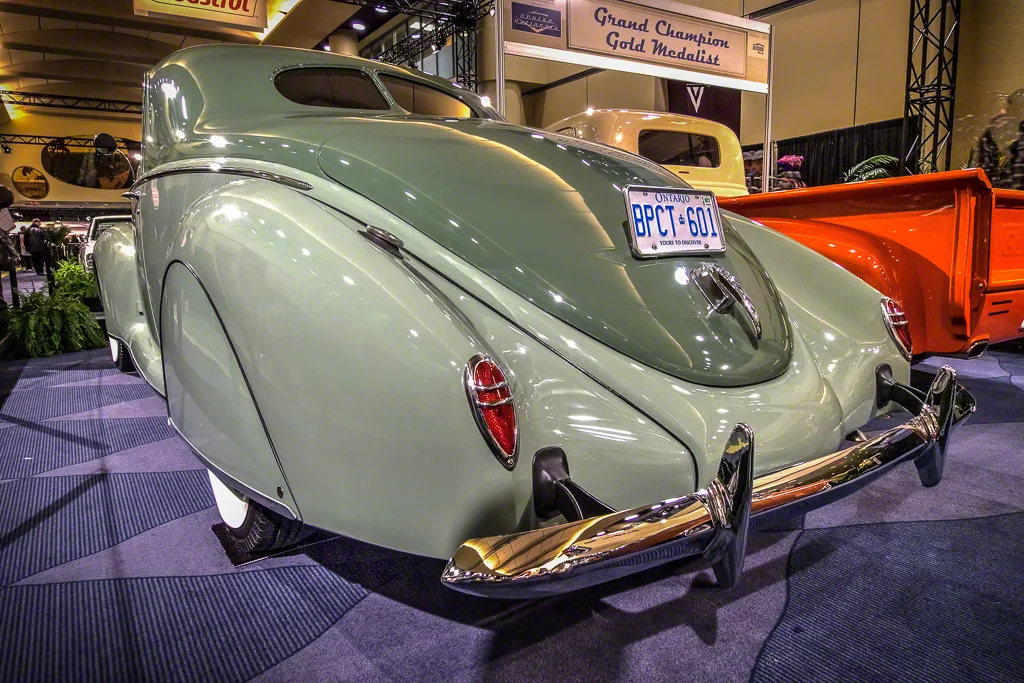
Photoshop Merge to 32 Bit HDR
This is what I would have typically gotten from Photoshop's 32 bit HDR mode out of Photoshop CC. It's clean and sharp with really good tonal range. The returned image offers a ton of dynamic range so I could pull more detail out of the shadows in the grill and spoiler without compromising the rest of the image. That's the real advantage of the 32 bit models. The image you get back is still mostly RAW but with extended dynamic range.

HDRsoft 32 Bit
This is the HDRsoft version of what Photoshop CC does so well, with a simpler process and fewer clicks. There is still all that uninterrupted dynamic range available to play with. As in the PS version, I did nothing to the image except what was noted above. It's a very natural look and doesn't scream out "I'm an HDR"
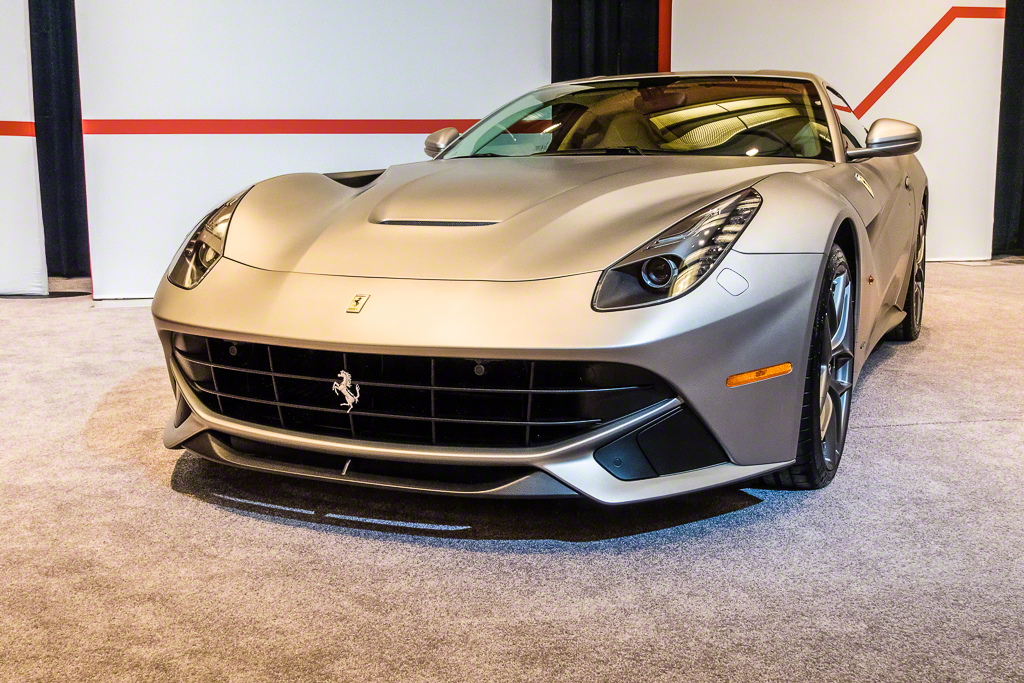
The situation to make the captures was far from ideal but is indicative of the types of scenarios we can run into. In this case, I was in the basement of a convention centre with really horrible light and colour temperatures all over the place. The lighting was not particularly bright so the ISO was set to 2500 on the Olympus OM-D E-M1 I brought with me as part of its evaluation review. I used the Olympus 9-18 zoom which gives a full frame equivalent of 18-35mm It's optically pretty slow so the shutter speeds were longer, than I would have gotten had I been shooting my usual 1Dx and 16-35/2.8. There were no Lens Corrections for the combination in Lightroom, so you see what the lens produced without any optical corrections applied. I am grateful to the folks at Ferrari Maserati of Ontario for allowing me to place my tripod inside the rope to make the images.