ACDSEE Pro Mac 3 - Why would you bother?

I recently installed the 30 day trial of this software to try to help a friend out who was struggling with it. After the usual click forty thousand times to install routine, the product said it installed properly.  Like most programs that start out on the Windoze platform it wants to be the default application for everything, a very customer hostile move.  I declined since it was a) a trial and b) I am very happy with the tools I use that work properly.

I launched the application and navigated to a folder where photos are stored in their original form.  It looked like I would need to Import images (hate this), but when I clicked the Image button that was not an option.  Why show me a button I cannot use?

Not one single image could be opened in either View or Develop mode.  The application claimed that they were all locked or in a format that the application could not read.  And even though I cleared the checkbox to have ACDSEE Pro be the default for all images, it still set itself as such.  F*CKING PIECE OF CRAP.

I checked the help and it said this error could occur with RAW files if they were already open with another application.  Nope.  Wouldn't open JPEGs either.  Hell it wouldn't open file types it arbitrarily decided it should be the master of.  Otherwise Help was helpless.  I opened a ticket with support and the first email invited me to update my ticket.

Fired up Appzapper and completely removed this junk from my Mac.  To help my friend, I will tell him to get rid of this program and use a processing application that is a) Mac intelligent and b) not crap.

So if you are thinking about trying less expensive processing applications on your Mac, run do not walk past ACDSEE Pro 3.  I understand that the Windows version is very good.  I don't run Windows.  The Mac version is lousy.  Don't waste your time or money.

Q & A : Confused about what the 50mm lens is for

John wants to know what the 50mm lens is for.  A great question, and prompted by a ton of bafflegab as you'll see. "Hi.  My camera, a Nikon D3100 came with a 18-55 zoom lens.  My girlfriend and I were told by the salesman that this was a good all around lens, even though it was a kit lens.  He couldn't or wouldn't explain what that meant.  Then we started to see some advertising from Canon on a "portrait" lens and thought maybe we should get one since we take pictures of each other mostly.  We went back to the store, a big Canadian photo chain, and asked about this portrait lens.  The same salesman told us that a 50mm lens was essential to our success and that we should have one.  He pushed a Sigma 50mm lens at us, but the price was too high, nearly as much as our camera, so we bought a Nikon 50mm lens.  We had to bring it back because it would not autofocus on our D3100.  A different salesman said we bought the wrong lens, like it was our fault and then spent almost an hour talking about his photography and what he does.  We got a refund and then bought the right lens online because we figured these people weren't helping.

Sorry for the long email complaining, but we have the 50mm and cannot tell why we bought it.  Pictures look like the pictures from the 18-55 when we set it at 55.  When we ask other photographers we meet, they cannot seem to tell us why we need it either.  We feel like we were lied to.  What is this lens good for?  It is a Nikon AF-S 50MM F1.8 G lens.  Thanks, John."

Well hi John and let me say how sorry I am to hear you got such a runaround.  I work part time in a camera store (the same chain you mentioned, whose name I removed from your email) and I am really sorry to hear about your negative experience.  I know exactly why the Sigma was pushed at you, or can guess pretty well.  The Sigma is a great lens, well built and very sharp, but would be expensive compared to your D3100 kit.  There are often salesperson incentives called spiffs, basically cash, to encourage certain behaviours, and some salespeople will hurl their integrity into the breeze for $5.  Plainly you met one.

Your camera uses what the industry refers to as a crop sensor.  All that means is that the sensor is smaller than the original 35mm film negative size on which most SLR cameras were based.  Because the industry is often confused itself, this means that the 50mm lens that is optically designed to create an image big enough to cover the 24mm x 36mm of the original negative size, when you use a smaller sensor, you see less of the image circle. Does this hurt?  Not at all but it creates the illusion that the lens produces more magnification than it really does.  Why would you care?  You probably don't need to.  Short answer is that the 50mm lens has the look of a 75mm lens on film when used with a crop sensor.

Hence the first effort of mcmarketing.  Back in the days of film, "portrait lenses" were typically between focal lengths of 85mm and 105mm.  Even this is a silly argument because a good photographer can make a portrait with just about any focal length.  This focal length produces shallower depth of field, and a very nice and very subtle level of perspective compression that makes faces more pleasing.  This is completely subjective of course.

Canon decided to play a bit loose with terminology and refer to the 50mm as a portrait lens.  Which it can be, when used well, but they did this because on their crop sensor cameras, it looked like an 80mm would on film which is sort of close to 85mm and then the mcmarketing took over.

The lens you own has a very wide maximum aperture relative to your zoom lens capability. When shot wide open, at f/1.8 it produces very shallow depth of field, meaning not much of the picture is in focus, usually the area between the tip of the nose and the front of the ear on a filled frame shot.  The background is blurred creating nice separation, and this allows the marketing people to drag a mispronunciation of the Japanese word Bokeh into the fray.  Bokeh refers to the look of the out of focus area and is even more marketing abused than calling the 50mm a portrait lens.

The wide aperture of your lens will also pass more light wide open and may allow you to capture images at lower ISOs or without flash, a limitation of the relative optical slowness of the 18-55 lens.

BTW a kit lens means that the lens comes in a kit with the camera.  People who don't know what they are talking about often say that these lenses are poor quality.  Optically they are very good, however to keep manufacturing costs down, the use of metal in the lens body is minimized in favour of high density plastics.  For the most part this works very well but the lenses won't take the same amount of abuse as a "pro" lens costing 10x as much.  It is true that low cost lenses, kit or otherwise, may exhibit more distortions than a pro level lens, but if you are sharing your photos online or on your smartphone, you'll never see these distortions.  They only become obvious in large prints made from RAW and then edited images.

So don't worry about what you have.  You are absolutely right that the 50mm lens produces images that look like what you get from your 18-55 at 55mm.  In fact if you shoot with the 50mm lens at an aperture of f5.6 or smaller, they are going to be pretty much identical.  The advantages your 50mm bring you are as mentioned relevant in low light and wide aperture scenarios only.  Back in the days of film, it was said that a 50mm had the "look" of the human eye.  This is mostly true from a relative magnification perspective.  On a crop sensor camera it doesn't, but I don't think that this matters.  Make pictures that make you happy, using whatever tool you like.  The 50mm is a very good, optically fast lightweight lens.  It doesn't have the focal length flexibility of the zoom but will produce lovely images if you do your job.  Also film was one ISO only for the entire roll.  Today you can manipulate the ISO for every image and with good sensors, low light is less a problem than it used to be.

You have a good camera with good glass.  Go make images and have fun.  Feel free to write again if you have more questions or need information on other lens options.  Always remember that if you are in a store of any kind and you start to feel your personal BS detector begin to ping, you are probably right.

Later,  Ross

The Photo Video Guy Podcast - Episode 76

Nikon announces the D610 which is a D600 in a new logo.  Nikon updates Capture NX to 2.4.4 and files a patent for an interchangeable sensor.  Canon to release a new 18-300 EF-S and 50/1.4 EF.  Adobe Creative Cloud databased breached, 2.9M accounts stolen.  Adobe releases Photoshop Elements 12.  DxO releases Viewpoint 2.0.  Google+ gets better RAW to JPEG conversion.

Q&A : Why don't my images look the way they did on the camera screen?

There's no podcast this week, mostly because there was no news of interest this week.  There was however, the second question in the Q&A offering so here we go. Marco writes:

"I look at the back of the camera when I take a picture and it looks good.  But when I get it into my computer, the colors are flat and the picture looks a bit out of focus.  When I got the camera this didn't happen."

A bit of correspondence with Marco revealed the following:

"When I got my camera, I used it in fully automatic or Program mode most of the time.  I took a class through xxx (store name removed) and the teacher told us that for the best quality to shoot in raw.  I still don't really know why but I did it and I am not happy with the pictures.  Why does raw not make better pictures like we were told?"

This is a common problem suffered by photographers who switch to capturing in RAW without having the full story told to them.  I am constantly encouraging my own students to shoot in RAW, but I also try to make sure I explain the why.  So let's start there.

The out of the box setting for most all digital cameras, and certainly all point and shoot variants is to capture in JPEG.  JPEG exists for a reason, although the initial reason is less valid today.  JPEG is a compressed file format and back when digital storage media was exorbitantly expensive, the smaller files could help people save money on cards.  JPEG compression is destructive.  This means that it throws data away that is non-recoverable by a factor of at least 33%.   If all you will ever do is look at images on the screen of your smartphone, you won't care and JPEG is probably all you will ever need.

But if you want to make photographs and not just take pictures, you might not want to throw all that detail and information away.  Cameras are built and designed for immediate gratification.  Thus, the rear display screen shows only JPEGs.  Actually all the information on the screen, including the histogram if you look at it, is based on a JPEG.  These JPEGs have colour corrections, exposure adjustments, tints and sharpening applied before you see the image at all.  When you look at the camera display, you are seeing a processed image.

RAW on the other hand is completely unprocessed.  Technically it's not even a picture until the data is passed through the RAW codec on your computer.  There are no adjustments, no corrections, no sharpening, no nothing applied.  It's the uncooked image.  JPEG processing, better known as "camera styles" cooks the data to a predefined state.  As a photography educator I sometimes forget that frustration happens when a student captures in RAW but has the camera style set to Vivid.  The image on the rear display is sharp and punchy, but the RAW file has none of that processing done to it.

For those who are shooting in RAW, set your camera picture style to neutral.  This will still display a JPEG on the rear display but it will be as lightly "cooked" as the vendor allows.  There is still processing happening that you cannot see documentation for, but remember that manufacturer goal of immediate gratification.  Now when you import your RAW image into your editor, because now your image MUST be edited (you have a blob of uncooked dough) you can start by setting the manufacturer's picture style for the scene.  I teach Lightroom and Adobe Camera RAW and do not know, or care to know every editor out there, but I can assure you that both Lightroom and Adobe Camera RAW have options to use the manufacturer's picture style.  Or more correctly, a non-JPEG iteration of the style that has some default processing steps.  You may be perfectly happy with one of these settings or you can use it as a place to start for your own customization.  Either way, you are farther edit than simply shooting JPEG because you have not thrown away irretrievable data by going JPEG in camera.

Here are a couple of examples of what I mean.  The first is an unprocessed RAW file converted directly to JPEG for display on the web.  The only thing done to it is to embed a Digimarc copyright protection.  It is what came out of the camera.  It does not look like what I saw on the back of the camera.  It seems softer and the colours are flat.

Unprocessed


It's not pleasing in any way.  The next image is the SAME file that has been processed.  Starting point was to select the Camera Landscape picture style in Lightroom and then work from there.  I added Highlight and Shadow recover, added Contrast and Clarity, applied Sharpening, Lens Corrections and a tiny little bit of vignette.

Processed


It's a better image.  While not everyone would like the image and some might consider it a discard, you can clearly see the difference that processing makes.  That's the difference between taking and making.  If you just want nice pics for Facebook and Email, shooting in JPEG and using Camera Styles could be the right answer for you.  However if you want to truly "make" photographs, you agree to undertake work in the digital darkroom.  Thanks to Marco for his question.

Q&A - Why is the exposure "off" with my TTL flash

I've received my first couple of questions for Q&A.  I want to thank both writers and will address questions in a timely fashion.  I will also keep writer's contact information and full names confidential.  So here's the first one. "Hi.

I have a Canon Rebel model T2i.  The built in flash makes bad pictures so the guy at the store said to get a bounce flash with TTL.  I bought a Canon 430EX II.  When I use the flash sometimes the pictures are good, but sometimes they are too bright.  I have attached two examples.  Is my camera not working with the flash?  The sales guy said TTL gave perfect pictures.

Jacqueline."

Well thanks for writing in Jacqueline.  I appreciate you attaching the pictures for me to look at.  I think I can answer your question.

The sales person was correct in recommending a TTL flash as they do make flash very simple.  In the kit you bought you get what Canon calls eTTL.  It's the same idea.

When you take a picture without flash, the camera sets the exposure based on the light reflected from the subject.  When you use any kind of TTL flash, the camera sets the exposure based on the amount of flash reflected from the subject.  It does this by controlling how long the flash lasts, what we call duration.

In both your example pictures, you are correct that they are too bright.  I assume you are shooting in JPEG because that is what you sent me.  Nothing wrong with that, but correct me if I am wrong.  If you look around your subject's in both pictures, the background is pretty far away.  In the picture of the older couple with the cake, it looks like you shot it in a hall or hotel ballroom, a place with very high ceilings and walls some distance away.

The camera and flash combination are looking at the reflected light from the entire scene as the light hits the sensor.  Because your subjects in both cases take up only part of the total image, the camera is adjusting exposure (flash duration in this case) to try to achieve balanced lighting across the entire image.  Since the walls are so far away compared to the couple, the camera and flash are working hard trying to light the back wall and overpowering the couple with the cake.

This doesn't mean that there is a problem with the camera or the flash.  Actually things are working as they should.  There are a couple of ways you can make this a more successful photograph.  Easiest is to fill the frame with the couple, tightening your composition to exclude more of the background.   Because they are standing up, you could have shot this as a vertical image and thereby tightened things easily.  By excluding more of the background, the meter won't see as much of it and won't work so hard to light it.  The other way is a bit more work but is a very useful skill to develop.

Your camera has exposure compensation, so you can tell the camera to add or take away exposure depending on the subject and the creative effect desired.  Similarly you can compensate for flash exposure with flash exposure compensation.  I've attached a link to a Canon site you can review but here is the quick steps to this.  I thank Canon for making this available.

+++++++++++++++++++++++++++

EOS Rebel T2i, T3i, T3 

1. Press the [Q] button on the back of the camera. The Quick Control screen will appear.

2. Use the [Cross key] buttons to navigate to and highlight the feature you want to change.

3. Once the setting is highlighted, use the [Main dial] (immediately behind the shutter button) to change the setting. There is no need to press the [Set] button afterwards to “lock in” the setting. If you do press the [Set] button, the camera will display a contextual submenu that shows the full range of available options. Use either the [Main dial] or the [◄►] buttons to highlight and select a setting on the submenu.

When using the EOS Rebel T2i, T3i, or T3, the Quick Control Menu is the only way to access Flash Exposure Compensation directly, without going deep into the camera setting menus.

++++++++++++++++++++++++++++

Now how do you know which way to dial your compensation?  If the background is a lot darker than your main subject such as when it is farther away for the flash to light, dial in negative compensation.  Start at -1 and adjust to taste.  If the background is close and very white, the camera is going to try to make that white average to grey so add some flash exposure.  Start at +1 and adjust to taste.  Flash exposure compensation is not some black art, but experimentation is going to be involved as is practice.  Repetition is the mother of skill so the more you experiment and try things, the better you'll get .  TTL flash is a really great system and most of the time it's really good, but even when it isn't right the first time, it gives you a really good place to start.  One other tip.  Since you spent money on a flash that has a tilting head, try adding a reflector to it and point the head straight up and not directly at your subjects.  The Rogue Flashbender system is really good and is not specific to a particular flash.  Because the Flashbender is a much larger element than the flash tube, you will get light that is a bit softer and not so many harsh shadows.  If you are home or in a place with "normal" ceiling height, just point the flash head at the white ceiling.  TTL will do a good job in general of giving you really good exposure and the bounced light will be much more pleasing than the head-on flash.

I hope you found this tip helpful.  Here's the link to the Canon document.


The Photo Video Guy Podcast - Episode 75

Leica confirms flare in 50/2 ASPH.  Fuji unveils X-A1.  Adobe releases ACR 8.2 and Lightroom 5.2   Nikon announces AW-1 and two lenses to use underwater.  D600 and D5100 move off Nikon MAP list.  Canon updates firmware for the EOS-1Dc.  Is an EOS-M2 coming?  Sigma releases new firmware for the 35/1.4 and 17-70/2.8-4 but it might be a trap.

Announcing ThePhotoVideoGuy Q&A

I'm now ready to initiate a new offering for readers and listeners called somewhat unimaginatively, ThePhotoVideoGuy Q&A.  I've been a photographer for quite some time and find myself asked questions about "how to do" pretty frequently.  So if you have a question send an email to qanda@thephotovideoguy.ca.  I will answer your questions on the site and perhaps on the podcast. There is no cost for this offering.

The Photo Video Guy Podcast - Episode 74

Apple announces new iPhone camera, Phil Schiller disses serious photographers everywhere.  New Apple RAW decoders.  Leica introduces the C aka the Lumix LF-1.  Canon announces changes to CPS for 2014.  Canon intros new large format printers and Premium Pigment inks.  DP Review covers the OM-D E-M1.  Olympus releases 12-40/2.8 ED pro lens.  Sandisk offers 256GB CF card.

New kit from Think Tank

My friends at Think Tank Photo just launched two new product lines whose intention is to help those us using Apple® devices have an easier time of organizing our accessories and ourselves. My 2nd BrainMy Second Brain – The four ultra thin My 2nd Brain™ bags were created with pockets specifically sized for Apple® computers and accessories and all the tools needed to support a digital lifestyle. Slide a MacBook Pro® or iPad® into the zippered padded pocket that also has an organizer for pens and more. Keep an iPhone in the top pocket with a pouch for earbuds or a Bluetooth headset. Unzip the main compartment to organize and secure adapters and small items in clear zippered pockets. Stow documents in the rear pouch. Even the removable padded shoulder strap has a clip for full-size headphones.  Buy online

PowerHousePowerhouse – Created for MacBook Pro® laptop power adapters and AC cable plus pens, small cables, USB drives, and other small accessories.  Buy online

Don’t forget, as a supporter of The Photo Video Guy, when you click on these links and order $50 or more of Think Tank Photo gear you receive a free gift, such as a Pixel Pocket Rocket memory card holder. (USA residents only)


The Photo Video Guy Podcast - Episode 73

Nikon to release D610 and D5300. Nikon LD1000. Canon to upgrade all Cine cameras via firmware update. Canon and Zeiss announce new Cine lenses. Still coming, Canon EOS-M, 800/5.6L IS II. Sony reveals QX10 QX100. Sony announces 4K FDR-AX1. Wristwatch live view and HDR-AS30V from Sony. Ilford opens B&W processing lab in California. Adobe offers PS+LR for $10/mth. Cokin revamps. ASMP warns about Facebook changes to ToS.

onOne Software Announces Perfect Photo Suite 8

From my friends at OnOne Software onOne Software Announces Perfect Photo Suite 8 New Perfect Enhance module, Perfect Eraser, Perfect Batch utility, and re-engineered Perfect Effects module create a complete photo editing solution that seamlessly integrates into any workflow

Portland, OR – September 4, 2013 – onOne Software, Inc., a leading developer of innovative and timesaving solutions for digital photography, today announced Perfect Photo Suite 8—the photographer’s choice for photo editing. Perfect Photo Suite 8 is a full-featured, standalone photo editor that integrates seamlessly with Adobe® Photoshop®, Lightroom®, Photoshop Elements, and Apple® Aperture® and it includes all the best tools a photographer needs to create extraordinary images. Key new features include the Perfect Enhance module for essential photo adjustments, the Perfect Eraser with content-aware fill technology, the Perfect Batch processing utility for applying workflows to multiple images at once, and a re-engineered Perfect Effects module with twice as many filters, customizable presets, and integrated FocalPoint™ technology.

The new tools and capabilities alongside Perfect Photo Suite 8’s eight modules—Effects, Enhance, B&W, Portrait, Mask, Layers, Resize, and Browse—allow photographers to enhance, retouch, and stylize images in a layered workflow, replace backgrounds, create high-quality enlargements, prepare images for output, and batch process workflows. The modules share a unified interface, each targeting a specific imageprocessing task. Each module provides only the tools necessary to complete the job at hand, eliminating screen clutter and confusion for the user.

“We listened intently to the digital photography community about what they wanted for their image processing in today’s world of plug-ins, online apps, and subscriptions,” said Craig Keudell, president of onOne Software. “We made it a priority to respond quickly and design a cohesive new product that continues to focus on photography and is built for photographers of all levels, from enthusiasts to professionals. We’ve leveraged our extensive experience as a plug-in company and evolved the Perfect Photo Suite into a complete and powerful photo editor that, unlike existing plug-in collections, works as one, elegantly designed product that seamlessly integrates into any workflow.”

New in Perfect Photo Suite 8: • Perfect Enhance module – Perfect Enhance provides essential tools for basic enhancements. Use it to adjust brightness and contrast, remove a color cast, remove dust spots and power lines, and add sharpening and vignettes. It is an ideal module to start with when using Perfect Photo Suite 8 as a standalone application or when quick corrections are needed. • Perfect Eraser – Using content-aware fill technology and simple brush strokes, the Perfect Eraser removes objects and automatically reconstructs the image with realistic results. • Twice as Many Filters – The Effects module now includes new adjustable filters including: HDR Look, Dynamic Contrast for tonal clarity, Vintage, Grunge, Antique, and more. • Customizable Presets – All built-in presets included in Perfect Photo Suite 8 may be deconstructed by their filter settings and personally customized. • FocalPoint is now in the Effects Module – The best parts of FocalPoint technology to create bokeh, tilt-shift, and selective focus effects after the shot, are now in the Effects module as the Lens Blur filter. • New Browse module – Images can be browsed and directly accessed from Perfect Photo Suite wherever they are stored—on the computer, an external drive, a connected network, and even on a cloud-based storage service like Dropbox, Google Drive, or Apple’s photo stream. • Perfect Batch Utility – Powerful batch processing of actions from one or multiple modules, including the insertion of a watermark. • Multiple File Handling: As a photo editor, you can now open and work with more than one image at a time. Move between images to edit or copy layers from one file to the next. • Improved Masking Bug: Redesigned Masking Bug in the Effects and Layers modules make mask creation easier and more intuitive. • Higher Quality Effects: Performance enhancements improve effects by minimizing artifacts without sacrificing processing speed. • Improved RAW file handling: Open and process RAW files faster and with better quality. Support for new cameras also added. onOne Software Announces Perfect Photo Suite 8, a complete photo editor for every workflow

Availability and Pricing The new Perfect Photo Suite 8 will be available November 26, 2013. Pre-orders are available immediately at www.ononesoftware.com/store. Perfect Photo Suite 8 is available in three editions: Premium, Standard, and an edition for Adobe Lightroom & Apple Aperture. The Premium Edition works with Adobe Photoshop, Lightroom, Aperture, Photoshop Elements, and as a standalone application. Owners of previous versions of Perfect Photo Suite Premium Edition can upgrade for $99.95. New users may pre-order the Premium Edition for $179.95. For a limited time, pre-orders of Perfect Photo Suite 8 Premium Edition will include a complimentary Essential Video Guide to Perfect Photo Suite 8, which provides a comprehensive collection of getting started training videos for Perfect Photo Suite 8 ($40 value).

Perfect Photo Suite 8 for Adobe Lightroom & Apple Aperture works with Lightroom, Aperture, Photoshop Elements, and as a standalone application. It is available for $129.95 | $79.95 upgrade. The Standard Edition works as a complete standalone photo editor and is available for $79.95. New users who pre-order Perfect Photo Suite 8 will immediately receive a complimentary license for Perfect Photo Suite 7.5. Customers who pre-order Perfect Photo Suite 8 will receive all upcoming Loyalty Rewards that will be delivered monthly to owners of the Perfect Photo Suite 8. For those who have purchased Perfect Photo Suite 7.5 on or after August 1, 2013, onOne Software will issue a complimentary upgrade to Perfect Photo Suite 8 via download when it is available. For more information on Perfect Photo Suite 8, please visit http://www.ononesoftware.com.

About onOne Software onOne Software, Inc., is a leading developer of innovative software tools and apps for digital photography and offers time-saving software solutions for photographers of all levels, from enthusiasts to professionals. Leveraging its extensive history as successful plug-in developer for Adobe Photoshop, Photoshop Elements, Photoshop Lightroom, and Apple Aperture, and continued development of cutting-edge technology, onOne publishes unified solutions that offer both full-featured photo editing capabilities and the flexibility of traditional plug-ins. Founded in 2005, onOne Software is a privately held company located in Portland, Oregon. For additional information, visit www.ononesoftware.com.

Press Contact: Amy Chan, onOne Software, achan@ononesoftware.com, 503-968-1468 x 137 General Press Inquiries: press@ononesoftware.com onOne Software Announces Perfect Photo Suite 8, a complete photo editor for every workflow

Online Press Center: www.ononesoftware.com/press onOne Software Blog: www.ononesoftware.com/blog Facebook: www.facebook.com/onOneSoftware Twitter: www.twitter.com/onOneSoftware Google+: www.ononesoftware.com/plus ©2013 onOne Software, Inc. All rights reserved. onOne Software, the onOne Software logo, and Focused on Photography are registered trademarks and Perfect Photo, Perfect Enhance, Perfect Effects, Perfect Eraser, Perfect Batch, and FocalPoint are trademarks in the United States and are the property of onOne Software. Adobe, Photoshop and Lightroom are registered trademarks of Adobe Systems, Inc. Apple and Aperture are registered trademarks of Apple Computer, Inc. All other trademarks are property of their respective owners.

Quick Look : Stick & Stretch Gallerie Wraps

SS_fsAs I've been looking at alternative ways to display prints, I came across this item called Stick & Stretch Gallerie Wraps.  Or at least that's what they are called in Canada.  In the United States, you'll find them under the brand name Hahnemuhle Gallerie Wrap.  Different packaging, same thing. Basically they consist of four sticks, 1 ¼ wide in the Standard version and 1 ¾ wide in the Pro version.  Each stick has an adhesive strip pre mounted, is beveled at the corners and is notched to fit into these moulded corner braces.  You need a set of corner braces to make the system work, so your first purchase should be a Starter Pack that contains four sticks, reusable corner braces, a bottle of archival glue and some corner pins that look a lot like big heavy staples.

If you've ever done a Gallery Wrap the old way, with stretcher pliers and staple guns and hot glue, you know that while the final outcome can be beautiful, getting there is often arduous and frustrating.  Hence this kit.

There are a couple of videos on the web that show how to use the kit, one from Photoplus in 2010 with the inventor, and one with Phil Neilsen from Amplis Canada.  Both are excellent, Phil's is a bit easier to follow.

Making It Happen

  1. You collect your four sticks and by choosing different lengths and widths, you define your wrap size.  Let's say you take 2 14" sticks and 2 17" sticks.  You'll set up your print job to produce (for the standard sticks) a print that is 16 ½ x 19 ½, basically adding 2 ½ inches to the length of each dimension.  This leaves you enough excess canvas to complete the wrap.  If you are using the Pro series, you need to add 3 ½ inches to the length of each dimension.
  2. Print your image onto the canvas of your choice.  This may require a higher end printer, or that you send the image out to a lab.
  3. Once the canvas is dry, hold it up to the light and mark the corners of the printed image on the back.  This is important because you will use these marks to align the sticks.
  4. Peel back the cover of the adhesive on each of the beveled corners and then put the sticks into the corner blocks.  They only go in one way.  Standard corner blocks are blue, Pro corner blocks are red and they are not interchangeable.  Press the sticks down into the corner blocks so the back sides of the sticks are flush with your table.
  5. Peel the remainder of the covering on all the sticks.  Picking the frame up (corners and sticks) place it on the back of your print.  Use the marks you made on the back to align the corner blocks to the corners of the printed image.
  6. Press each stick straight down.  It will release from the blocks and adhere to the canvas.  Use lots of pressure, you are making a bond happen between the stick and the canvas.
  7. Run a razor knife along the outside edge of each stick to trim the canvas.  On larger prints you might want to leave an extra ½" to allow for an optional stapling step.  Extend your cuts square to the corners and remove the excess canvas.
  8. You know have four sticks glued to the back of your image, that are properly placed and what looks like a square canvas area in each corner.  Cut each corner at a 45 degree angle and fold back each section and adhere it to the exposed adhesive on the sticks.  This will produce really nice clean corners when you do the tensioning.
  9. Run a bead of archival glue down the inside edge of each stick.  When you tension, this glue will further adhere the canvas to the front edge of the stick and help address movement in the canvas over time.
  10. Starting with any adjacent pair of sticks, fold them upwards until their beveled edges meet in a nice corner.  Take one of the staples and press it into the predrilled holes.  Don't push it all the way in yet.
  11. Repeat for the other three corners.  There is now nice tension on the canvas.  Inspect your corners and if you are happy, tap with a small mallet or use some flat object to press the staple all the way in, anchoring each corner.
  12. Take the supplied corner brace sticks and press them into place.  The mounting sticks have little notches pre-cut for these braces.  This takes a bit of pressure and then they snap right in.  This further tensions the canvas.
  13. At this point, I like to take a hard rubber roller and press the edges of the wrap again to assist the adhesive to bond.
  14. If you left extra canvas for your big print, now fold the excess over the back edges of the stretcher sticks and put a staple in every couple of inches.  The adhesive is very good but this is sort of belt and suspenders solution.

Thoughts

This is really dead simple.  My first one lost some tension about ten minutes after setting up, and that's why I added the step using the roller.  The second one remains taut as a drumhead.  The pricing for the sticks is pretty reasonable considering that they are all preformed and predrilled, the adhesive is decent, the archival glue works well and the staples are easy to work with.  You will need to buy at least one starter kit for each format to get the proper corner blocks but once you have them, you're good.  You can also buy glue as a standalone product as well as sacs of extra staples.

If you want to see someone do this before you buy, watch Phil's video on the Amplis Store page here.

---

Followup a day later.  I've changed my description of the strip adhesive from good to decent.  It doesn't stick consistently and to my disappointment, both wraps have sections that became unstuck.  So I'm changing my rating and going to call the company tomorrow to vent a bit.

The Photo Video Guy Podcast - Episode 72

Nikon patents variable AA technology.  Nikkor 6mm fisheye only $80K.  Canon moving into security cameras.  Sony releases A3000, 3 E lenses and the NEX-5T.  Ricoh updates Pentax DA lenses with HD coating and releases two flashes.  First look at Canon 70D.

Breaking the "pro camera" barrier in DSLM

Digital Single Lens Mirrorless.  It's the name used by Panasonic in their marketing materials.  Being a mostly DSLR person, this is logical.  Compact System Camera?  Mirrorless Interchangeable Lens Camera?  Mirrorless Interchangeable Lens Format? How about "camera"?

When I talk to serious photographers who are DSLR (and larger format) shooters and ask them about mirror less cameras (and let's agree that this is a fundamentally stupid name), there are two reactions.  First is that it's not a real camera.  Okey dokey, enjoy your life on planet Denial (which is not a river in Egypt).  Second is that they love their smaller cameras but are less comfortable using them on paid gigs because they don't look professional.  This I definitely understand since Uncle Bob has a 5D Mark III and thinks he is a much better photographer than he actually is, because he thinks that the tool makes the photographer.  Uncle Bob is plainly visiting from planet Delusion.  Clients who are not photographers may expect big, bulky gear and much waving of hands and boiling of potions to make pro photography look like some kind of black art.

Some pros are actively using their new smaller cameras and letting their work speak for itself.  More power to them.  The camera is a tool.  No more.  One of the frustrations I see, and hear in stores, is the perception coming in the door, or created at the sales counter, that a camera that doesn't have a floppy mirror is not a real camera.  This is, a load of poo.

I bought one of the first Lumix micro 4/3 cameras.  It was pretty good, no better at anything than a DSLR and worse only in the number of lens options available at the time.  That used to be a credible argument.  It's not valid any more.  The average DSLR buyer has just under two lenses, so round up and you have a wide angle zoom and a telephoto zoom and that solves pretty much everything for the general consumer.  Sure an enthusiast might start looking at a macro, or an ultra wide or maybe demand a super fast big telephoto, and with the exception of the last option, those are also available.

Hang on though, a DSLR gives me way more override capabilities than one of these new mirrorless things, right?  Um no.  You have as much flexibility in an OM-D or NEX-6 as a similarly priced DSLR, and in some cases, more flexibility and more features.

Oh, but I have more flash options with a DSLR.  Bull hockey.  Most DSLR buyers never go near even a hotshoe flash, let alone anything of studio power.  If you want a bigger offboard flash, they exist, and they do TTL and slaving and sync and all that and you can always load up a Skyport or PocketWizard onto the hot shoe and trip your big studio lights.  Works fine.

But wait!  What about low light?  These smaller cameras cannot possibly have the same low light performance as a DSLR can they?  In many cases we are comparing APS-C sensor to APS-C sensor, sometimes even from the same manufacturer so that argument is spurious.  Yes my original Lumix was not brilliant above ISO 3200.  Neither was the Canon 40D I had at the time either.  Too high megapixel counts on too small a sensor make for small photosites and that is less low light efficiency.  Or at least that was the way it was three years ago.  Digital is as much about the software as it is the sensor and you can get excellent low light performance today that was not attainable at all only three years ago.

Well then, the lenses must not be as good.  Nope, wrong again honey.  Smaller?  Yes.  Lighter?  Yes.  More plastic in the construction?  Probably not statistically speaking.  The gap today is in lens speed.  We don't yet see the f/1.4 variants that we see in the DSLR space.  How many of those are sold to the average customer by the way?  Oh right, that would be zero.

So your question should be, what am I actually losing if I buy one of these smaller cameras over a DSLR.

Here's a list

  • physical size - less
  • weight - less
  • size of the bag to put it all in - less
  • really big filters - don't need em, need smaller filters

big super telephoto lenses with huge maximum apertures - yes these don't exist right now, but you may not be Bill Frakes or Dave Black anyway

Manufacturers aren't helping either.  Canon released the anti-enthusiast SL1, basically a Rebel with a lobotomy in a 1/4 smaller body in order to hit a size/weight target.  Sony releases the A3000 that has no pentaprism or mirror box but is built to look like it does giving the camera the feeling that it's filled with foam and cheap plastic.  Stupid marketing is stupid marketing.  Other vendors shoot themselves in the head by making their compacts less functional than their DSLRs because the divisions compete and they are afraid of eating their own lunch, more content to let a competitor do it.  Canon released the EOS-M with the world's crappiest autofocus performance and wondered why no one would pay nearly twice the price of an NEX-3 that could run circles around it.  Nikon released the 1 series with a smaller than M43 sensor creating a completely unique line and mount structure and then compounded the sin with the J1, the camera with the highest customer return rate I have ever seen.  The 1 Series is dead on the pad, yet the V1 and V2 were spectacular performers, virtually ignored by their maker.

Today's digital compacts with interchangeable lenses are for the most part functional equivalents to DSLRs.  You choose the size and style you want and have a tool that will enable you to make great photos if you do your part.  If humping a bunch of kit around is not what you want to do, you should take a serious look at this alternative.  It's interesting that in Japan this market is explosive but in North America it's not nearly as strong.  I put the why down entirely to misperception, misguidance and lies.

The Extremely Useful FRIO

I like lighting.  It's one my my "things".  One of the challenges I have had with hotshoe flash is having them stay where I put them.  I used to own a bunch of Metz 58 units, great flashes all, but very suicidal, they kept jumping off where I put them.  Fortunately they are also Panzer tough and served me well despite their tendency to validate the equations for acceleration due to gravity. Frio2Face it, those screw down rings don't always screw down properly.  I had resorted to my other good friend, Mr. Gaffer Tape to be sure and then at the recommendation of Joe McNally's former lead assistant Drew Gurion (I wish you huge success my friend!) I discovered the Frio.  Drew mentioned these things to me at the last Photoshop World, and then I forgot, and then they were out of stock whenever I looked.  Suffice to say, I finally got some and they are as brilliantly simple as they are advertised to be.

Frio is not sold in stores, you order them online from EnlightPhotoPro.  Click here to go to their website.  Ordering is easy and the shipping is both fast and economical because they have shipping centres in different parts of the world,  Being in Canada, shipping here is usually an adventure in pocket-picking but these guys were awesome!

The Frio is a blue clip that you slide your hot foot encumbered device into.  It is a spring type clip lock.  Your device comes off the Frio when you decide it does and at no other time.  The Frio has a ¼-20 standard thread socket on the bottom so you can attach it to, you guessed it, anything with a ¼-20 post.  Like a light stand, (go figure), or a Gorillapod, or one of those Manfrotto Doc Ock style arm thingys, or a tripod, or even a freaking ¼-20 bolt that you've poked through something because you needed a cold shoe there.

Enlight Photo Pro also sells ¼-20 posts so if you have a clamp that takes a ¼-20 post like oh say a Justin clamp or whatever Manfrotto calls their version, you can mount your flash securely to the clamp.

I ordered a 5 pack and a couple of posts.  They showed up at my door in a couple of days, no hassle, no fuss.  As easy as buying from Amazon and that is a compliment in my book.  A Five Pack is $50.

FrioBut wait you say!  I need the ability to attach my Frio to a ⅜-16 post!  Whatever shall I do?  Simply unscrew the ¼-20 socket from the Frio revealing the not so hidden and not very secret ⅜-16 socket.

You need these things.  You know you do.  Click the link and order some.  The Frio images used in this post are courtesy of Enlight Photo Pro.  I didn't take these images on my camera, I took them from the vendor's website

The Photo Video Guy Podcast - Episode 71

Nikon D7100 wins EISA.  Nikon updates ViewNX.  Nikon still on track for new DSLRs despite forecast drop.  Canon releases STM version of 55-250, stack of point and shoots and all in one printers.  70D should be in stores in the next week or so.  Voigtlander Nokton 42.5/0.95 now ava.  Garmin enters the POV action camera market.  ASMP says instagram terms are too far reaching.  Kodak bankruptcy plan approved.  Apple RAW update.  Fuji introduces Instax Mini 90

Canon Product Announcements August 22, 2013

My friends at Canon passed along this press release summary of the announcements that they made this week.  It's predominantly point and shoot and small printer offerings although there is a new, and much needed STM lens available.  Highlights and verbiage are courtesy of Canon ---

Canon PowerShot G16
  • First G-series to come equipped with Wi-Fi technology
  • Available October 2013 for an estimated $549.99
Canon PowerShot S120
  • Pocket-sized camera with Wi-Fi technology and a sharp 24-120 mm extra-wide angle lens
  • Available October 2013 for an estimated $449.99
Canon PowerShot S200
  • Built for users who are looking to explore advanced photography
  • Features a 24-120mm extra-wide angle lens with a DIGIC 5 image processor
  • Available September 2013 for an estimated $349.99
Canon PowerShot SX510 HS
  • Incorporates a 30x optical zoom and a 24mm wide-angle lens
  • Equipped with WI-Fi to share images easily
  • Available September 2013 for an estimated $299.99
Canon PowerShot SX170 IS
  • This camera offers a long zoom in a compact camera body
  • Includes 16x optical zoom with 28mm wide-angle lens and Optical Image Stabilization
  • Available September 2013 for an estimated $199.99
EF-S 55-250 mm f/4-5.6 IS STM Telephoto Zoom Lens
  • The perfect companion lens for the EOS 70D, EOS Rebel SL1 and EOS Rebel T5i
  • Offers high magnification in a compact and lightweight EF-S telephoto zoom lens with an Optical Image Stabilizer for shake correction
PIXMA MG7120
  • Advanced home office capabilities with key benefits for photo-printing enthusiasts
  • Available in white, black, red or brown
  • Estimated price: 199.99
PIXMA MG6420
  • Allows two-sided printing for energy and resource efficiency and produces high-quality images
  • AirPrint compatible allowing users to print directly from Apple devices without an app
  • Available in white or black
  • Estimated price: $179.99
PIXMA MG5520
  • Produces stunning high-quality images along with clean and clear documents for home or home office
  • Available in white or black
  • Estimated price: $129.99

The Photo Video Guy Podcast - Episode 70

Get all Nano lenses and two bodies for $90K.  Nikon drops the TC-14E II.  Magic Lantern dual iso crack now for 5D Mk II and 6D.  Canon wins 3 EISA awards.  Sigma gets great reviews and a new lens.  Lumia 1020 P&S killer.  GX-7 wows reviewers.  Thinktank has new bag line.  Are snapshots dead?

New Bag Series from ThinkTank : Turnstyle Slings

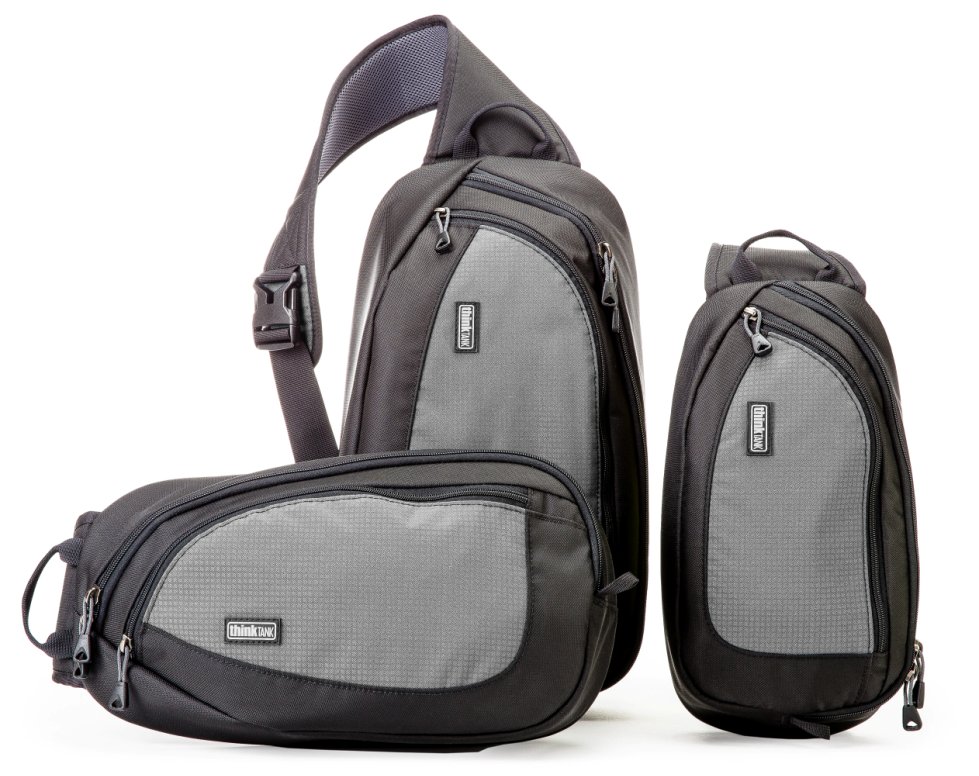
TurnStyle-Group.jpg

My friends at Think Tank Photo just announced the release of a new line of sling bags, the TurnStyle.  Lightweight with easy access, the three TurnStyle™ models are ideal for DSLRs and mirrorless systems. Their soft, body-conforming shape means all-day comfort and their tough water-resistant fabrics offer lasting protection. TurnStyle GroupEasy rotation gives you fast access to your gear, including a zippered tablet pocket on all three sizes. These hybrid bags can we be worn as a shoulder sling bag or as a belt pack for increased versatility and comfort.

  • TurnStyle™ 5: Fits a mirrorless system with two to four lenses plus a small tablet. The front organizer pocket holds memory cards and other small accessories. Examples: Fuji X-Pro1 with 50mm f/1.4 attached + 38mm f/2.0 + 60mm f/2.8 with hoods reversed OR Olympus E-P2 with 14-42mm attached + 17mm f/2.8 + 40-150mm f/4-5.6 + VF-2 viewfinder + FL-14 flash.
  • TurnStyle™ 10: Fits a standard size DSLR with one to three lenses plus a small tablet. The front organizer pocket holds memory cards and other small accessories. Examples: Nikon D800 with 24-70 f/2.8 attached + 50mm f/1.4 hoods reversed or Canon 5DMIII with 50mm f/1.2 attached + 16-35mm f2.8 hoods reversed.
  • TurnStyle™ 20: Fits a standard size DSLR with one to four lenses plus a large tablet. The front organizer pocket holds memory cards and other small accessories. Examples: Nikon D800 with 70-200 f/2.8 attached + 50 f/1.4 (or flash) hoods reversed or Canon 5DMIII.

And don’t forget, as a The Photo Video Guy reader, when you click on this link you receive a free gift with your purchase.  Unfortunately the promotional gift offering only works for readers living in the United States.

http://www.thinktankphoto.com/categories/sling-camera-bags/turnstyle.aspx?code=AP-743