The World's Worst Full Frame Sensor?

Recently the folks at DxO released their assessment of the Kodak CCD sensor in the Leica M9, M9-P and ME.  They called it the worst full frame sensor in the world.  Thus Leica fans developed apoplexy and Leica haters took to the internets for group slamming. I own and M9.  It's a freaking awesome camera.  The camera is more than the sensor.  It's the size, the feel, the glass, and the images.  It's not terrific at high ISO, it has no video (YAY!) and it's a CCD.  That and something on the order of a ten spot will buy you some frappy drink at Starbucks.

Why is the DxO review irrelevant?  Because there was no lens involved in the test.  Right.  The tests are mathematical, not image oriented.  How one can offer a qualified report on a camera sensor without using it as a camera, sounds about as likely as oh say, political integrity.  The review also doesn't take into account that the sensor was developed specifically by Kodak to capture the light from a small lens on a large sensor.  As Steve Huff points out, no Kodak sensor, no digital Leicas.

Be that as it may, my Leica is wonderful.  There are things it doesn't do well, and there are things it does better than anything else.  Let's focus on the photography and not the engineering reviews, what do you say?

Tips to Make Better Photos : Shooting Hockey

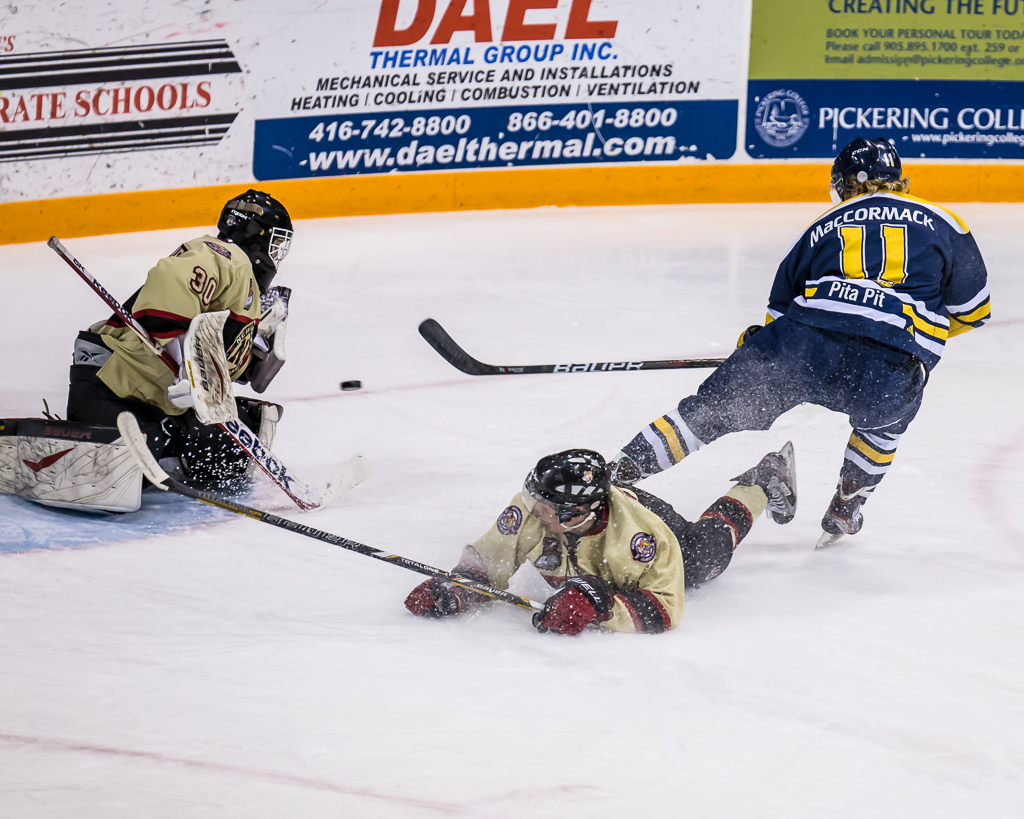
Shooting sports is not my forte.  I shot soccer and football a million years ago in High School and have been shooting Polo for a couple of seasons.  My friend Susan's son plays in the OJHL for the Aurora Tigers and I went out once last year to provide her some coaching support.  This year was busy but I've been pushing to make time to attend local games.  We're into the Quarter Finals of the OJHL playoffs and the action is great! 1Dx_NmktWhitby_-003020130303-156

What I love about OJHL hockey is that the young players are really committed to the game and are NEVER going through the motions.  I actually prefer this hockey to the NHL, but that's my choice.  I can attend a lot of games at a very fair admittance price, get very close to the ice and shoot like a mad fool without being in the way of the other spectators.  I have the good fortune of being able to attend local team's games as both the Newmarket Hurricanes' and the Aurora Tigers' home ice is reasonably close.

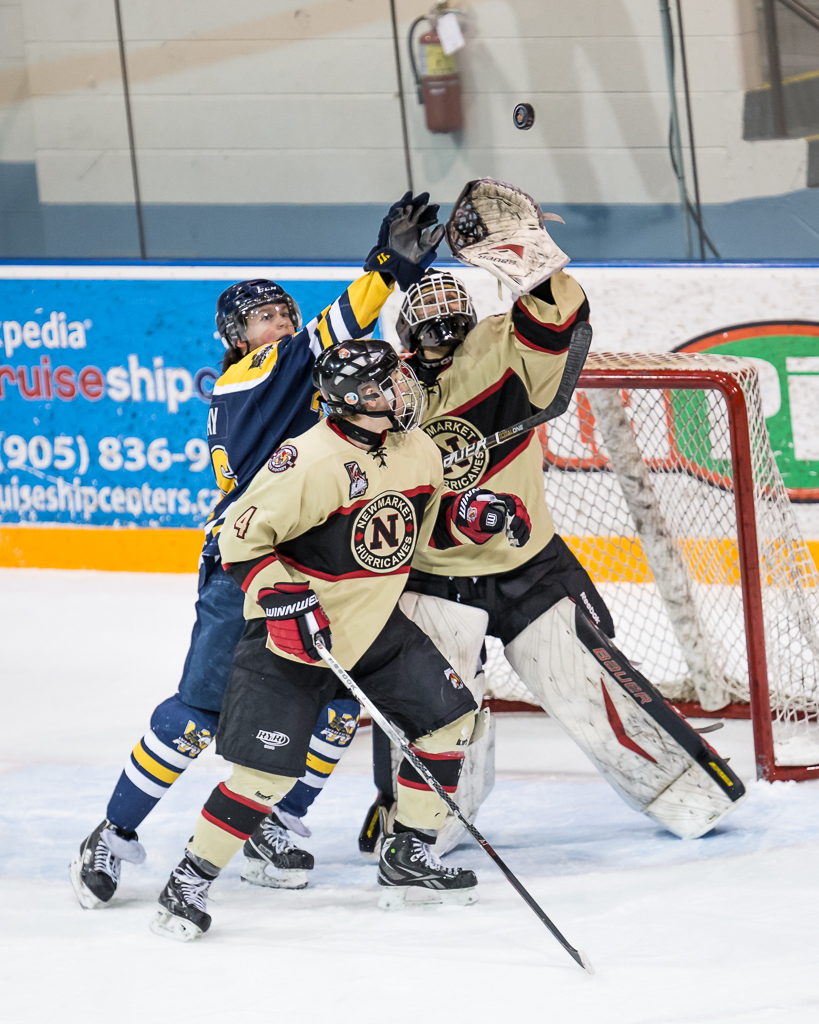
1Dx_NmktWhitby_-003020130303-354These shots are from a recent game between the Newmarket Hurricanes and the Whitby Fury.  I thought it might be interesting to share some of the things I have learned the hard way about shooting hockey.  First, you have to know the game, at least to some extent.  I surely don't know the ins and outs of hockey as well as my wife does, but well enough to set up for shots and to be continuously learning to anticipate where the puck will be, to paraphrase the Great One.

1Dx_NmktWhitby_-003020130303-73

So to get started, one of the first things I learned is that the lighting in Junior hockey arenas is pretty horrible.  It looks ok (mostly) to the eye but is a mess of colour temperature.  In the Ray Twinney Centre in Newmarket, my friend Brian Watts, who shoots hockey professionally, warned me of the "red" corners.  The ice looked fine to me live but once I downloaded the photos the span of white balance was all over the place.  I have tried arriving early to do a custom white balance but that didn't work out well because of the amount of variance so now I shoot AWB and correct in post.  The other thing about the lighting is that it is dimmer than you think it is.  I've shot everywhere between ISO 800 and ISO 2500 and now go in with the ISO set to 2500 and live with slighter reduced tonal range and nominal noise.  This is one place where the low light capability of the 1Dx blows me away.

1Dx_NmktWhitby_-003020130303-79My shooting kit for hockey is as follows;

  • Canon 1Dx in Av, ISO2500 EV, +1 2/3, Focus Tracking in Mode 6, AI Servo, Evaluative Metering
  • Sigma 120-300/2.8 lens either wide open or f/4 and RRS lens plate
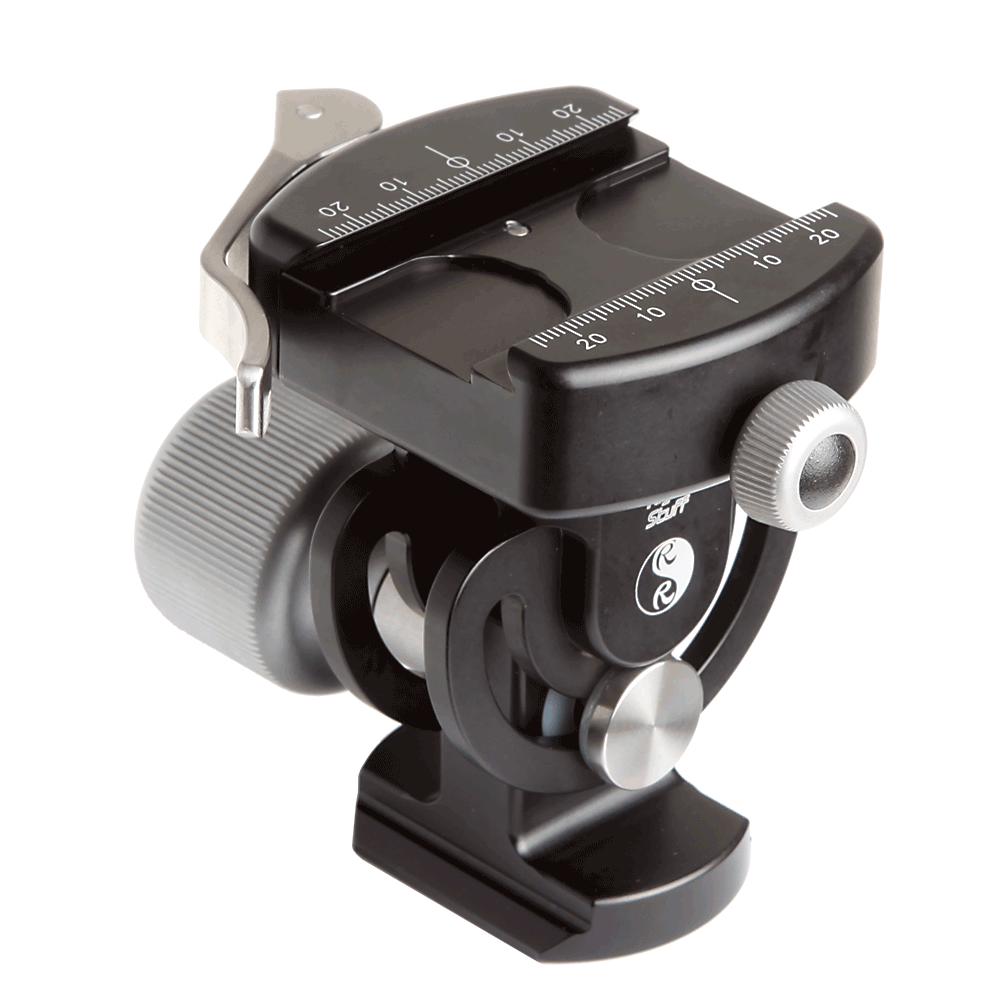
  • Gitzo 3551 Carbon Fibre Monopod with RRS MH-02 Head
  • Black Rapid HD Sling Strap

That's pretty much it.  If I want "environmental" images, I put my Leica M9 with Zeiss 35/2 in my coat pocket.  As much as I love the Leica, rangefinders aren't optimal for sports and the high ISO performance need in hockey rinks isn't wonderful.

eos_1dx_03The 1Dx has Canon's new case based focus tracking module and I've tried all the different cases to shoot hockey.  The 5D Mark III has a similar system and I find that Case 6 for subjects that are fast moving and change direction erratically works well for shooting with the long glass.  I get a lot fewer missed shots because the AF is not transitioning in accordance with the game.  In this mode the AF works with me, not against me.  I can now say I understand why pro sports shooters love this camera.  In fairness most all semi-pro and pro level gear has focus tracking of some type built in, but I find the Canon system so fast and so easy to use, I love it.  I set a single focus point and follow the action, using the back focus button (AF-On) to enable the AF in advance so it's locked when I press the shutter.  Obviously I have the AF set to AI Servo mode.  I've tried spot, center weight and evaluative metering patterns and have gone back to evaluative.  It's not perfect but nothing in a hockey rink is neutral grey so my experiment with spot metering linked to the AF point produced a disproportionately high failure rate.

136_120-300mm_osThe Sigma lens is extremely sharp. There are Lightroom profiles for it and I give the Sigma folks credit for their design because the corrections are relatively small, the lens is that good out of the box.  The only downside to the Sigma is that it is big.  I mean really big.  I'm no tiny guy, but if I had to handhold this glass for a full period, I'd need a chiropractor, a sports masseuse and bed rest.  So I go with the Gitzo monopod and the Really Right Stuff MH-02 Monopod head.  This head is AWESOME.  It offers a smooth moving tile mechanism so I can loosen it off and have smooth but not sloppy tilting while panning with my body.  This is a new monopod head for me and I'm looking forward to the coming MH02LRPolo season as it will help a lot.  By mounting a Really Right Stuff plate on the lens foot, I can have the foot in the LR clamp on the monopod and leave the Black Rapid strap with the Really Right Stuff FAB adapter attached at the same time.  Very handy and very secure.


From a shooting perspective, I find arriving early at the arena and surveying potential shooting locations is critical.  Most town arenas have pretty beaten up glass and shooting through it isn't optimal.  You want to be close enough so you aren't cropping out 80% of the shot but also high enough so you aren't shooting partially through the glass.  I can shoot manual but find that Aperture preferred works well for me.  I set the lens at f/2.8 or f/4, depending on the available light and find in most arenas that with an ISO of 2500, I will get shutter speeds above 1/500 of a second.  Yes the lens has optical stabilization and yes I am using a monopod but that doesn't change the fact that hockey moves FAST.  In the sample pictures, I am able to mostly freeze the players yet in most cases, the puck is still blurred.  I like this as it conveys the sense of action.  You'll also note that by default I dial in +1 2/3 stops of exposure compensation to keep the whites from going grey.  I tried just dialing in +2 but I kept running into situations at certain points on the rink where the shot just blows right out.   I can add the 1/3 stop in post processing but if the important stuff gets blown out completely, there's no bringing it back.

Hockey is a blast to shoot.  I'm starting to wonder what sport I will shoot when the season is over other than Polo.  Junior hockey is a professional league and the OJHL is very supportive of photographers (no selling of images is the major rule).  Many other sports leagues are very protective of photographic rights or are against photography at all where youngsters are playing.  If your child is playing, it may be easier for you.

I'm hopeful that both my local teams go all the way.  They have a wonderful rivalry and it would mean plenty of games for me to shoot before season's end.  Many of the players I have photographed this year are going away to school on hockey scholarships next year, so we'll see a new group of players in the 2013-2014 season.  If you want to learn to shoot hockey, your local teams are a great place to go shoot and you'll be supporting your local community.

1Dx_NmktWhitby_-003020130303-272


Tips to Make Better Images : Taking or Making

I admit to being a bit pedantic about this, but there is a substantial difference between taking a picture and making a photograph.  Thats not to say that there is anything wrong with taking pictures but the real joy and differentiation comes when you make a photograph. Youre driving along and see something that grabs your eye.  You pull over and take a few shots with your smartphone and get back to the driving.  Youre sitting at home and the cat does something amusing.  You grab the camera and snap some shots before it bores of you and ambles off to sleep.  Your child comes out of her bedroom with a sleepy face, mussed hair, thumb in mouth and shes just so cute you hit the burst mode to capture this moment in time.  These are all great pictures, fun to share with family, friends and social networks if you go that way.

At another time you decide to make a photograph of a friend.  Before you shoot, you mentally visualize the final image.  You think about light and shadow.  You consider the dimensionality of the image.  You think about the background, and make a decision to throw it out of focus by using shallow depth of field, and check to make sure that it wont create distractions.  You meter carefully to position yourself to maximize soft light and reduce contrast in your friends face.  You make sure that there wont be anything growing out of her head.  You look for wrinkles in the clothing, you have her press her chin forward to streamline her neck and you make sure that her eyes arent buried in shadow.  You tighten up your composition to fill the frame and place her face into a pleasing arrangement.  You decide that a bit of fill flash will help fill shadows under the eyebrows and under the chin, so you add your flash and diffuser and watch that they dont create shadows in opposition to the existing light.  As you press the shutter you watch for an expression that creates a framework for the viewer to create his or her own story.

If the last scenario sounds like a lot more work than the first three, you are correct.  Its the difference between making a photograph and taking pictures.  Both are valuable, both have reason to exist but its the last one that will help you grow as a photographer.  Im not ever going to advocate a 365 anything as I find them to go mechanical very quickly.  What I do encourage you to do is to challenge yourself to make photographs regularly.  Every photograph doesnt have to be museum grade, every photograph does not need to be a saleable item.  While many of our mentors derive all their income from photography, many of us do this for the fun and joy of having and investing in a creative pursuit.  The only viewer you have to please is you, and if part of that pleasure is learning what does and does not work, youre winning.

Tips to Make Better Images : Calibrate Your Monitor

CMUNSML_M1.jpg

As digital photographers, we have the luxury of having complete control of the digital darkroom.  We have not always had this, but with great power comes great responsibility.  (with apologies to Stan Lee and John Romita Jr.) Your responsibility?  Make sure that BEFORE you start working in the digital darkroom, make sure your tools are not lying to you.

Here's a secret.  Unless the magical unicorns of editing sit on your shoulder, your monitor is wrong.  If you are still using a CRT, don't spend money on a calibrator, go buy a decent IPS display and come back after you've done that.

IPS or In Plane Switching displays are a great place to start with for a display.  But maybe you have a general LCD, or LED powered LCD or a laptop display.  Then by default you are seeing issues.  Most all monitors these days have the ability to change their brightness automatically.  Good for word processing and browsing, bad for editing.  Most all monitors come set from the factory to eyeball stunning brightness, crushed gamma and high contrast.  Why?  So they look "better" on the wall in the retail store.  It's just like a TV.  If you bought your TV at a big box store, it was on display in "demo" or "vivid" or "retina burn" mode.  You get it home, turn it on and it hurts.  If you play games on your computer, many games "reconfigure" your display for brightness and contrast, or to make the dark scenery legible so the monster doesn't eat your face, you turn the display way up.

Enough kvetching on my part.  A display calibrator reads the display, measures the display capabilities and produces a display profile called a display ICC.  These are just like a printer / paper ICC file but for your display.  There are lots of vendors out there doing this with the best known being the Datacolor Spyder, the Huey and the X-Rite Colormunki.

CMUNSML_M1I have owned all three.  The Huey was incredibly inconsistent.  Software updates were rare and doing multiple monitors cost extra.  Bad - do not buy.  Until the release of the Spyder 4 Elite (and only that model), the calibrations were never consistent and Datacolor's software is still serialized to a single computer.  Bad choice - do not buy.  The Colormunki line consisting of the Photo, the iDisplay, the Display and now the Smile are easy to use, have great software, are fast and consistent.  The Smile is new and sells for about $120.  If you don't need to profile printers or paper or projectors, buy the Smile, keep the rest of your money in your pocket and get to the calibrating.

I've spoken about calibration on the TV show and at meetings of the Newmarket Camera Club.  A very seasoned member, who has developed a healthy cynicism about tech sent me this email the afternoon after he bought a Smile.

"Ross,

I did the calibrations on my three monitors......quite a difference..
I also took it to work and let the Publication Dept do their monitors.
They now know why the publications look bad.
All of their monitors were way off.
I'd recommed this to anyone who wants to look at real colour on their montors."
The deal was that if he did not see a difference in his displays after calibration, he would return the device, no questions asked.  He's not returning the Colormunki Smile, and I expect the production department at his place of work will be buying their own as well.
Calibration isn't perfect and you should be recalibrating your displays regularly.  I do mine every two weeks.  Since the process takes all of five minutes, it's no problem at all.  If you aren't happy with your edited work not looking the same on paper or on the web, or you do all kinds of editing work on your machine and it then looks like cat yak on a different machine, your monitor is in need of caibration.  Save time, save headaches, save frustration, get a display calibrator and if you want it good, fast and inexpensive go directly to the Colormunki system.

The Photo Video Guy Podcast - Episode 54

Canon 12-24/2.8L prototype in the wild?  Canon to release a 70D at the end of March?  Specs for the next EOS-M.  Leica M (240) now shipping in limited quantities.  Pocket Wizard intros Plus X.  Phase One releases Capture One Express.  Adobe has new release candidates for Lightroom and Camera Raw.  Adobe releases Photoshop Touch for iPhone and Android.

Tips to Make Better Images : Black and White Processing and the Use of Filters

It appears I start many tips the same way, so in keeping some consistency... Back in the days of film...

Happy now?

Black and white processing for digital images has come a long way from the horrible B&W converters of old or just dragging all the saturation away in a colour image to make a black and white one.

We now have superior post processing tools designed specifically for the creation of black and white images.  The two that I am inclined to recommend are Nik Softwares Silver Efex Pro 2 and OnOne Softwares Perfect B&W.

Both products offer a number of really well done presets that could be the end or the beginning of your black and white creations.  The primary thoughts that go into black and white digital processing are a) maximizing the dynamic range of the exposure and b) getting the contrast to the right levels to facilitate story creation.  By removing colour, the viewer must become more engaged in the story making process and so our artistic intent has more power, given that the pretty colours are stripped away.  Think of the multiple fall leaves images or sunsets you have seen and think of what story they initiate if devoid of colour.

One of the lesser used functions in black and white digital processing is the use of coloured filters.  When we shot B&W film, we carried an assortment of coloured filters that by filtering out their own colour, would change the look of the black and white image, sometimes substantially, to help create the storyboard.  With digital processing you dont need to carry sleeves of filters for b&w anymore although you can if you wish.  Its just a lot easier to do this in post.  Lets take a look at the effects of some of these filters.  Note that most of the these filters can be applied in post processing, but two of them, the Neutral Density and the Polarizer are only effective when used at time of Image Capture.

Yellow

When I started shooting film, one of my mentors at this time, an awesome fellow by name of Jim Brotchie, told me to go out and get a Yellow filter and put it on the lens ALL THE TIME when shooting b&w.  He convinced me to set an adjustment on my handheld meter (my camera at the time had no internal meter) to compensate for the light loss when shooting with the (Y2) filter.  Yellow filters reduce the yellow and so enhance blues and improve contrast overall.  You do have to watch that they dont increase the visibility of human blemishes too much but the effect is nearly always an improvement.  If you dont know where to start when processing b&w images, try adding a yellow filter first.

Orange

Go figure that an orange filter is like a yellow filter only stronger.  The same guidelines apply, but you have to be more careful with reddish subject matter going lighter.  This filter is very useful for b&w images of fall colours since it lightens oranges and reds while darkening greens and blues.  Some really stunning images of Chicago blues musicians with very dark chocolate skin had beautiful contrast and texture appear, when an orange filter was applied.

Red

Red filters were most commonly used with the old infrared films, but work very well on some landscapes as they deepen the blue of skies and make reds nearly white so you can get very interesting juxtapositions with red leaves and blue skies.  Whites, greys and blacks transit mostly unchanged so you can really make outdoor images pop.  Red filters for people produce a very pale skin on caucasian people and whiten reddish areas like lips and blemishes.  For the most part a red filter is not optimal for human beings.

Light Blue

A light blue filter makes blues light and darkens reds.  So not particularly optimal for landscape work but wonderful to soften blemishes and to create contrast between skin and lips on light skinned people.  Pretty much the go to filter for b&w images of women.  Use caution because very bright blue eyes can take on a possessed look.

Dark Blue

Not really useful as they tend to block up contrast heavily and darken most colours.  Try as an experiment but not a filter you are going to use a lot.

Green

Greens will lighten foliage and may increase contrast in clouds.  Some people like the effect on skin in portraits.  Again something to experiment with, but certainly not a go-to filter for black and white.

Neutral Density

We know what ND filters do.  They reduce the light transmitted to the sensor.  This allows us to slow shutter speeds or increase the aperture size for creative effect.  These filters should be in every photographer's kit and are one of the two that you really need to be using at time of capture.

Polarizer

The Polarizer is most often considered to deepen blue skies or to remove reflections in colour photography.  It adds the same value to a B&W image so if the plan is to go make images that will be B&W processed, use the Polarizer for the same reasons you would for colour.  The Polarizer must be a real filter and is used at time of capture.  Polarizer effects in post processing or for the most part, lousy.

Tips to Make Better Images - HDR 101 by Guest Writer Darren Gahan

The guest writer for this article is Darren Gahan.  Darren is a professional real estate photographer in addition to being a superb Lightroom and Photoshop Elements educator.  I've had the pleasure to teach with Darren in the field and be a guest on the Daytripper Webtalk show with Darren and his co-hosts Bryan Weiss and Gabriel Bousquet. ----------------------------------------------------------------------------------

HDR 101 with Darren Gahan

What is HDR? High Dynamic Range. What is Dynamic Range? Contrast, as in dark areas and bright areas.

Why would I be interested? Our eyes see a much larger range of light and dark detail than the camera can capture. We use HDR Photography to make the photo the way our eyes would see it. HDR Photography can also be used to enhance or modify a regular looking photo into an exaggerated brightness and or colour photo.

Do I need special equipment? No, you can use any camera as long as there is a way to make the images brighter and darker. Most cameras have a feature called "Exposure Bracketing" that will change the brightness automatically after every shot.

Do I need a tripod? No, but it would help and make things easier.

Can I do a HDR of moving subjects? Not really. Because it has to overlay each image exactly on top of each other, things that move will create a problem called "ghosting" .

How would I set my camera to do this? Set your camera to the Aperture Priority Mode. A or Av (If it doesn't have this mode, use the P or other advanced mode where it will allow you to use Exposure Bracketing. Find the Exposure bracketing feature of your camera and turn it on. It may be helpful to also turn on your continuous shutter release or burst mode.  Try to hold the camera steady and not move it while it is recording the photos. Take a deep breath, hold it for a second, then when you start to slowly let it out, press and hold the shutter button down and the camera will take the required number of photos then stop, and then you release the shutter button. This is where a tripod is very useful.

What if there is a range of exposure values in bracketing? Usually a difference of 1ev (also called 1 stop) is enough. Feel free to experiment.

How can I tell if it worked? Play back the photos. If it worked, there should be 3 photos of the same subject with 3 different brightness levels.

TIP: You are looking for a normal or middle brightness photo, and 1 darker than normal and 1 brighter than normal. Your camera may have them in a different order, but usually in this order: Normal -> Darker -> Brighter, but this doesn't matter.

What if I have 2 dark photos and 1 normal brightness photo? This means you need to find and use your exposure compensation control, and set it to a value of +1 (plus 1 ev).

What if I have 2 light photos and 1 normal brightness photo? This means you need to find and use your exposure compensation control, and set it to a value of -1 (minus 1 ev).

Does it matter if I shoot in JPG or RAW? No it doesn't make any significant difference. In fact, if you aren't comfortable with shooting in RAW or you don't know what it is, don't worry. Some software may only work with JPG images or with RAW images converted to a different format, such as Photoshop Elements. (Which does have a RAW converter)

What software do I need to process my photos? There are many different software packages out there, each with a specific advantage. The best bang for your buck would be Adobe Photoshop Elements. Available at Henry's for around $99. (Henry's also has workshops on Photoshop Elements. I teach at many of GTA locations. I also offer my services directly and can do customized training in Elements, CS5 & CS6, Lightroom or Apature) You can also download a FREE 30 day trial fully functional of Photoshop Elements from the Adobe website.

In Photoshop Elements (Version 9 and above) open up your 3 (or more) photos from your bracketed set. (If they are in the RAW format, make sure you select all 3 at the same time before you choose Open,<Click the first one, hold CTRL <<CMD on a MAC>> and click on the other 2, release the CTRL key> and then in the Camera RAW editor, select all 3 images <<The same way>> and then choose Open Images on the bottom right. ) Go to File -> New -> Photomerge Exposure. Play with the 3 sliders till you are happy. File Save As a jpg file and you can have it printed or shown anywhere.

The Photo Video Guy Podcast - Episode 53

Nikon announces the D7100 and the Wr-1 radio remote.  Nikon is rumoured to be bringing out a 16MP fixed lens compact.  Nikon issues a service advisory for the D600.  Canon issues a service advisory for the 1Dx and the 5D Mk III.  Canon's EOS-M firmware update won't address slow AF performance.  Rumour mill specs are out for the 7D Mk II.  Testers unimpressed with the Sony RX-1.  Sony introduces NEX-3n and A58 along with new A lenses, a 50/1.4 and 70-400/4-5.6G.  Prerelease reviews of the Leica M (240) gush with praise.  Cactus releasing laser trip releases.

Tips to Make Better Images : Choosing the Right Lens

All too often we look at adding lenses to our kit, and when we enter the camera store or go online, we are directed to a particular brand or range.  Back in the days of film, zoom lenses were growing in popularity but it was acknowledged that they were a compromise, more flexible than a fixed focal length lens (what we now call primes), but never as sharp or as contrasty, or as bright.  Photographers made the hard decision to go zoom or prime, and serious shooters often had zooms that overlapped the primes.
Today lens technology has changed dramatically.  We no longer have to pay thousands and thousands of dollars for lenses with extra low dispersion glass, or apochromatic elements.  Multicoatings that actually do the job are no longer solely the province of the camera manufacturers, or as it was then, the glass manufacturers.
However, one size RARELY fits all and I am seeing an increase in the number of vendors pushing the one size fits all lens.  While I don't dispute that the very expensive Nikon and Canon 28-300 variants are quite good, we pay a price for their flexibility still.  And when we look to the non- L Canons and the non-FX Nikons as well as pretty much all of the third parties we are giving up even more.
Theres an old saying that you can have any two of good, fast and cheap, and this applies to lenses to some extent although fast and cheap is hard to find outside of the 50/1.8 sub $200 offerings.  Before you run out and buy the kit zoom or that new exciting 18-270 take some time to consider your own needs, not what the seller wants you to buy.
Wide to tele lenses are ALWAYS compromises.  They all vignette in the corners when wide open, and all display some level of barrel distortion at the wide end and pincushion distortion at the tele end.  My friends Quyen, Bryan and I have done eye level tests and there are lenses on the market where the distortion is not just there, it's so obviously there, that potential buyers should run, not walk, from those lenses.
We also find that the wider the zoom range, the slower the lens is.  By this I mean that it has a relatively small maximum aperture and one that varies depending on the focal length selected.  Have you ever noticed that top line lienses have the same aperture through the zoom range while consumer grade range from 3.5-6.7 and beyond?
I also see a significant shift away from using a flash.  Since our default lenses are slower optically and people dont want to use flash, even though flash has never been better than it is today, how can they make successful images in low light?  There are only two options, slow shutter speeds, or pumping up the ISO.
Certainly film never had the ISO range of today's digital cameras that can produce decent results up to ISO 3200 in most cases.  But do an experiment and take the same shot on a tripod at ISO 200 and ISO 3200.  The difference in image quality is enormous.  Colour saturation, contrast and digital noise are very different.  As we push the ISO higher we give up saturation and contrast in exchange for noise..  If we go to slow shutter speeds we need a tripod and may still get motion blur if the subject moves.
Fast lenses, those with larger maximum apertures cost more.  People keep cameras between three and five years, but often keep the glass much longer.  Should you not consider having fewer lenses that are faster, or consider zooming with your feet instead of zooming in the lens?  The wide range zooms make great snapshots, but I consistently see that the best work of photographers is captured with primes or with the top of line zooms.
It's your call, but do think about what you want out of the photographs you will make.  That will define the route to follow for glass.

Tips to Make Better Photos : Buying the RIGHT Macro Lens

I met a lovely lady on Sunday.  She is relatively fresh into the field of serious photography and was being frustrated in her efforts to get effective shots of coins without harsh shadows and full sharpness. She had gone into a camera store and the very helpful sales person suggested the Nikon 40mm Micro.  This is a fine lens and very inexpensive.  Unfortunately, it's a TERRIBLE choice for close up work.

While the lens is quite sharp and has a great aperture range to ensure depth of field, the idea of a macro (or as Nikon calls them - Micro) lens is to get lifesize captures.  Simply this means that if you have a full frame sensor measuring 24mm x 36mm, you can get sufficient closeness to capture a subject that is 24mm x 36mm on the sensor.  This is what the marketing people mean when they hurl 1:1 around in their documentation.

The challenge is how physically close you have to get as the photographer to get that 1:1 image.  The shorter the focal length, the physically closer you can get.  Sounds good, right?

Nope.  The closer you must physically be, the greater the probability that you will become an impediment to getting a good image.  If your subject is alive, you crowding in may cause it to leave.  Or bite you.  If your subject is static, you might end up blocking most or all of the light you need.

So, you may be thinking, ok smart guy, what does work?  100mm or longer.  That's it.  Start there.  Crop sensor camera?  Start around 100mm.  Full frame sensor camera?  Start around 100mm.  If you shoot Nikon, the Nikkor 105 Micro is imho the most awesome lens that Nikon makes, amongst a family of awesome lenses.  If you shoot Canon get the 100/2.8L.  Both lenses are relatively expensive and both will last a lifetime.  If you shoot Nikon, do NOT buy a lens built for the DX sensor.  If you shoot Canon, do NOT buy an EFS lens for the crop sensor.  Do yourself a BIG favour.  Buy lenses built for full frame even if you only have a crop sensor.  There's this thing called image circle and this other thing called internal vignetting.  You want the most of the first and the least of the second.

I think I was able to help her out.  By suggesting a much smaller aperture to optimize depth of field and recommending the use of a diffused daylight balanced CFL lamp with reflective white foam core, I expect that she will achieve the level of detail and soft light she needs without spending a couple of hundred dollars on softboxes and such.  My biggest concern is that she won't be able to get the shot without getting in the way of the light because of the focal length requirement to be so close.

The Photo Video Guy Podcast - Episode 52

Nikon rebates this month.  D7100 coming soon?  Canon to release new firmware for the EOS-M.  Canon lenses on sale through the end of Feb. More Canon rumours.  DP Review goes deep on the Canon 6D.  Visual Supply Company releases Film Pack 03.  DxO Optics Pro adds support for Leica M.  Dell introduces new Ultrasharp monitors.  Leica delays release of M.  RED sues Sony for patent infringement.  Picking a fast 85mm

FlashZebra : A great place for flash accessories

Not all of us use a flash regularly, but if you do, you want to know about FlashZebra.  These folks are a web merchant and their focus is on accessories for flash.  From AA extended battery packs to conversion shoes, replacement feet to sync cables, they've got a great selection.  They also have very cost effective kits of pre-cut flash gels for colour correction and creative work.  Neat. I was watching a segment on KelbyTV and Scott was talking about remotely controlling his camera when shooting pro football with Pocket Wizards as triggers.  I do this now with a Hahnel device and it works really well, but I want to use a more powerful radio, and I already own one in the Pocket Wizard Plus IIIs that I have.  I looked into the PW cables to enable this for the Canons and the Hasselblad (standard micro connector) and when I saw the prices from PW for these things I nearly puked.  I've become convinced that even when PW does make a good product they manage to shoot themselves in the cranial vault with stupid ripoff pricing and accessories you'd only buy while tripping on LSD.

Hence I was very pleased to discover the FlashZebra has cables for Canon and Nikon cameras to work with the PW Plus III units for exactly the purpose I need and that I could buy 6 for the price of a single PW N3 cable.  You order online, pay by credit card or Paypal and they ship the goods to you.  Shipping from the US was $5 for my order so well worth it.

Go take a look at FlashZebra.  They might have exactly what you need.

Teleconverter Comparison Shots

One of my regular readers asked for comparative images with and without teleconverters following my recent post.  SInce I own Canon products I made three images to make the comparison.  The images were shot in RAW, brought into Lightroom where the Lens Profile Correction for the 70-200/2.8L IS II was applied and then exported to JPEG.  No other post processing was done.  White balance is identical on all images.  Camera positioned on tripod, position fixed, light from above using daylight tubes in the Kino Flo DIVA 400 Canon 1Dx with Canon 70-1200/2.8L II

A basic shot at f/5.6, no teleconverter, lens zoomed to 200mm, effective focal length 200mm

Canon 1Dx w 70-200/2.8L II and Canon 1.4x Teleconverter III

Same position with the 1.4x converter now inserted.  Still f/5.6 set in camera.  Lens zoomed to 200mm.  Effective focal length now 280mm.

Canon 1Dx w 70-200/2.8L II and Canon 2x teleconverter III


Same position with the 2x converter now inserted.  Still f/5.6 set in camera.  Lens zoomed to 200mm.  Effective focal length now 400mm.

All images were shot with the only change being the addition of the teleconverter and the exposure change in shutter speed to compensate for light loss through the converter.

Depth of field gets shallower at the same aperture when using the teleconverter since the effective focal length is now longer as one would expect.


QUICK LOOK : Zeiss 85/1.4

Thanks to Henry's Newmarket who brought in a Zeiss 85 for me to look at to close out my challenge to pick an 85mm. To say it's beautiful is an understatement. The quality feel is unsurpassed. Having a lens with a hyper focal distance scale on it is a real treat. Sharp? You could cut yourself. Sadly, it's greatest benefit, a really flat helicoid for precision focusing makes focusing very slow. The focusing screens in my Canons are not much help for precision focus and the in focus indicator that leverages Canon's focus detector does not match well with the travel of the focus ring. If I were using a traditional manual camera this lens would be the one, but I'm not so it isn't.

Aperture settings work from the camera as expected. Fine focus is tough and whenever I tried trusting the in focus indicator where it looked ok in the viewfinder, it was not sharp when viewed in playback. I did all my testing at f/1.4 since that's why you spend the coin on a fast lens. I tried Live View as a means to focusing but it's so foreign to me that without a loupe it was unusable.

Consequently, the Zeiss is not an option, and the softness in the Sigma irks me, so I will be saving my now discontinued pennies for the Canon 85/1.2L II

Tips to Make Better Photos : Get yourself a teleconverter. A good teleconverter

Lets start at the beginning. What is a teleconverter and what does it do?

A teleconverter is a type of lens that works in conjunction with another lens. Specifically with a telephoto lens. This special type of lens alters the image at the sensor in two ways. It modifies the effective focal length of the primary lens and it takes light away from the image.

Years ago, teleconverters came along as a cheap way to double or triple (yerk burble barf) the effective focal length of your lens. I remember working part time in a camera store and being told by a company rep that these new teleconverters were amazing. You could buy an 80-200 lens for $250 and for only an extra $60 make it a 240-600! To a young guy it sounded too good to be true.

Yup, Thats absolutely correct. Fortunately when the bottom of the crapola lens market dropped out so did the crapola teleconverters. Today we can find teleconverters from camera manufacturers and the better third party lens manufacturers. Yes, there is still junk out there but its less prevalent than it used to be. There exists the concept of pair matched teleconverters, highly specialized devices built to work with a specific primary lens and they do exist but are outside the scope of this article. Instead I want to look at five teleconverters, two from Canon and three from Nikon.

TC

Nikon AF-S Teleconverter TC-14E II

This cool little unit takes the focal length of the lens you are using it with and increases it by 1.4x, so for example a 200mm lens captures like a 280mm when the teleconverter is mounted between the lens and the camera body. The light lost in the teleconverter is a single stop so a low price to pay for a decent pop in magnification. Consider you own a Nikkor 300/4, a nice and not stupidly expensive lens. Add the TC-14E II and you also have a 420/5.6 by only spending $429.95 (CDN MSRP).

Screenshot

Canon EF Extender 1.4X III

The Canon converter works the same way as the Nikon. Its slim and coloured like Canons pro telephotos in that off white finish that Canon uses. The converter provides a 1.4x factor and consumes a single stop of light. Its very sharp and has very minimal negative impact. I use mine regularly with the 70-200/2.8L II Canon and it performs extremely well. Like the Nikon, it is lightweight and easy to carry in a regular pocket. The unit sells for $579.99 (CDN MSRP)

AF

Nikon AF-S Teleconverter TC-17E II

This midpoint teleconverter offers a 1.7x focal length increase at the cost of about 1.5 stops of light transmission. Thats not bad at all considering. Using our earlier example we would have a 510mm f/6.3 for an added cost of $429.95 (CDN MSRP). Thats a fair bit less than what you might have to pay for a Nikkor 500mm prime.

Screenshot

Canon EF Extender 2x III

Canons 2x converter is in its third iteration, like the Nikon 2x offering. I owned the Series II Canon converter before it was stolen and I have to credit Canon for the significant improvement between the Series II and the Series III. The current unit is excellent and while I have noted a reduction in sharpness at the edges, centre sharpness loss is minimal. It does consume 2 full stops of light so one thing to remember is that the primary lens should be optically fast. I have used this in conjunction with my Sigma 120-300/2.8 and liked the results very much. Theres no way I can afford a 600/5.6 prime and in the limited times I need this kind of reach, the pair works admirably. The unit sells for $579.99 (CDN MSRP)

AFS

Nikon AF-S Teleconverter TC-20E III

I really like this converter a lot. Couple it with 70-200/2.8 Nikkor and youve got a rocking kit with tons of versatility for the additional spend of $599.95 (CDN MSRP). The converter doubles the effective focal length and uses up two stops of light. So that 200mm f/2.8 becomes a 400mm f/5.6.

Teleconverter Concerns

A teleconverter reduces the amount of light transmitted, so using one on a lens that is already optically slow will have an impact on your ability to make images because of too slow shutter speeds or may even prevent the AF in your camera from operating. I have a Canon 100-400/5.6L zoom lens that works just fine with the Canon 2x converter but because the effective maximum f stop to f/11 smaller than the f/8 that is the minimum maximum aperture that the autofocus system in my camera. Even then, its still the answer to getting an image or not getting it in some situations.

Teleconverters cannot be used with wide angle lenses or lenses where the rear elements move backward as they could impact the front elements on the teleconverter. Manufacturers publish compatibility lists. Best to check these before you buy a teleconverter, or a lens to use with an existing teleconverter.

Some reviewers rail against teleconverters complaining that they introduce softness and impact sharpness. They do as would any additional elements that are not permanently part of a lens, but the manufacturer converters are stunningly good and when you consider what you get in exchange for what is really a very low purchase price. If youre like me and cannot afford a 500mm or 600mm native prime but need that kind of reach for images you like, a quality teleconverter can really help you get there.

Tips to Make Better Images : The Only Filters You Really Need

Welcome back my friends.  A quick sojourn to film and then back to the present.
 
In the past, photographers carried a slew of filters to use to compensate for different conditions and subjects.  I remember my friend and mentor Tony Gonsalves telling me that ALL photos of people would benefit from an 81A filter and that it couldnt hurt a landscape either.  As in many things, Tony was right, and if you were to look through my old film bag you would not find UV filters on my street lenses, but 81As.  I also learned that a light blue filter could cool a scene down and change the mood, so I carried those.  Then there were the conversion filters that corrected tungsten to daylight or fluorescent to daylight.  Oranges and greens may be nice colours but not so much for skin.  On top of this I had Soft Focus filters for some portraits and still have the original Minolta set of three portrait softeners that worked so brilliantly delivering results like the Hasselblad Softars but at prices affordable by mere mortals.  I also had a bunch of graduated filters in the Cokin system, although I cannot honestly say that I used them very much.  Used most of all were the Neutral Density filters to cut light and the Polarizer to manage reflections and deepen blue skies.  But if you are looking for a stack of B+W and Tiffen 55mm filters, boy have I got them.
 
Digital is a different world and since we all have our own digital darkrooms, we really dont need to carry much in the way of filters at all.  In fact with the camera setting the white balance for each shot, using coloured or tinted filters can be more a liability than an asset now.  If I want to soften images, I can do that in post, and in fact there are dedicated software applications that use very sophisticated math to do this one thing.  If I want to warm or cool a shot, I have a colour temperature control in the digital darkroom.
 
So what filters do I REALLY need for digital?
 
It comes down to this.  While you can reduce exposure in the digital darkroom, you cannot slow your shutter speed  or open the lens wider post capture.  Everyone has seen and probably tried to shoot flowing water with the goal of not freezing it but instead showing the movement and making it creamy  Maybe you spent big coin on a lens that has a really large maximum aperture so you can achieve minimal depth of field.  Both of these goals can be achieved with a neutral density filter.  If you just set a low ISO and small aperture, on a decent day, your shutter speed will still be too high for creamy.  Since youll be using a tripod anyway, you want a good neutral density filter.  You want to shoot that 85mm at f/1.4 to get a beautiful portrait but even at ISO 100, the shutter speed is maxed?  Use a good neutral density filter.
 
How do you know its a good Neutral Density?  Shoot something white and overexpose your reflected meter reading until the white is actually white, usually between 1 2/3 and 2 1./2 stops.  Now put on the ND filter and shoot it again.  The image had better be exactly the same white.  If not, youve dropped money on a junk ND filter.  Oh and by the way, the junk outnumbers the quality by a substantial margin.
 
Further to this, there are now Variable Neutral Density filters that can block between 6 and 10 stops of light.  These are typically two polarizers mounted in separate rings and by rotating one against the other you get a reduction in light transmission.  Since very good polarizers cut about 2 stops each, Variables always start at around 5-6 stops of light suppression.  The problem is that many variables are assembled using absolute junk polarizers.  You pay about the same for a generic variable as you would for a mid grade polarizer.  If you do drop coin on one, expect crappy results with colour shift, saturation loss, contrast loss, softening and when used with aggressive settings, plenty of moire.   Really good variables are complex entities.  The best are the Singh-Ray and the Heliopan, with the Tiffens being very good.  I havent been able to test the latest B+W versions but I cannot see B+W risking their reputation.  Every other variable I have tested is complete crap.  And by that I mean it would need to be 10x better to be merely awful.
 
So what do you do if you dont have the coin to drop $400 on a variable?  Dont do it.  Buy a single ND with at minimum a three stop reduction, also known as a 0.9   A three stop cut is reasonable and your autofocus will probably still work.
 
What?  Probably?  Ok, stop freaking out.  NDs cut light, sometimes so much light that you cannot see what you are shooting and your AF system definitely cannot see what you are shooting.  My friend Simeon uses the Lee Big Stopper and if you pull 10 stops of light out of anything, you are in the focus and then put the filter on territory.
 
The other necessary filter is our old friend the polarizer.  Back in film we used linear polarizers but we hear that with digital we have to go with circular polarizers.  Whats the difference?
 
Autofocus systems need the light wave crests to hit the sensor at the same time.  Linear polarizers dont do this so while you can use your old linear polarizer, youll want to go to manual focus.  A circular polarizer has an extra aliasing filter to align the wave crests.  We get autofocus but give up some polarizer effectiveness and reduce the maximum polarization.  Now remember how we talked about light suppression in polarizers?  Linear polarizers were stronger so they would consume between 2 ½ and 3 stops of light.  Circular polarizers consume about 2 stops.  But load this on top of your three stop ND and you have at least 5 stops of light cut when you need it.  But wont stacking filters reduce the image quality?  If youve bought cheap polarizers or filters that are not multi-coated, the answer is absolutely.  But if you bought smart and saved to buy better quality image degradation and colour shift is minimized.  Pairing a B+W Pola and B+W ND, or a Heliopan pair will give excellent results.
 
Now this is not a post on selecting a lens, but heres an idea.  If you think you will want to put a polarizer on a lens, ever, make darn sure that the front of the lens does NOT rotate during focus or zoom, because thats going to put in you the tedious and seemingly never ending limbo of polarizer rotation.
 
I know youve been in camera stores where the representative assures you that the house brand is just fine, or that some offshore brand will do the trick, and they may even believe it to be true.  Theyre likely to be wrong.  And you will find some of these filters are the same price or more than the best German filters.   You can also buy filters from the manufacturer of your lens, but you may be getting a lot less than you pay for.  In my experience, I am comfortable with Nikon filters or any of the Minolta filters (if you can find them and they fit your modern lens) because both companies made their own glass and exerted serious quality control on the filters.  Dollar for dollar Heliopan or B+W are your best buys.  If the prices are too high for your budget go with Tiffen.  They are often priced lower than even some offshore makes but use a unique process of laminating Wratten gels between two slices of optical glass.  They are the best of the rest.
 
By the way, if you are going to stack a pola and an ND, this is the rare time where you want to remove your high quality UV filter thats on your lens.   You did buy a high quality UV filter for your quality lens didnt you?  No?  If you bought junk, go without.  Yes if you damage the front element of the lens you are in the doodoo, but shooting any glass through those cheap-ass no name UVs is worse.  Contrast loss, saturation loss, colour shift, distortion, focus oddities are all common outcomes from cheap UVs.  I hear regularly from people buying kit zooms saying why would I pay $50 for a UV filter when the whole lens costs $279.  Fair question.  Make your own decision, but dont put cheap glass on any lens you would shoot through.  Kit lenses are already a compromise so why make it worse?
 
So what filters do you really need?  A good polarizer and a good 3 stop Neutral Density.  And heres a tip, buy the ones that fit the largest diameter filter size you need and go with stepping rings to size own to smaller filter size mounts.   Theres no problem using a 77mm polarizer on a step ring to a lens that takes a 58mm filter.

REVIEW : A Tale of Two 85mm Lenses, Sigma's 85/1.4 EX DG HSM and Canon's 85/1.2L II USM

Canon-85mm.jpg

I've been wanting a fast 85mm for portraits and to use that razor thin depth of field wide open.  While super fast lenses help in low light, it's really the shallow depth of field that puts them in demand over the 1/2 to 2/3 stop slower variants that cost a lot less and are typically as sharp if not sharper. I had purchased Canon's 85/1.8 and I just didn't like it.  Perhaps I had a bad one but there was a lot of chromatic aberration wide open and it just didn't feel right.

I arranged to do testing on the two 85mm lenses I had narrowed the field to, the Sigma 85/1.4 and the Canon 85/1.2L.  I left out the Zeiss 85/1.4 because I wanted to retain autofocus for the comparison but I may yet go have a look at the Zeiss as focusing is not that big a deal for me.

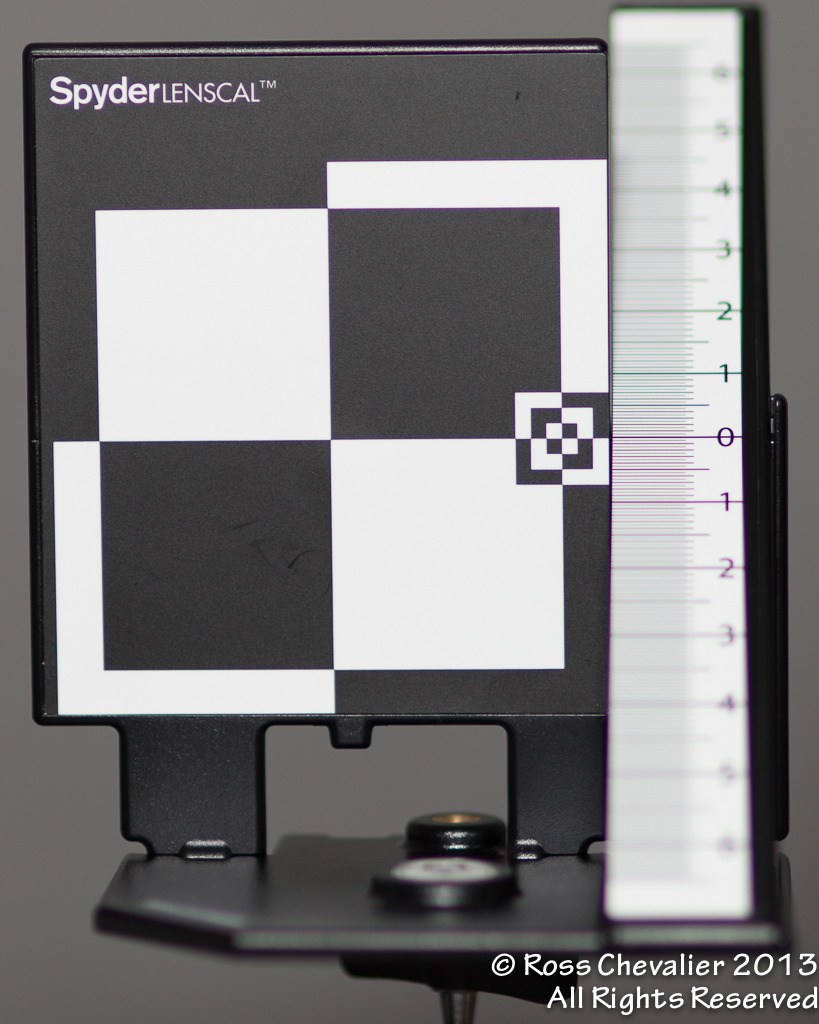
I did my testing using a Canon 1Dx shooting in manual after metering off a grey card.  The camera was tripod mounted and all shots were tripped using the 2s self timer.  Illumination was provided by the awesome Kino Flo DIVA Lite.  All focus testing was done in camera and each lens was checked for focus using a SpyderLENSCAL and for colour using a SpyderCHECKR.

The sample images were shot in RAW format and imported to Adobe Lightroom 4.3  Each was white balanced in Lightroom using the white balance eyedropper off the SpyderCHECKR according to the instructions.

All images received the benefit of Lightroom's Lens Profile Correction function and in both cases, it as usual, made a positive difference.

Sigma 85mm f/1.4

Sigma 85/1.4 w petal hood

This lens comes out of the box feeling very well made.  It takes a 77mm filter and includes a petal style bayonet hood.  It also includes a hood adapter for when used on a crop sensor body, a very nice touch.  It comes packed in Sigma's padded nylon case and has Sigma's excellent 10 Year Warranty.

The lens mounts up without issue and meters consistently with other lenses at like apertures.  Autofocus tends to hunt in low light doing a sweep past focus and then backing in to sharpness.  Autofocus performance was good in terms of time to achieve focus.

I felt that the images just weren't sharp though and

Sigma 85/1.4 Front

after reading other reviews, I'm not alone.  Some people seem to have received really bad copies, but after some time with the SpyderLENSCAL, I was able to maximize the sharpness by dialing in -12 in microfocus adjustment.  It seems like a lot, but the secondary benefit is the removal of seriously bad purple fringing (chromatic aberration).

After shooting the SpyderLENSCAL, and making the required micro-focus adjustments, I went on to colour check and white balance check with the SpyderCHECKR.  Colour rendition is pleasant but 300 degrees more yellow than the Canon lens.

The last shots are of my very patient model Sondra, the Sigma 85/1.4 Sigma 85/1.4first with focus locked on the eyelashes of her near eye and the second with focus locked on the eyelashes of the far eye.  Multiple shots were made and the ones posted are the best ones.

The lens vignettes heavily wide open as one would expect it to.  Using the Lens Profile Correction in Lightroom 4.3 corrected for most of this.

Near Eyelash - Sigma Far Eyelash - SigmaEven after the corrections, I still find the lens a bit soft.  This may not be an issue if one only uses the lens for portraits.  Knowing that the depth of field is very narrow at 1.4 I focused precisely and checked with a loupe.  It's certainly not awful and for many people would be more than acceptable.

Canon 85mm f/1.2L II

Canon 85/1.2L II

Canon 85/1.2L II Front

The Canon lens comes out of the box with a recommendation that you practice wrist curls. It's enormous.  Filter size is 72mm which is annoying considering that most of my other lenses are 77mm.  Construction is very solid and the focus ring is incredibly smooth, a virtue of the ring based USM motor.  The downside is that this makes the autofocus slow.  If you switch off a speed demon like the 70-200/2.8L to this, you might think your camera has broken, it's that slow.  This really bugged me when I first tested this lens but I am slowly (pun intended) getting used to it.  I'm told that the first series of this lens was two times slower.  That would mean a glacier could move before focus was complete.  Slow focus is the biggest downer on this lens.

The lens comes with a soft case, not nearly as protective as the Sigma case and includes traditional barrel hood.  No compensator is provided for use on a crop sensor camera, so points on this little thing go to Sigma.

Canon 85mm/1.2L Canon 85mm/1.2LI checked the focus using the SpyderLENSCAL and discovered that no micro focus adjustment was necessary.  In observing the zoomed images I detected none of the fringing I saw in the Sigma lens.

Next I shot the SpyderCHECKR for colour rendition.  Colour is lovely with this lens although it shoots about 100 degrees cooler than Canon's 100/2.8L Macro.  Not a big deal, and more consistent lens to lens than with the Sigma which is noticeably warmer.

Canon 85mm/1.2L Canon 85mm/1.2LThen I moved onto shooting Sondra again, first her left (near) eyelashes in focus and then the right (far) eyelashes in focus.  As with the Sigma I made multiple exposures and selected the best ones to include here after viewing them on the large screen.

Vignetting is well evident when shooting wide open and again Lightroom's Lens Profile Correction function comes to the rescue.

I felt that the Canon lens was sharper.  Overall I think it is a lot sharper.  I never got the sense that there was any softness or hesitancy in locking focus, it just takes a long time to get there.  Manual focus is smooth and fast, and for this reason I will take a look at the Zeiss MF lens since neither of these lenses is rocket powered when it comes to autofocus performance.

Conclusion

I've included the specs at the bottom of the article and include common street price here in Canada.  The Canon is twice the purchase price and the AF is much slower.  The Sigma does a good job but still feels soft even after tuning the micro focus adjustment.  In controlled lighting both exhibit good contrast but again I think that the Canon has a slight edge here.  Both are very good lenses, with positives and negatives in both cases.  In the right hands for the right task, either could be a solid performer.  At this point I am still undecided pending a look at the Zeiss option.

Specifications


Canon 85/1.2L II USM Sigma 85/1.4 EX DG HSM
Focal Length (FF) 85mm 85mm
Maximum Aperture f/1.2 f/1.4
Filter Size 72mm 77mm
Weight 1025g 727g
Closest Focus 95 cm 85 cm
Angle of View 28°30” Not specified
Construction 8 Elements / 7 Groups 11 Elements / 8 Groups
Warranty 1 Year 10 Years
Street Price $2,299.99 $1,229.99


The Photo Video Guy Podcast - Episode 51

D4x rmours and Nikon cuts profit forecast.  Canon to release high MP 1 series in 2014 and firmware updates for 5D Mk III and 1Dx.  Panasonic devises new sensor design for lower noise in low light.  Casio thinks the future is in point and shoots, denies being on acid.  Sony to release a 20MP  APS-C sensor in the Alpha 58.  Apple enhances RAW converter to 4.0.4  ProCutX brings FCPX controller to the iPad.  Camranger allows remote control of DSLRs from the iPad.  Shots from the last roll of Kodachrome now up on Steve McCurry's blog and the National Geographic offers a DVD set of magazines going back to the late 1800s for $25

Tips to Make Better Images : The Roll Film Exercise

1Dx_1010-002120130130-3.jpg

I was recently a guest with friends on their weekly webcast called Daytripper Webtalk.

The primary subject was the value of structured photographic exercises.  We all tried the 10 x10, basically 20 images within the same 10 foot square space, although I messed up thinking it was a 10 inch square space.  Simple gear, no post processing.  Darren and Bryan really focused on seeing everyday things differently, Gabriel took a childs eye view and I tried for a theme of like pairs.

In my case I limited myself to the camera, 100mm lens, on camera flash and a plain black background.  As part of my constructed theme my right hand or portion thereof had to be in each frame.  I tried to find like pairs of things to put in the sequence such as pencil and pen, memory card and film box and fork and spoon.  Coming up with ten pair of like items, shooting them and pushing them out as JPEGs in the span of an hour was a bit challenging.  I found the images I created to be contrived and there was really nothing there I will keep or print, although I did get some ideas for things to do as individual stills.  The real issue I have is that a photograph should set the stage for the viewer to create a story around it, and the slideshow motif really took away from that although a couple of the individual images could be a starting point for more serious work.

The primary outcome of the assignment was to determine if fixed exercises can be beneficial.  We all concluded that they do, if they help you get your head outside of the box.  Each host plus me as guest offered up suggested exercises.  Mine is as follows;

Pick a location and a time.  Limit yourself to a timeslot to capture images.  Now you go to the location and may click the shutter twelve times for twelve images.  No more no less.  Get it right in the camera, because while you will have post processing available, the goal is not to do exposure, white balance, or serious cropping in post.  When I was starting out and shooting roll film this was a very popular exercise to force the photographer to look for and see the images because we could only get 12 shots on a roll of 120 film, although those shooting 645 could get fifteen.  Working with a twin lens reflex at the time, the square format was also a different way of composing that I really enjoyed.

The roll film exercise is a good one.  It creates constraints in multiple vectors and really does help you see

Tips to Make Better Images : Enhancing Your Editing Experience

If you're looking at this article, you probably would like to make your experience when editing better.  This isn't an article about a specific piece of software, or some workflow technique. Wacom MediumWhen we use editing software, many of us interact with it, using the same interface points as we do for the rest of our computing, hence using the keyboard, mouse and / or trackpad.  These are terrific tools and I'm not saying forget them, but if you really want to improve your editing experience, you have to add a tablet to your kit.
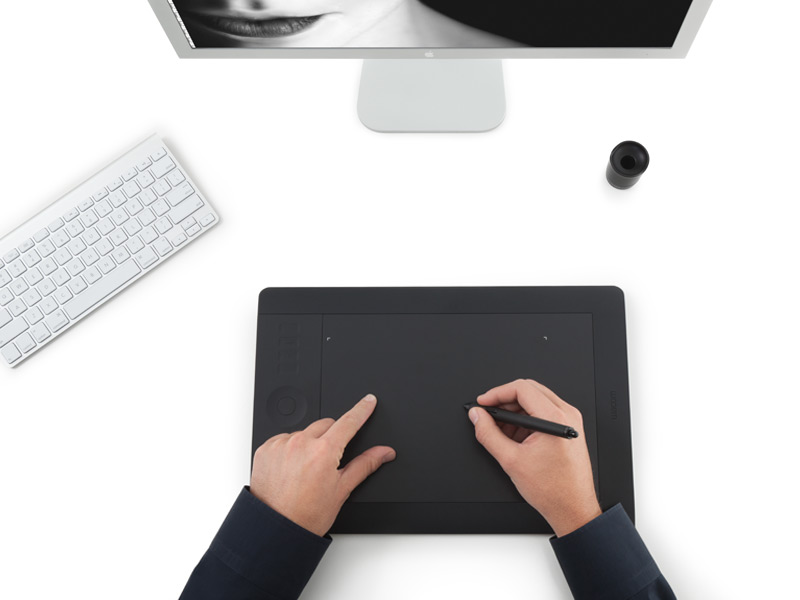
Oh wait you say, I can't use a tablet and pen because it's not working on the screen directly.  Not so my friend.  If you have created the skill to use a mouse or a trackpad, a tablet is very easy to add to your repertoire because you are working with a screen pointer in the same way.

Where tablets and pens ARE different is in the tactile area.  Just as with a pencil, you can press harder or more softly to change the strength of what you do.  Like a marker, you can angle the pen to the tablet and change the feel and the effect.  In fact, design tools like Photoshop even have brush palettes specifically for tablet pens.

If you've thought about this you know that there are multiple tablet lines and even model variances from single manufacturers.  I am going to make it simple for you.  Assumption A is that you are a photographer and that your primary use of the tablet will be for post processing.  If that's so, the Wacom Intuos lineup is what you want to look at.   Trust me on this, because I've spent hard earned money on different tablets and even different Wacom tablets.  Save a lot of time, pain and money and go directly to the Intuos.

It doesn't matter whether you use Windows or OS X as the tablets work with either operating system.  The drivers are solid and the installation is easy.  The biggest question is what size tablet to get.  Now budget may be a factor because larger is more expensive but take the time to think about this.  The Intuos comes in two flavours the 4 and the 5.  The 4 is only available in the Extra Large size while the 5 series come in small, medium and large.  If you have buckets of money they also make the Cintiq line which are tablets that are also IPS displays but that's a different story entirely.

The size of course is usually interpreted to reference the overall dimensions, but the important criteria is the working area.  The larger the working area, the more finite control you have, at the expense of portability and desktop real estate.  Unless you are a digital painter, you probably want to pass on the Extra Large.  Here are the working area dimensions for the three versions of the Intuos 5.

  • Small : 6.2" x 3.9"
  • Medium : 8.8" x 5.5"
  • Large : 12.8" x 8.0"

Wacom touchI've owned the large and used it on the desktop before I switched to the Cintiq, but I find myself working remotely and traveling a lot and so I bought the small version and find I use it all the time.  Once connected, i don't even use the mouse or trackpad as the tablet is so effective, even for non-editing some times.

Wacom is the top name in tablets.  You can get different pen types that give different feels, different nibs for different effects and in the 5 family there is even touch support.  I'm of two minds about touch.  It's fine if you want a big touchpad but I turn that off when editing because of interference between my hand edge and the pen.

I'd suggest looking at either the small or medium versions because of the balance of portability and flexibility, but decide what's right for you.  Whichever you choose, choose a tablet and you will absolutely see an improvement in your editing experience.  Yes there will be some acclimatization required but it will go quicker than you think.

Until next time, peace.