Removing the Creative Blockage

We've all been there as artists and creatives.  The place where nothing seems to work, where we feel stalled, stuck and perhaps even contemplating moving on to another interest.  I've been there as a photographer, a musician, as an archer, and am there now as a videographer.  It's not the end but it is cusp or inflection point, so I thought I would share how you can get past this point and grow again.Sometimes the easiest answer is to stop and take a break.  I did that a long time ago as a photographer.  I took a break, albeit too long a break.  The photographer I am today is a much better photographer than when I took the long break because in that time, I learned a lot, and apparently I am a slow learner. That Won't Work

I hear very often this very statement from folks I am mentoring, or students in a class or other people out on a shoot.  I offer the following guarantee.  If you say this, even mentally, you're right.  Don't even bother trying, you've already decided.  Sound foolish?  It is.  Stephen J. Covey made lots of people rebuild their thought patterns by encouraging them to start with the end in mind.  There is a ZEN principle, that says to envision the end before the start.  If your envisioned end doesn't work, you'll get there.

I Will Probably Fail

I surely hope so.  We are not expert at anything the first time we do it.  Or perhaps not even the thousandth time we do it.  While focused repetition can be the mother of skill, failing to fail is a guarantee of not learning anything.  To quote Alfred Pennyworth, "Why do we fall?  So we can learn to get back up."

I Don't Know How

At one time this is true for everything we do.  If you have learned to walk, at one time you could not.  If you read, at one time you did not.  If you speak a language at one time you could not.  None of these skills burst fully formed into existence.  We learned.  It took time.  We practiced.  We got better.  How is this different from art?  Does the great pianist play Rachmaninoff on the first day?  Was Adams' first image of Half Dome also his last image?   Focused repetition is the mother of skill and the availability of the knowledge to do new things is more available today than it has ever been.  That knowledge is not an end in itself, it is a tool to help you extend your creativity.

It Might Not Turn Out

Oh paean to negativity...  This very statement says that it might actually turn out.  So do it.  With a bit of positive orientation, it might just turn out, and if it doesn't you could be a step closer to when it does.  When I get an idea or concept in mind, I don't get there in one image capture.  It can take lots.  Sometimes so many I wonder why I keep trying.  But I get there often enough to keep going.  I don't play golf, but I am told by those who do that the one great shot makes up for the hundreds of truly horrible ones.

What If No One Likes It?

And to this I say, who the heck cares?   Van Gogh wasn't painting for someone else's pleasure, he painted because he had to, for himself.  By the way, he was not well appreciated in his lifetime, but now, hoo boy, major artist that fellow.  I know that it sounds anti-social but if you are making art with the primary goal of pleasing anyone other than yourself, you've started with the wrong end in mind.

I Don't Have Anything to Post Today

Good for you.  Be honest.  If you look at the tidal wave of images on social media. how many really capture you?  How many times do you plus or thumbs up something, purely because some one did that for you or you think you have some kind of social obligation to do so.  "Liking" stuff that you really don't like is destructive to your creativity.  It lowers the bar for acceptability and inhibits your ability to strive.  Don't get me wrong, I see some really compelling pieces of art when I bother to look at social media.  But those are the gems in an ocean of dreck that does nothing for me other than make my eyes hurt.  If you aren't posting every day, that doesn't make you a bad artist, it makes you honest and selective and by the way scarcity makes work more in demand than abundance.

I Cannot Think of Anything to Shoot

Right again.   Try this.  Stop thinking so hard about what to go shoot and just go shoot.  See with your mind open and something will reveal itself.  When I ride the motorcycle, I rarely take a camera because if I did, and if I stopped every time I saw something I would never get anywhere.  I make mental notes of what was revealed and will go back with time or seek out a similar reveal.  I need to stop more in the moment and count on seeing it again less.  It may not be there again.

My Work Will Not Be Well Received

If by this you mean that someone won't like your work, you're right and if you let this stop you, well you've made an intellectual decision to stop and let the voice of another change your existence.  It's a fact of life that for every piece of art, there is someone who hates it and that someone is probably the classless type of bottom feeder that he or she feels that others want to hear what he or she has to say.   A critique can be very useful.  A critic is good for organ donation.  And by the way, just because someone offers you a critique, sanctioned or not, the virtue of its existence does not make it valid, unless you decide it to be so.

Making Art Seems So Selfish and Everyone Knows Selfishness is Bad

I'm not sure who "everyone" is but they need to be drowned and soon.  No person can add value to anything before that person values and cares about himself or herself.  If you place no worth on yourself, you cannot place worth on anything else.  That's a parasite. Art is by definition selfish.  You make it yourself.  No one else makes your art.

Trust Yourself and Go Do

Not to be all Yoda-like but there really is no try, there is do or do not. The greatest barrier to creativity often lives between our own ears.  We create our own walls, often more formidable than those that others might try to erect in front of us.  For most readers, photography exists in a space covering hobby to passion to source of income.   There are always those who will criticize, not as help but as a way to exert power you grant them over you.  There's a two word phrase for those folks, and you are all smart enough to figure it out for yourself.

So go do.  You will love some of the work you do.  You will hate some of it.  You  will be thrilled.  You will be saddened.  Welcome to the human race.  Others may have more skills in some areas but they won't have your eye, so go make your own work seen with your own eye.  Do new things, do old things, do different things, do the same thing, just go do.   If that sounds like a simple answer, it is.  There really isn't more to it than that.   The best way to breach creative barriers is to recognize that they are of our own creation, and then to tear them down by determining that they add no value.

See the finished work, make the image, edit the image and do what you will with it.  Publish it, print it, hide it away forever, it's all your choice.  Make the choice to create.

First Look : Yong Nuo YN-E3-RT

I am a big fan of Canon's transition from infrared remote flash to using radio.  The 600 EX RT is a very powerful unit and by adding Canon's effective but pricey ST-E3-RT, you could control a bunch of 600s from the camera without using up a flash head on camera.  It works, but what if there were a more cost effective alternative?yne32There is.  It is from Yong Nuo.  This company is a known quantity amongst hot shoe flash people.  Training master #Scott Kelby has advocated use of Yong Nuo flashes for some time.  I have clients who live by the Yong Nuo radio triggers because they deliver radio based TTL flash control without inducing a month of Kraft Dinner for meals.  They just work. Yong Nuo even announced their clone of the 600 EX RT although that remains scarcer than hen's teeth for the moment.  At the same time, they announced the YN-E3-RT.  It's their version of the ST-E3-RT and the big difference is investment.  The Canon offering is great, but pretty expensive.  The Yong Nuo does what the Canon does and is less than half the price.  Yes you will be likely ordering it from China.  Mine took about 10 days to arrive.

There are some pretty cool benefits to the YN-E3-RT over the Canon unit.  Most importantly for me, is that it adds infrared focus assist.  Canon had this in the ST-E2 unit that worked with the 580 EX series.  It was not a well loved offering but it did have IR focus assist.  When the E3 from Canon came out, serious flashers asked WTF?  We're often shooting in conditions where the lighting that brings on the need for flash also doesn't provide enough light for regular Autofocus.  By including focus assist in the YN-E3-RT, Yong Nuo demonstrates that they listen to buyers, something Canon frequently has a problem with.

If you use the Canon unit on cameras older than 2012, max flash sync speed is 1/125.  Not awful but not what the camera may be capable of.  The Yong Nuo eliminates that barrier.  It also means that if you have an older camera, you can get group support in the flash system a missing unless you have a newer product with Canon's offering.

The Yong Nuo also arrived with a bunch of sync cables, that I don't recall getting with my Canon unit, although I may have misplaced them.

From a construction perspective, the units look identical.  Canon allows for either green or orange display, the YN does green.  No biggie.  I found the buttons on the Canon more precise and with a nominally better fit but if I did not have the side by side comparative capability, I probably would not know.  The Yong Nuo unit has a USB port so you can update the firmware on it.  The port is in the same place as the sync cable port on the Canon.  The YN-E3-RT comes in a padded nylon case that is virtually indistinguishable from the Canon model.

Canon's unit sells for about $385 where I live.  The Yong Nuo cost me $140 through Amazon Canada.  Some have complained that the IR AF assist in the YN doesn't cover all the focus points.  True, but the Canon unit doesn't cover any since it has NO autofocus assist.

Judge for yourself.  The Yong Nuo solves a couple of legitimate issues for me with IR focus assist and no throttling of flash function on my older 1D Mk IV.  I'm pleased so far.

Power for you, power for them - introducing WakaWaka

wakawaka1 We are all driven by the need for power for our electronic devices.  But what happens when you aren't near grid power?  Well my friends, there is power in the sky, and there are plenty of vendors who make solar power chargers, but how many of them also bring power to areas where the word "grid" has no meaning?That's what WakaWaka and the WakaWaka Foundation is all about.

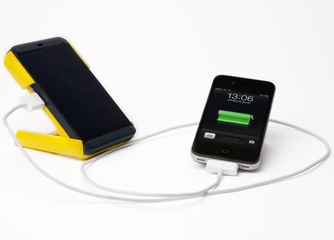
wakawaka2The Waka Waka is a solar charged battery system.  It is small, in a real world tough casing, available in black or yellow.  12 hours of sunlight brings it to a full charge.  Not only can you charge your mobile device off it, (an iPhone 5s charges from dead to full in 2 hours) you can also use it for supplemental light from 5 to 75 lumens delivered by high efficiency LEDs.  At low power, the WakaWaka can generate light for 150 hours on a full charge.  It also has a convenient tilter holder.

wakawaka3Did I mention it's tough?

When John Charbonneau of Nadel Enterprises Inc. (Canadian Distributor) was showing me the device he was literally pounding the countertop with it.

About the WakaWaka Foundation

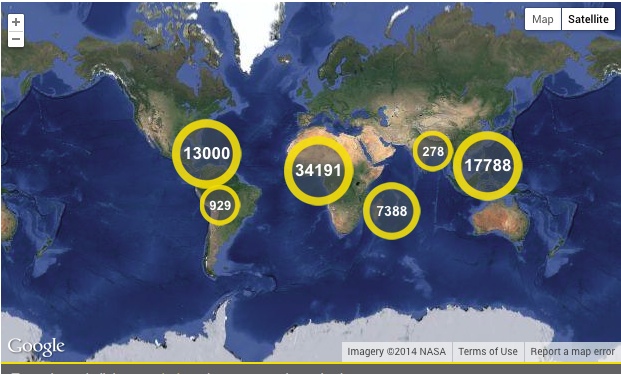
The idea here is to support folks living in areas of energy poverty, such as Haiti, Syria and Kenya.  The deal is pretty simple.  If you buy a WakaWaka power system, someone in a WakaWaka supported area gets their own power system.   They are working around the world already as you can see in this map.  Obviously the numbers are growing every day.

IMPACT_-_WakaWaka

You can learn more about the WakaWaka Foundation at their website.

Now to really make a difference, you need to buy one.  At least.  You can certainly purchase the WakaWaka power system online through the website, but if you live in Canada, you can also get one at Henry's   At this spring's Exposure show, Nadel was showing off the WakaWaka and customers could purchase one from the onsite Henry's staff.  If you missed it, no problem.  The black one is SKU 586NAD001 and the yellow is 586NAD002 and either one is $99.99.

wakawaka4You need portable power and light, so do folks elsewhere in the world, so get your own WakaWaka and put one in the hands of someone who desperately needs power.


DXO Optics Pro goes to V9.5

The folks at DXO have updated their well known optics package to version 9.5.  It's available for download now at their website, either as a trial or as a purchase.  Customers licensed for DXO Optics Pro 9 receive the update at no cost.  So what makes this update worthwhile? There are a number of great tools built into DXO Optics Pro.

DXO is best known for their incredible lens correction capabilities.  Unlike other products that use a general lens profile database, DXO builds profiles for lenses mounted to specific bodies.  The software downloads the profiles you need based on the EXIF data stored in the RAW files.  It makes for very comprehensive corrections.

DXO also includes their perspective correction algorithms that are richly used in DXO's Viewpoint software.  They are very good, even better than the correction algorithms in Photoshop CC, which is already superb.

DXO recently introduced their Smart Lighting algorithms.  They are programmatic adjustments for highlights and shadows and do a very good job very quickly.  Of course, there are also full overrides for the Smart Lighting settings.  What's great about this function is how well it works without you having to muck around with sliders and correct for colour shift if you push too hard.

DXO is not so well known for their noise reduction algorithms.  Most of us think of Nik's Dfine when it comes to robust noise reduction.  DXO has excellent noise management built in to the software as well.

What makes v9.5 so significant is that for the first time, DXO Optics Pro has a Lightroom plugin!  Now you can roundtrip directly from within Lightroom.  This is a very important shift and will definitely encourage more folks to try out DXO Optics Pro.

One last thing about DXO that is also not well known.  If you like to convert your RAW files into the open DNG standard but are not completely enamoured by Adobe's DNG Converter or the converter in Lightroom, you may want to check out the DNG conversion in DXO Optics Pro.  It is very effective but bear in mind that the file sizes are quite large as should be expected from a high definition uncompressed RAW file.

Finally! A point and shoot worth having - Sony RX100 III

Point and shoot cameras haven't made sense to me for a while.  I have an iPhone always with me and if I do my job it makes pretty decent images.  There are all manner of apps and stick on, clamp-on, bolt-on accessories for it.  I've even made decent sized prints from an iPhone image after work in the digital darkroom.  So why do I love this Sony? When the first iteration came out, the RX100, I arranged an evaluation with Henry's in Newmarket Ontario.  Sony's distinctly not P&S sensor, coupled with a good UI, excellent RAW performance and a stunningly good Intelligent Auto mode made for great images, quickly and in a nice small package.  It was pricey for a point and shoot, but if one was hunting image quality, it was the one to beat.   If only it had a viewfinder...

Then came the RX100II.  Faster CPU.  Still no viewfinder.  But it had a hotshoe, and the ability to add on a stupidly expensive optional electronic finder.  Why anyone would want a hot shoe on a tiny pocket camera was beyond me, as a flash of decent power would be three times the size of the camera.  Still a great sensor, great intelligent auto and good layout.  And a price increase.   Still missing a viewfinder.

Who's going to pay $800 for a point and shoot anyway?  Not the casual snapshotter.  This is a limited vertical market, for serious photographers who need something with great glass, great image quality, small size and a darn VIEWFINDER!

Third time is the charm.  The RX100 III that ships in June or maybe July hits the key indicators for me.  Faster Bionz X CPU.  20.2MP BSI-CMOS sensor.  Built in pop up EVF with 1.44M dots.  High performance video with clean HDMI out.  And of course the new lens.

What?  Did Sony replace the 28-100 2.8-4.9 Zeiss lens?

Yes they did.  The new lens is still from Zeiss and is a 24-70 equivalent f/1.8-f/2.8 variable aperture zoom.  Sony has given up some telephoto for more width and at least one stop faster optical performance.  Let's face it, 24-70 is a seriously popular range, loved by street and general look image makers.  The additional lens speed is very helpful and the new lens only increases the depth of the camera by about 3mm.

I have not had hands-on yet but I hope to as soon as one is available.  Initial first looks around the web are very positive.

Pricing is presently listing at $899.99, we'll see what the retailers do when it comes out.  I expect the initial street price to be high and then to see it level out about 60 days post release.

Specifications (courtesy Sony Canada)

Product Specifications

  • Software

    • Operating System Compatibility : PlayMemories Home: Windows® XP SP3, Windows Vista® SP2, Windows®7 SP1, Windows®8 (PlayMemories Home is not Mac compatible); PlayMemories Online Uploader: Windows XP SP3, Windows Vista®SP2, Windows®7 SP1, Windows®8, Mac OS X (v10.5- v10.8); Image Data Converter Version 4.2: Windows® XP SP3,Windows Vista® SP2,Windows®7 SP1,Windows®8, Mac OS X (v10.5- v10.8)
    • Supplied Software : Supplied Software: PlayMemories™ Home, Image Data Converter Version 4 (via software download from camera)
  • Advanced Features

    • Image Stabilization : [Still Image] Optical [Movie] Active Mode, Optical type with electronic compensation (Anti-rolling)
    • Auto High Dynamic Range : Yes, (Auto Exposure Difference, Exposure difference Level (1-6 EV at 1.0 EV step), off)
    • Sweep Panorama : Horizontal (Wide/Standard), Vertical (Wide/Standard)
    • Face Detection : On, Off, Face Registration, Face Selection; maximum eight faces detected
    • Priority Setting (for Face Detection) : Yes (eight faces max) New Registration / Order Exchanging / Delete / Delete All
    • Smile Shutter™ technology : Smile shutter (selectable from 3 steps)
  • Camera

    • Camera Type : Cyber-shot® Digital Still Camera
    • Lens Compatibility : Fixed lens
    • Colour : Black
  • Convenience Features

    • Media/Battery Indicator : Yes
    • View & Index : Single (with or without shooting information), RGB histogram and highlight/shadow warning, 4/9-frame index view, Enlarged display mode (L: 13.6x, M: 9.9x, S: 6.8x), Auto Review (10/5/2 sec, Off), Image orientation (On/Off), Slideshow, Panorama scrolling, Folder selection (still), Forward/Rewind (movie), Delete, Protect
  • Drive System

    • Continuous Shooting Speed : 10 fps at 20.2MP
    • Burst Buffer : JPEG Standard (12 shots) JPEG Fine (12 shots) RAW (13 shots) RAW+JPEG (10 shots)
    • Shutter Speeds : iAuto (4 - 1/2000) / Program Auto (1 - 1/2000) / Manual (Bulb, 30 - 1/2000) / Aperture Priority (8 - 1/2000) / Shutter Priority (30 - 1/2000)
    • Self-timer : 10 sec. / 2 sec. / Self-portrait One-person/ Self-portrait Two-person/ Self timer Continuous (3 or 5 shots)
    • Drive Mode : Single-shot, Continuous, Speed Priority Continuous, Self-timer (10/2 sec. delay), Self-timer (Cont.), Self-portrait One-person, Self-portrait Two-person, (with 10 sec. delay; 3/5 exposures), Bracketing
  • Exposure System

    • D-Range Optimizer : Off, Dynamic Range Optimizer (Auto/Level 1-5), Auto High Dynamic Range: Off, Auto Exposure Difference, Exposure difference Level (1.0-6.0EV, 1.0EV step)
    • Auto Exposure Lock : Yes (AE Lock button). Can be disabled from menu
    • Exposure Compensation : +/- 3.0 EV, 1/3 EV step
    • Minimum Illumination : Movie: Auto:1.2lux(Shutter Speed 1/30")
    • Picture Effect(s) : [Still Image] Toy Camera, Pop Color, Posterization, Retro Photo, Soft High- key, Partial Color, High Contrast Monochrome, Soft Focus, HDR Painting, Rich-tone Monochrome, Miniature, Watercolor, Illustration [Movie] Toy Camera, Pop Color, Posterization, Retro Photo, Soft High-key, Partial Color, High Contrast Monochrome
    • Exposure Settings : [Still] Superior Auto, Intelligent Auto, Program Auto (Program shift available), Shutter Priority, Aperture Priority, Manual, Scene Selection, Movie, Sweep Panorama [Movie] Program Auto, Aperture Priority, Shutter Priority, Manual
    • Scene Mode(s) : Anti Motion Blur, Fireworks, Gourmet, Handheld Twilight, High Sensitivity, Landscape, Macro, Night Portrait, Night Scene, Pet Mode, Portrait, Sports Action, Sunset
    • Metering Modes : Multi-segment, Center-weighted, Spot
    • Metering Sensitivity : EV 0 to 20 (at ISO100 equivalent)
    • ISO : Auto(ISO125-12800, selectable with upper / lower limit),125/160/200/250/320/400/500/640/800/1000/1250/1600/2000/2500/3200/4000/5000/6400/8000/10000/12800 (Extendableto ISO80/100),Multi-Frame NR:Auto(ISO125-12800), 200/400/800/1600/3200/6400/12800/25600
    • Creative Style : Standard, Vivid, Neutral, Clear, Deep, Light, Portrait, Landscape, Sunset, Night Scene, Autumn Leaves, Black & White, Sepia, Style Box
    • Color Temperature : 2500 – 9900K with 15-step each Magenta/Green compensation (G7 to M7), Amber/Blue (A7 to B7), Custom
    • ISO Sensitivity (Movie) : Auto:(ISO125Level-ISO12800Level, selectable with upper / lower limit), 125/160/200/250/320/400/500/640/800/1000/1250/1600/2000/2500/3200/4000/5000/6400/8000/10000/12800
    • White Balance Mode : Auto / Daylight / Shade / Cloudy / Incandescent / Fluor (Warm White) / Fluor (Cool White) / Fluor (Day White) / Fluor (Daylight) / Flash / C. Temp., Filter / Custom
    • Exposure Bracketing : 3 continuous or single shots in 1/3 or 2/3 EV steps
    • WB Shift : G7-M7,A7-B7
  • Flash

    • Flash Bracketing : ±2.0 EV
    • Flash Metering System : Pre-flash TTL
    • Flash Compensation : ±2.0 EV (switchable between 1/3 EV steps)
    • Recycling Time : Approx. 3.4 sec.
    • Flash Modes : Auto / Fill-flash / Slow Sync / Rear Sync / Off
    • Flash Coverage : ISO Auto: 1’ to 49’ 2” (0.30m to 15.0m) (W) / 1’ 9” – 18’ 8” (0.55m to 5.7m) (T) ISO 12800: Up to 98’ 5” (30.0m) (W) / 37’ (11.3m) (T)
    • Flash Type : Built-in, Pop-up Auto
  • Focus Control

    • Focus Features : Predictive control (AF-A, AF-C), Focus Lock
    • AF Illuminator : Built-in LED, Range: approx. 3' 4” - 9' 9” (0.3m-3.0m)
    • Focus Sensitivity : EV 0 to 20 EV (at ISO100 equivalent)
    • Focus Area : Multi point AF (25 points) / Continuous AF / Single Shot AF / Flexible spot (S/M/L) / Lock on AF (Wide/Center/Flexible Spot (S/M/L))
    • Focus Points : 25 points
    • AF Modes : Single-shot AF (AF-S) / Continuous AF (AF-C) / Direct Manual Focus (DMF) / Manual Focus
    • Focus System : Contrast-detect AF
  • Imaging Sensor

    • Pixel Gross : 20.9M pixels (approx.)
    • Focal Length Conversion Factor : 2.7x
    • Color Filter System : RGB primary color filters
    • Effective Picture Resolution : 20.1M pixels (approx.)
    • Imaging Sensor : Exmor® R 1.0” CMOS sensor (13.2 X 8.8mm) (3:2 aspect ratio)
    • Processor : BIONZ® X image processor
  • Interface

    • NFC : Yes (NFC Forum Type 3 Tag compatible, One-touch remote, One-touch sharing)
    • DC IN : Yes, via AC-UB10 AC charger and USB cable
    • Memory Card Slot : Dual compatibility slot: Memory Stick PRO Duo™/Pro-HG Duo™/PRO-HG HX Duo™ media - SD, SDHC and SDXC memory card
    • HD Output : HDMI® (Type D micro)
    • Wi-Fi : Yes
    • Accessory Shoe : Multi Interface Shoe
    • Tripod Mount : Yes (1/4" diameter, 20 threads per inch)
    • Remote Commander : Yes, via RM-VPR1
    • PhotoTV HD : Yes, with BRAVIA Sync enabled HDTV and HDMI® cable
    • USB Port(s) : USB 2.0 Hi-speed (mass-storage, MTP)
    • BRAVIA® Sync™ : Yes, via HDMI® with compatible BRAVIA HDTV (link menu)
    • Microphone Input : Via MI Shoe + Optional ECM-XYST1M
  • LCD Display

    • Peaking : Yes Level setting: High/Mid/Low/Off Color: White/Red/Yellow
    • Real-time image adjustment display : Yes (On/Off)
    • LCD Type : 3.0” (7.5cm) (4:3) / 1,229,000 dots / Xtra Fine / TFT LCD / Tiltable (Up by approx. 180degrees, down by approx. 45degrees.)
    • Coverage : 100% Field of View
    • Angle Adjustment : Tilt angle: Up by approx. 180degrees, down by approx. 45degrees
    • Histogram : Yes (On/off)
    • Live View : Continuous Live View
    • Brightness Control : Auto / Manual(5 steps) / Sunny Weather
    • Grid Display : Yes (Rule of Thirds, 4x6 Square, Diagonal & 4x6 Square Grids, Off)
    • Customization : Grid, Histogram display, Digital Level Gauge, Grid Line, Magnified display for playback
  • Optics/Lens

    • Optical Zoom : 2.9x (Optical Zoom during movie recording)
    • Minimum Focus Distance : iAuto: AF (W: Approx. 5cm (0.17 ft.) to Infinity, T: Approx. 30cm (0.99 ft.) to Infinity) / Program Auto: AF (W: Approx. 5cm (0.17 ft.) to Infinity, T: Approx.30cm (0.99 ft.) to Infinity)
    • Lens Type : Carl Zeiss® Vario-Sonnar T*
    • Aperture (Max.) : F1.8(W)-2.8(T)
    • Aperture : F1.8 - 11 (W), F2.8 - 11 (T)
    • Aspheric Elements : 9 aspheric elements including AA lens
    • Aperture Blade : Iris diaphragm (7 blades)
    • Digital Zoom : Still image: 20M Approx.11x / 10M 16x / 5M 23x / VGA 44x; Movie: Approx.11x
    • Lens Construction : 10 elements in 9 groups (9 aspheric elements including AA lens)
    • Steady Shot Mode:Active : [Still image] Optical [Movie] Active Mode, Optical type with electronic compensation (Anti-rolling)
    • ND Filter : Auto / On(3 steps) / Off
    • Clear Image Zoom : Still Image: 20M Approx. 5.8x / 10M 8.2x / 5M 11x / VGA Approx. 44x; Movie: Approx. 5.8x
    • Focal Length (35mm equivalent) : [Still Image 3:2] f=24-70mm [Still Image 16:9] f=26-76mm [Still Image 4:3] f=25-73mm [Still Image 1:1] f=30.5-89mm [Movie 16:9] f=25.5-74mm (SteadyShot Standard), f=30-86mm (SteadyShot® Active Mode), f=33.5-95mm(SteadyShot Intelligent Active) [Movie 4:3] f=31-90mm (SteadyShot® Standard), f=37-105mm (SteadyShot Active Mode), f=41-117mm (SteadyShot InteligentActive)
  • Power

    • Battery Type : InfoLITHIUM® NP-BX1 (3.6V)
    • Power Requirements : AC 100V to 240V, 50/60 Hz, 70mA
    • Power Consumption (in Operation) : Approx. 1.8W
    • Number of Still Images : Approx. 320 images with LCD monitor (CIPA standard)
    • Battery Capacity : 4.5Wh (1240mAh)
  • Recording

    • Panorama Still Image Size : Wide (12,416×1,856/5,536×2,160), Standard(8,192×1,856/3,872×2,160)
    • Audio Format : XAVC S: LPCM 2ch; AVCHD:Dolby Digital(AC-3) 2ch(Dolby Digital Stereo Creator); MP4:M PEG-4 AAC-LC 2ch
    • Video Format : XAVC S / AVCHD Ver. 2.0 / MP4 (MPEG-4 AVC (H.264))
    • Video Mode : XAVC S: 60p 50M(1,920x1,080/60p) / 30p 50M(1,920x1,080/30p) / 24p 50M(1,920x1,080/24p) / 120p 50M(1,280x720/120p) AVCHD: 28M PS(1,920x1,080/60p) / 24M FX(1,920x1,080/60i) / 17M FH(1,920x1,080/60i) / 24M FX(1,920x1,080/24p) / 17M FH(1,920x1,080/24p) MP4: 12M(1,440x1,080/30fps) / 3M VGA(640x480/30fps)
    • Color Space : sRGB standard (with sYCC gamut) and Adobe RGB standard compatible with TRILUMINOS™ Color
    • Still Image Size 16:9 : L:17M(5,472×3,080) / M: 7.5M(3,648×2,056) / S: 4.2M(2,720×1,528)
    • Still Image Size 3:2 : L: 20M(5,472×3,648) / M: 10M(3,888×2,592) / S: 5M(2,736×1,824)
    • Still Image Mode : JPEG (Standard, Fine), RAW, RAW+JPEG
    • Media Type : SD, SDHC and SDXC memory card; Memory Stick PRO Duo™/Pro-HG Duo™ media
    • Still Image Max Effective Resolution : 20.1 Megapixels
    • Still Image Size 4:3 : L: 18M(4,864×3,648) / M: 10M(3,648×2,736) / S: 5M(2,592×1,944)
    • Video Signal : NTSC color, EIA standards
    • Microphone/Speaker : Built-in Stereo Microphone / Mono Speaker
    • Still Image Size 1:1 : L: 13M(3,648×3,648) / M: 6.5M(2,544×2,544) / S: 3.7M(1,920×1,920)
    • Mic Level Control : 16 steps
    • Still Image File Format : JPEG (DCF Ver. 2.0, Exif Ver.2.3, MPF Baseline compliant), RAW (Sony ARW 2.3 format)
    • Wind Noise Reduction : Yes (On/Off)
  • Service and Warranty Information

    • Limited Warranty Term : 1 Year Parts & Labor
  • Viewfinder

    • Type : 0.39" SVGA electronic viewfinder(OLED), 1,440,000dots
    • Magnification : Approx. 0.59x with 50mm lens at infinity, -1m1(diopter) (35mm equiv.)
    • Diopter Adjustment : -4.0 to +3.0m-1
  • Weights and Measurements

    • Weight(Approx) (Main unit only) : 9.3 oz. (263 g)
    • Dimensions (Approx.) : 4 " × 2 3/8 " × 1 5/8 " (101.6x58.1x41.0 mm) excluding protrusions
    • Weight (Approx.) : With battery and Memory Stick PRO Duo Approx.10.2 oz. (290 g)

Google updates Nik Analog Efex Pro to Version 2

Earlier this week, the Nik Collection was updated with the big change being the release of the second version of Analog Efex Pro, now seen as Analog Efex Pro 2.0 Existing Nik customers should receive the update automatically but if you are like me and the updates are random and flaky, you can download the latest release at www.google.com/nikcollection.  If you have a licensed version installed, the update uses the existing license without problem.  It also leaves Analog Efex (V1) intact, although I'm not sure why you would care to do that.

In the new version, Nik has added Control Points (commonly found in other Nik products) and more camera presets.

If you've never used Analog Efex Pro, it applies film looks to your photographs a la Instapuke (that thing someone call Instagram).  More accurately it is more like some of the other many film look plugins.  Analog Efex Pro 2 also adds what they call the "camera kit" that allows you to "assemble" a camera model with your own custom look.

I did my own install and played around a bit and then watched Google's Brian Matiash on The Grid with Scott Kelby.  Mr. Matiash is very excited about the offering and I find him to be a sincere fellow and not a corporate shill.

To my chagrin, I did learn that the trending photo effect is the double exposure, so we can all expect to see thousands of posts of horridly awful double exposures to come.  But, I digress...

i know that making perfectly good photos look fuzzy and fogged and noisy is a really popular thing to do, and if you like this sort of thing, Analog Efex Pro 2 really gives you a ton of control and with the same simple and powerful user interface found in other Nik products.

To each their own.  I found no practical use for the original and cannot imagine why I would want to dig into this offering either given that if I want a filmic look, I will shoot film and get the real thing.  I can screw up my images without the need to use software to make them look crappier.  Your mileage may vary.

Now available! OnOne Perfect Photo Suite 8.5

Released today is the latest release of OnOne Software's superb plugin and standalone editing software #Perfect Photo Suite.  Version 8.5 is a FREE upgrade for V8.0 licensees. New and returning users can expect richer masking and significantly improved photo browser performance.  Here's the press release courtesy of my friend's at OnOne.

And don't forget if you buy your license through this site, you help support The Photo Video Guy!

****PRESS RELEASE****

Perfect Photo Suite 8.5 Now Available - Photo Editor for Adobe Lightroom, Adobe Photoshop, Apple Aperture, and standalone use.

Update adds super-fast photo browsing, more file-management options, and improvements to the Perfect Eraser and Masking Bug tools.!
Portland, OR - May 13, 2014 - onOne Software, Inc®., the leading developer of innovative digital photography solutions, today announced that Perfect Photo Suite 8.5 is now available, a new version of its full-featured photo editor, which works as a plug-in with Adobe Photoshop, Adobe Photoshop Lightroom, and Apple Aperture, as well as a standalone app. Version 8.5 includes speed and productivity enhancements to the Perfect Photo Suite’s Browse module, improved performance with the Perfect Eraser tool, and enhanced masking support in Perfect Effects and Perfect Layers. In addition, RAW file support is now included with the Standard Edition in version 8.5.

Perfect Photo Suite 8.5 is available today as a free update to all owners of Perfect Photo Suite 8. It supports Photoshop CC, CS6, and CS5; Lightroom 5 and 4; Photoshop Elements 12, 11 and 10; and Apple Aperture 3.

onOne’s Perfect Photo Suite includes eight powerful, integrated applications, each one targeted to a specific photo-processing task:

* Perfect Effects. The richest and most versatile photo-stylization tool available on the
market today. It includes an extensive library of one-click presets, fully customizable
and adjustable effects and powerful masking tools, all of which help make your photos !pop. 
* Perfect Enhance. Offers essential tools for basic enhancements, including brightness, contrast, sharpening and color cast removal. Enhance also has retouching features like the Perfect Eraser and a Clone tool, which makes it easy to remove objects, fix dust spots and repair flaws in a photo.

* Perfect B&W. Create stunning photos that recreate the timeless look created by the masters of black and white photography. Perfect B&W adds dramatic and elegant looks to photos, letting you easily create the many moods black and white
! photography can evoke, resulting in beautiful, one-of-a-kind photos.!
* Perfect Portrait. Offers simple, yet powerful, portrait retouching, with automated feature detection and enhancement tools to smooth skin, remove blemishes, brighten eyes and teeth, and correct skin color. Fast processing speeds also allow photographers to retouch images quickly for simply stunning portraits.

* Perfect Mask. Creates high-quality masks quickly and easily with automated functionality and powerful tools that make selecting subjects and isolating
!backgrounds for removal extraordinarily accurate.

* Perfect Layers. Gives photographers the ability to combine images and extend their photo-editing options in a layered file workflow without Photoshop. Photographers can create and edit multi-layered files with Perfect Layers directly from Lightroom, Aperture or when using the Perfect Photo Suite as a standalone application. Also included are blending modes, textures, borders, PNG file support, and the powerful
edge-detecting Perfect Brush.

* Perfect Resize. Still the industry standard for photo enlargement. It is renowned across the photographic and printing industries for its ability to increase image size well over 1000% without the loss of sharpness or detail that is normally expected. Proven Genuine Fractals technology has been applied to algorithms that optimize the clarity and detail of different photo types, including mobile snapshots.

* Perfect Browse. Quickly get to the photos you want to edit wherever they're stored— whether they're on your computer, network, or on a cloud-based storage service. Now includes one of the fastest previews available for browsing photos. Also great for viewing photos side-by-side in a thumbnail grid or in a larger, more detailed view along with important metadata and navigate through them with intuitive keyboard 
shortcuts.

In addition, all Perfect Photo Suite 8 customers are automatically enrolled in the onOne Loyalty Rewards program. Each month customers receive free product add-ons such as presets, textures, backgrounds, ebooks, and other creative assets to help expand their photo editing arsenal and get the most from onOne products.

Availability and Pricing

Perfect Photo Suite 8.5 is now available. Existing owners of Perfect Photo Suite 8 are eligible for a free update. New users may purchase the Premium Edition for $179.95 or the Lightroom & Aperture Edition for only $99.95. The Standard Edition, a standalone application, is available for $79.95. Owners of earlier versions of the Perfect Photo Suite can upgrade to the Premium Edition for $99.95 or the Lightroom & Aperture Edition for $79.95. 

For more information on Perfect Photo Suite 8.5 release, please visit www.ononesoftware.com.

About onOne Software
onOne Software, Inc., a leading developer of innovative software tools for photographers, develops time-saving software solutions for professional and advanced amateur photographers. onOne Software solutions have been created to help photographers spend more of their time behind the camera taking pictures instead of the computer workstation. Such solutions include a wide range of easy-to-use standalone applications and plug-in enhancements for Adobe Photoshop, Photoshop Elements, Photoshop Lightroom, and Apple Aperture. Founded in 2005, onOne Software is a privately held company located in Portland, Oregon. For additional information, visithttp://www.ononesoftware.com or call 1-888-968-1468.

General Press Inquiries: press@ononesoftware.com
 Online Press Center: http://www.ononesoftware.com/press
 onOne Software Blog: http://www.ononesoftware.com/blog

A seriously awesome Freebie! Perfect Effects 8

My friends over at OnOne Software are doing everyone a good one, but for a limited time only.  Click here to get the awesome Perfect Effects 8, key element of the Perfect Photo Suite that sells for $100 on any normal day of the week, for FREE. Yes, that's right friendly friends, FREE.  What more could one ask for?  No, don't send me your list, instead click here to go get your free copy of Perfect Effects 8.

Did I mention awesome?  How about FREE?

Creativity in an Ocean of Tech

I'm just back from the April edition of Photoshop World #PSW in Atlanta Georgia.  This was my fourth Photoshop World and I heard some very different messages from what I have heard in the past.  Posting what I was hearing to Google Plus engendered some "interesting" replies, some positive, some highly negative, and that, in addition to the pushing by my shooting buddy Isabel, has prompted the writing of this article. Photography is, or can be, very technical.  As a founder of a camera club, I constantly hear about concerns for what settings were used for a particular shot.  As an educator, I am frequently asked, what the right aperture or shutter speed is for a particular situation.  As a reviewer of photography and video products, I am asked which is better, or best.

I've struggled with this for a long time.  I can teach technique or explain the physics of light or help people "get" the exposure triangle, but I have been troubled by the tech-centricity of what I see in our photographic world.  Manufacturers assault us with techno-babble, megapixels, focus zones, patterns and rates.  All interesting I suppose and perhaps helpful in a purchase decision but not really relevant to your execution of your craft.

I heard very clearly from photographers and educators that I respect a great deal that basically settings don't matter.  In a one on one, an internationally respected photographer bluntly told me that studying someone else's EXIF was more harm than good.  These messages fly in the face of what many say, and I see educators placing a lot of emphasis on these things, and yet their students are not coming away less frustrated or as better photographers.  If all this stuff is so important, why are these aspiring photographers so unhappy?

When I look at the work that inspired me, and the photographers that created these images, I don't see the settings, I see the final art.  Sharp or soft focus, deep or shallow depth of field, motion blur or not, all these things go to create the story, the character and the emotion of the photograph.  I don't know what settings Eisenstadt used to make the photograph of the skating waiter from Switzerland, and in the end, they don't matter.  What matters is the story that the photograph tells about the time, the place and the culture.  When the world gasped at Steve McCurry's photograph of the Afghan girl as shown on the cover of National Geographic, no one cared about the exposure data.  (It's not published but I am pretty sure it was shot on Kodachrome 64).  What captured the eye was the story, or the framework for the story the viewer created for him or herself based on the facial expression.

Let me make this clear.  Settings matter in so far as they assist you to take a sharp, well-exposed picture.  But having done this for over forty years, you and I know that there are lots of exposure options that will get us a well-exposed picture.  We also know that getting  important subjects sharp is not all that hard, it's been done for well over a century.  Those are table stakes.  You don't get to play the game without them.  A friend of mine does online mentoring.  One of his exercises forces the student to put the camera in Full Auto or Program mode.  Lots of his students feel like their hands are tied.  At first.  My friend Gabriel jokes that the P stands for Photographer.  It doesn't but I suspect that in the minds of the manufacturer's rep it stands for "decent Picture".  Creativity is not forged in knowing your settings or your EXIF, it is only forged in experimentation, in spending time seeing as opposed to playing with dials and buttons.

In my composition classes, I teach the principles of composition.  We all know at least one, typically the Rule of Thirds.  It's not a rule because it's unenforceable, but it is a framework to start from and when all else fails, if you use it, at least your composition has a chance of being interesting.  I find it fascinating when I hear so called educators tell folks who are working to develop their compositional eye, that the rules are there to be broken, so go so far as to add only when you understand the rules can you break them but the general message is that these artistic guides are really worthless and that unfocused rebellion makes for better images.  This is, as you might expect, a crock of poop.

Composition rules will not create your compositional eye.  You won't learn to see solely by following the rules of composition, but they will help you to get away from plopping everything dead centre and you may in fact find that the rules help you build compositions that foster your creative mien rather than restrain it.

There's a big difference between taking a picture and making a photograph, as much as the difference between scribbling with a pencil on a napkin and painting oil on canvas.  The difference is what Canadian great Freeman Patterson calls "Seeing".  Others refer to the process as perceiving.  I don't care what you call it, that is considerably less relevant than that you do it.  I've made photographs where viewers have said "but is that what was really there?"  My answer is "that's what I saw".  The two are not necessarily the same thing.  A made photograph has emotion, a framework, a story.  It's not just visual, you can smell the waves or the flowers, you can hear the wind in the trees, you can feel the sunlight on your face.  I read of an impressionist painter who said he painted music.  And for him, he did.

When I see, I see the potential for finished work, not just what is in the viewfinder.  While I work hard to get things right in camera, I choose to include the digital darkroom as an integral part of my creative process.  The digital darkroom is not where I correct mistakes, although I have done so, it's really where I complete the image.  Just like you, I've encountered people who call the digital darkroom dishonest or fake.  Photoshopping is now a verb, rarely used in positive context, yet if you are really embracing creative experimentation, it's another tool in your creative arsenal.  I've been part of conversations where I hear work described as having been "Nik'd" meaning unduly processed in the Nik suite.  I like the Nik tools but they aren't an end in themselves, they're just a tool and when they are applied the same way to every picture, they aren't helping.  That's not creative it's brute repetition.  Now some would argue that "it's workflow".  I don't see this since by their nature, every image is its own, so how could the same post processing apply to everything the same?   As a creative person, do you reduce every picture you take to effectively hitting it with the same stupid Instagram treatment?

Creativity is colour, and lines and shadows.  It's perspective and perception.  A razor sharp picture of a statue seen from the standing position is evidence, not art.  If all you see is that sharp statue at eye level, feel free to take a picture of it, but that's not making a photograph.

Great photographs aren't great because of shutter speed, or aperture, or ISO or lens or camera.  Those are all just tools and can be used well or poorly by the tool holder.  A great photograph is made.  It answers questions.  I have taken thousands of pictures and so have you where you look at them and go "uh huh, nice, um why did I take this?"  We have to agree to ask the questions up front before banging out 12 frames per second.  Why am I pressing the shutter?  What story do I want to remember?  What story would I like viewers to see?  What message am I trying to send?  What's the relevance of this moment?  Why does it matter?  Who cares or will care about the subject?

To grow as photographers we need to be able to answer these questions and many more.  And, contrary to the proselytizers of "community" and "social" and a bunch of similar and ultimately meaningless buzzwords, the only answer that really matters is your own.  If you are out there trying to make photographs to please others, sorry kiddo, you're doing it wrong.  If you feel sick to your stomach because you haven't posted anything to the social network du jour, stop making yourself sick.  Vivian Maier is now recognized as one of the greatest street photographers of the last century.  She made photographs for her pleasure first and only.  We would never have seen them at all had someone else not discovered them after her passing and had a "oh wow" moment.  She never wanted to "share" or "post"  She was the most honest kind of artist, the kind that doesn't care what someone else thinks.  Would she be pleased to learn how much her work has done for viewers?  I have no idea. My guess is that it wouldn't matter all that much to her.

So let's suppose that growing as an artist and enhancing your craft is important to you.  What do you do?   Look at other photographer's work.  Examine what you like and don't like.  You're right.  Learn to see by asking yourself every day what exactly you see.  You'll be thrilled to learn that you see much more than what is there.  Stop chasing the daily theme on the social network and being driven to post on some bogatz community where the end in mind is not to foster art but to sell you something.  Don't get hung up on settings and EXIF and the latest gewgaw.  Ask the hard questions before you press the shutter.  BUT PRESS THE SHUTTER.  And the only way that really works is if you always have a camera with you.  Certainly to take pictures, but sometimes to step across the line, and to make a photograph.

If there's no emotional commotion, it's not a photograph.

Episode 90 - The Photo Video Guy Podcast

Nikon announces a replacement to the existing 18-300 DXNikon releases a new short film shot entirely on the D4s Nikon may actually have a replacement shortly for the much loved D300s. It will be called the D9300 and that's all that's known at present Nikon 1 J4 has new sensor, better AF and Wifi Canon has announced a firmware upgrade for the C500 using Intel Iris Pro Graphics Canon announces cine lenses at NAB. 17-120/T2.95 with digital drive handgrip and the HJ18ex7.6B portable HD zoom for broadcast applications Canon has acknowledged an issue with cold weather autofocus problems with the 1Dx and 1Dc Canon acknowledges issue with noisy focus rings on 24-70/2.8 L II USM lenses Canon announces two new compact pro camcorders, the XF205 and XF200 with a 20x optical zoom. Both record in MXF and MP4 and will be available in July Olympus updates firmware on OM-D E-M1 to include anti shock electronic first curtain, to be used at shutter speeds below 1/320 Mockups of the allegedly forthcoming OM-D OM-G are out. Thought this was April Fools but might not be Olympus being sued for $273M by Japanese banks Apple patents a bayonet style lens mount Leica announces a $5K credit towards the Leica S DXOmark says the Sigma 18-200 OS is the best superzoom for your crop sensor Canon Sigma's 50/1.4 ART lens is available and reviews love it best $949 Transcend has announced U3 cards suited for 4K video capture Sony has announced the A7S with 4:2:2 4K video, 12MP great low light, 50MBPS Adobe announces Lightroom Mobile and Lightroom 5.4


Episode 89 - The Photo Video Guy Podcast

RED Epic Dragon sets a record on DxOmark with a score of 101Canon #1 in DSLR / ILC sales 11 years in a row Fortune ranks Canon as one of the world's most admired companies Canon updates firmware for the 6D Nikon has issued unsecured straight bonds The D4s is now shipping with limited stock Nikon wins a 14.5M settlement from Sigma for patent infringement around VR Nikon getting into the video training business, but you've seen this content before. Nikon announces the 1 V3, fastest camera on the market and two lenses 70-300/4.5-5.6 and 10-30/3.5-5.6. And a spring loaded lens cap.??? No viewfinder, uses micro SD cards Nikon D4s has issues with some Lexar 400x and 1000x cards Nikon is expected to release the 1 J4 shortly Nikon updates firmware for the D4 Nikon officially announces it will replace defective D600 cameras with a replacement D600 or "equivalent" China has ordered Nikon to stop selling the D600 DxO Optics update adds support to the D4s Rumours start for Nikon D800s Leica will officially announce the T type 701 on April 24th. Interchangeable lens with APS-C sensor between M and X series French fashion brand Colette has a Hello Kitty and a Playboy edition of the Leica C. Hell has now frozen over Fujifilm X-E2 not revolutionary but very positively evolutionary Initial looks at the Fujifilm X-T1 say good camera but the usual fawning and sucking is absent Panasonic announces the Leica DG Summilux 15/1.7 for m43 about $600 Panasonic has announced price and availability for the DMC-GH4. The body will cost $1699 and the bolt on video interface will sell for $1999 Sony has firmware updates for the A7 and A7r on March 19th 500px has put their Prime selling service into play. Photos sell for a flat rate of $250 for unlimited use and the photographer gets 70%. Listings are exclusive Getty and Flickr partnership is over Calumet Photographic files for chapter bankruptcy, closes all US stores NTSB Judge strikes down FAA suit against photographer for using a drone camera. Red Giant is now offering their software on a subscription basis instead of as license purchases Hungarian law now bans photos taken without consent - be careful on your vacation

REVIEW : The Phantom II Vision

DJI00006.jpg

Drone helicopters with cameras are the "in" thing, so when Chris Atkinson of Henry's Newmarket asked if I would like to do an evaluation and review of the Phantom II Vision, I jumped at the chance. It's Wicked Cool

Overview

So what is a Phantom II Vision?  It is a four rotor radio controlled helicopter with an attached servo driven camera.

The four rotor system with two pairs of rotors spinning in opposite directions to each other makes for a very stable "rotating wing" architecture.  Traditional dual rotor helicopters are difficult to fly well, whereas the four rotor or "quadcopter" design can be flown by those who are not pilots or without days of practice and multiple crashes.  Radio controlled means you fly it wirelessly via a pair of joysticks.  I will refrain from joystick competency jokes here, suffice to say that the joysticks are not overly sensitive but also that they have real linear control, not just full on and full off.  Have a servo driven camera means you can control the camera tilt and operation remotely, in this case from an IOS or Android based mobile device over a closed WiFi network.

There are kid's quadcopters you can purchase that you can fly in the house.  The Phantom II Vision is not one of them.  With rotor guards installed it's about 18 inches diagonally and it moves fast, so unless you want a busted copter or busted home furnishings, this is an outdoor only tool.

DCIM100MEDIA

What's in the Kit

When you open the box, there is a black container holding Quick Start cards that are very easy to understand.  Things that can fly, can also fall out of the sky, so READ the fine manual before you get started.  As you unbox, you will find the quadcopter itself, and four sets of rotors.  The Phantom II only uses two sets of rotors so the inclusion of the second set is recognition that buyers may not read the documentation fully and will break rotors.  The rotors are designed to break on impact so people, pets and other things don't get ruined by spinning blades.  You will also find a very sizeable battery, an international charger, the radio controller, a Range Extender, a mount for your smartphone and assorted cables and screws.  The documentation is very clear and easy to understand, but you do have to read it to set the Phantom II up properly.  The documentation varies on whether or not a Micro SD card is present.  The main docs say nothing but others say that there is a 4GB card in the box with the quadcopter.  Mine was already installed in the camera body.

Getting It Together

Follow the instructions.  Seriously.  There are two pairs of blades, one pair with a black cone and one pair with a silver cone that the docs refer to as black and grey.  The black coned blades go on the black tipped motors and the silver coned blades go on the grey tipped motors.  They screw on and are self tightening due to the thread direction.  It's a simple and very smart system.

While you are reading and building, charge the main battery.  Out of the box it showed two bars and it took a couple of hours to bring it to four bars.  Fifteen minutes of flying knocked it back to two bars.  The Range Extender is not an optional thing, so the name could be a bit of a misnomer.  This is one place where the kit gaps a bit.  The only way to charge the Range Extender is via USB so you will need a powered USB outlet to charge this unit.  I plugged it into the computer USB port and it charged up fine.

You will need to mount the Range Extender to the frame of the transmitting radio, and also mount the smartphone holder to the frame as well.  The kit includes a reversible slot/Philips head screwdriver as well as numerous well labeled screw bags.

If you do add the optional rotor guards, and you REALLY should, unless you want to be replacing blades a lot if you have a bad landing, and you likely will, you will need a metric Allen key set to remove some existing screws and replace them with the longer screws that came with the rotor guards.  My kit did not have the Allen key, which is a buyer gap, but perhaps being a demo it was missing.  Fortunately, I have multiple Allen key sets in the house as I keep misplacing them so this was not an issue.

Installing the memory card is pretty straight forward.  Push the card into the slot until it latches.  You have to press into the little depression that's provided to seat the card properly.  Press again and it will pop out enough to remove.  Note that the slot is in the back of the camera and while the edges are white, the slot itself is black and I started to put a card in, when one was already installed, so look closely in brighter light if you are not sure.

You will also want to head over to the DJI website and pull down the latest user's manual, software for your computer and check your system firmware.  This is the same as one would do for any other camera.  There are versions of software to run on both Windows and Mac OS X.

The Camera

This is one of the really great things about the Phantom II Vision.  There are lots of quadcopters out there but most of them require that you own a POV camera or buy one at the same time and then figure out how to mount it up.  The camera on the quadcopter is on a tilting mount and can be controlled by your smartphone via a free app over the quadcopters unique WiFi SSID.  Documentation is a bit skint but it is quick enough to figure out.  Being able to change the tilt at 150 feet up is really very cool.  The lens is not dissimilar to the ultra wide pseudo fisheye we see in the GoPro.  Edges bend, it's part of the charm, and there is no zoom in capability so you won't be using this as your own NSA spy drone.  Having the camera built into the unit and remote controllable in the mount is a real win for folks in general and definitely a win for those people who don't want to spend a lot of time futzing around.

The camera is designed for video first of course, but does 14MP stills in addition to a variety of video resolutions.  I was pleased to see three quality levels for JPEG as well as the ability to capture in RAW DNG format.  Adobe already has a lens profile for the Phantom Vision II that corrects for the bends caused by the near fisheye lens.

The Phantom II also has integrated shock mounts between the body and the camera.  This really helps reduce the jello effect a rigid mount camera will experience.  I was surprised by the high quality of the video considering I had done nothing at all from a stabilization point of view.

There is an optional adapter that allows you to attach 46mm screw on filters if you wish to do so.

DCIM100MEDIA

Flying the Phantom II Vision

The documentation is decent, although somewhat incomplete when it comes to flying the Phantom II.  You get enough information to put the unit into the air and get it back on the ground, but beyond that, you're pretty much on your own.

I would strongly emphasis the impact of the wind conditions on whether you fly or not.  The Phantom II is very lightweight.  Despite a smooth body and the advantage of four rotors, wind will still impact the quadcopter.  If you put it up on a day with much more than 3km an hour wind, you will have to be compensating for wind drift.  The controller does not have trim controls to allow you to set a compensation for the wind, so watching what you are doing and where the quadcopter is going is very important.

The left joystick controls altitude with forward for up and backward for down.  Moving the stick left or right rotates the craft on its axis.  The right joystick controls flight direction.  Move it up for forward, back for backward, right to slide right and left to slide left.

Once on the ground, you move both sticks to the inside bottom position to shutdown the rotors.  Obviously, one should not shut down the rotors until the quadcopter is landed safely unless you want to see what a brick falling out of the sky looks like.

The cool thing about the built-in GPS is that when you fly the copter, it uses the GPS to maintain its position when you aren't touching the joysticks.  Wind is hard to fly in with regular copters and while I did find the wind today had visible effect, I never lost control and the copter never got blown way off its hover.  I have a regular RC helicopter that gets blown all over the sky by the slightest breeze, the Phantom II is incredibly stable.

The second day I was out flying, I met a fellow who had a Blade quad copter.  He noted that he had lost it due to a flyaway and other owners blame this on interference because many of these crafts use the popular and overcrowded 2.4GHz band.  The Phantom II uses the 5.8GHz band which is much less crowded and less prone to interference.

Communications distance is rated at 300m.  If the Phantom II loses communication for a period of time, it enters failsafe mode.  If it has a GPS lock (6 satellites) it initiates a Return Home profile that flies it back to it's takeoff point.  Remember it doesn't know about buildings, poles, hydro wires so this reminds you to fly your unit in an unobstructed area.  If the copter cannot maintain a GPS lock it initiates a safe descent mode.  Hopefully that's not out over water, or a highway.

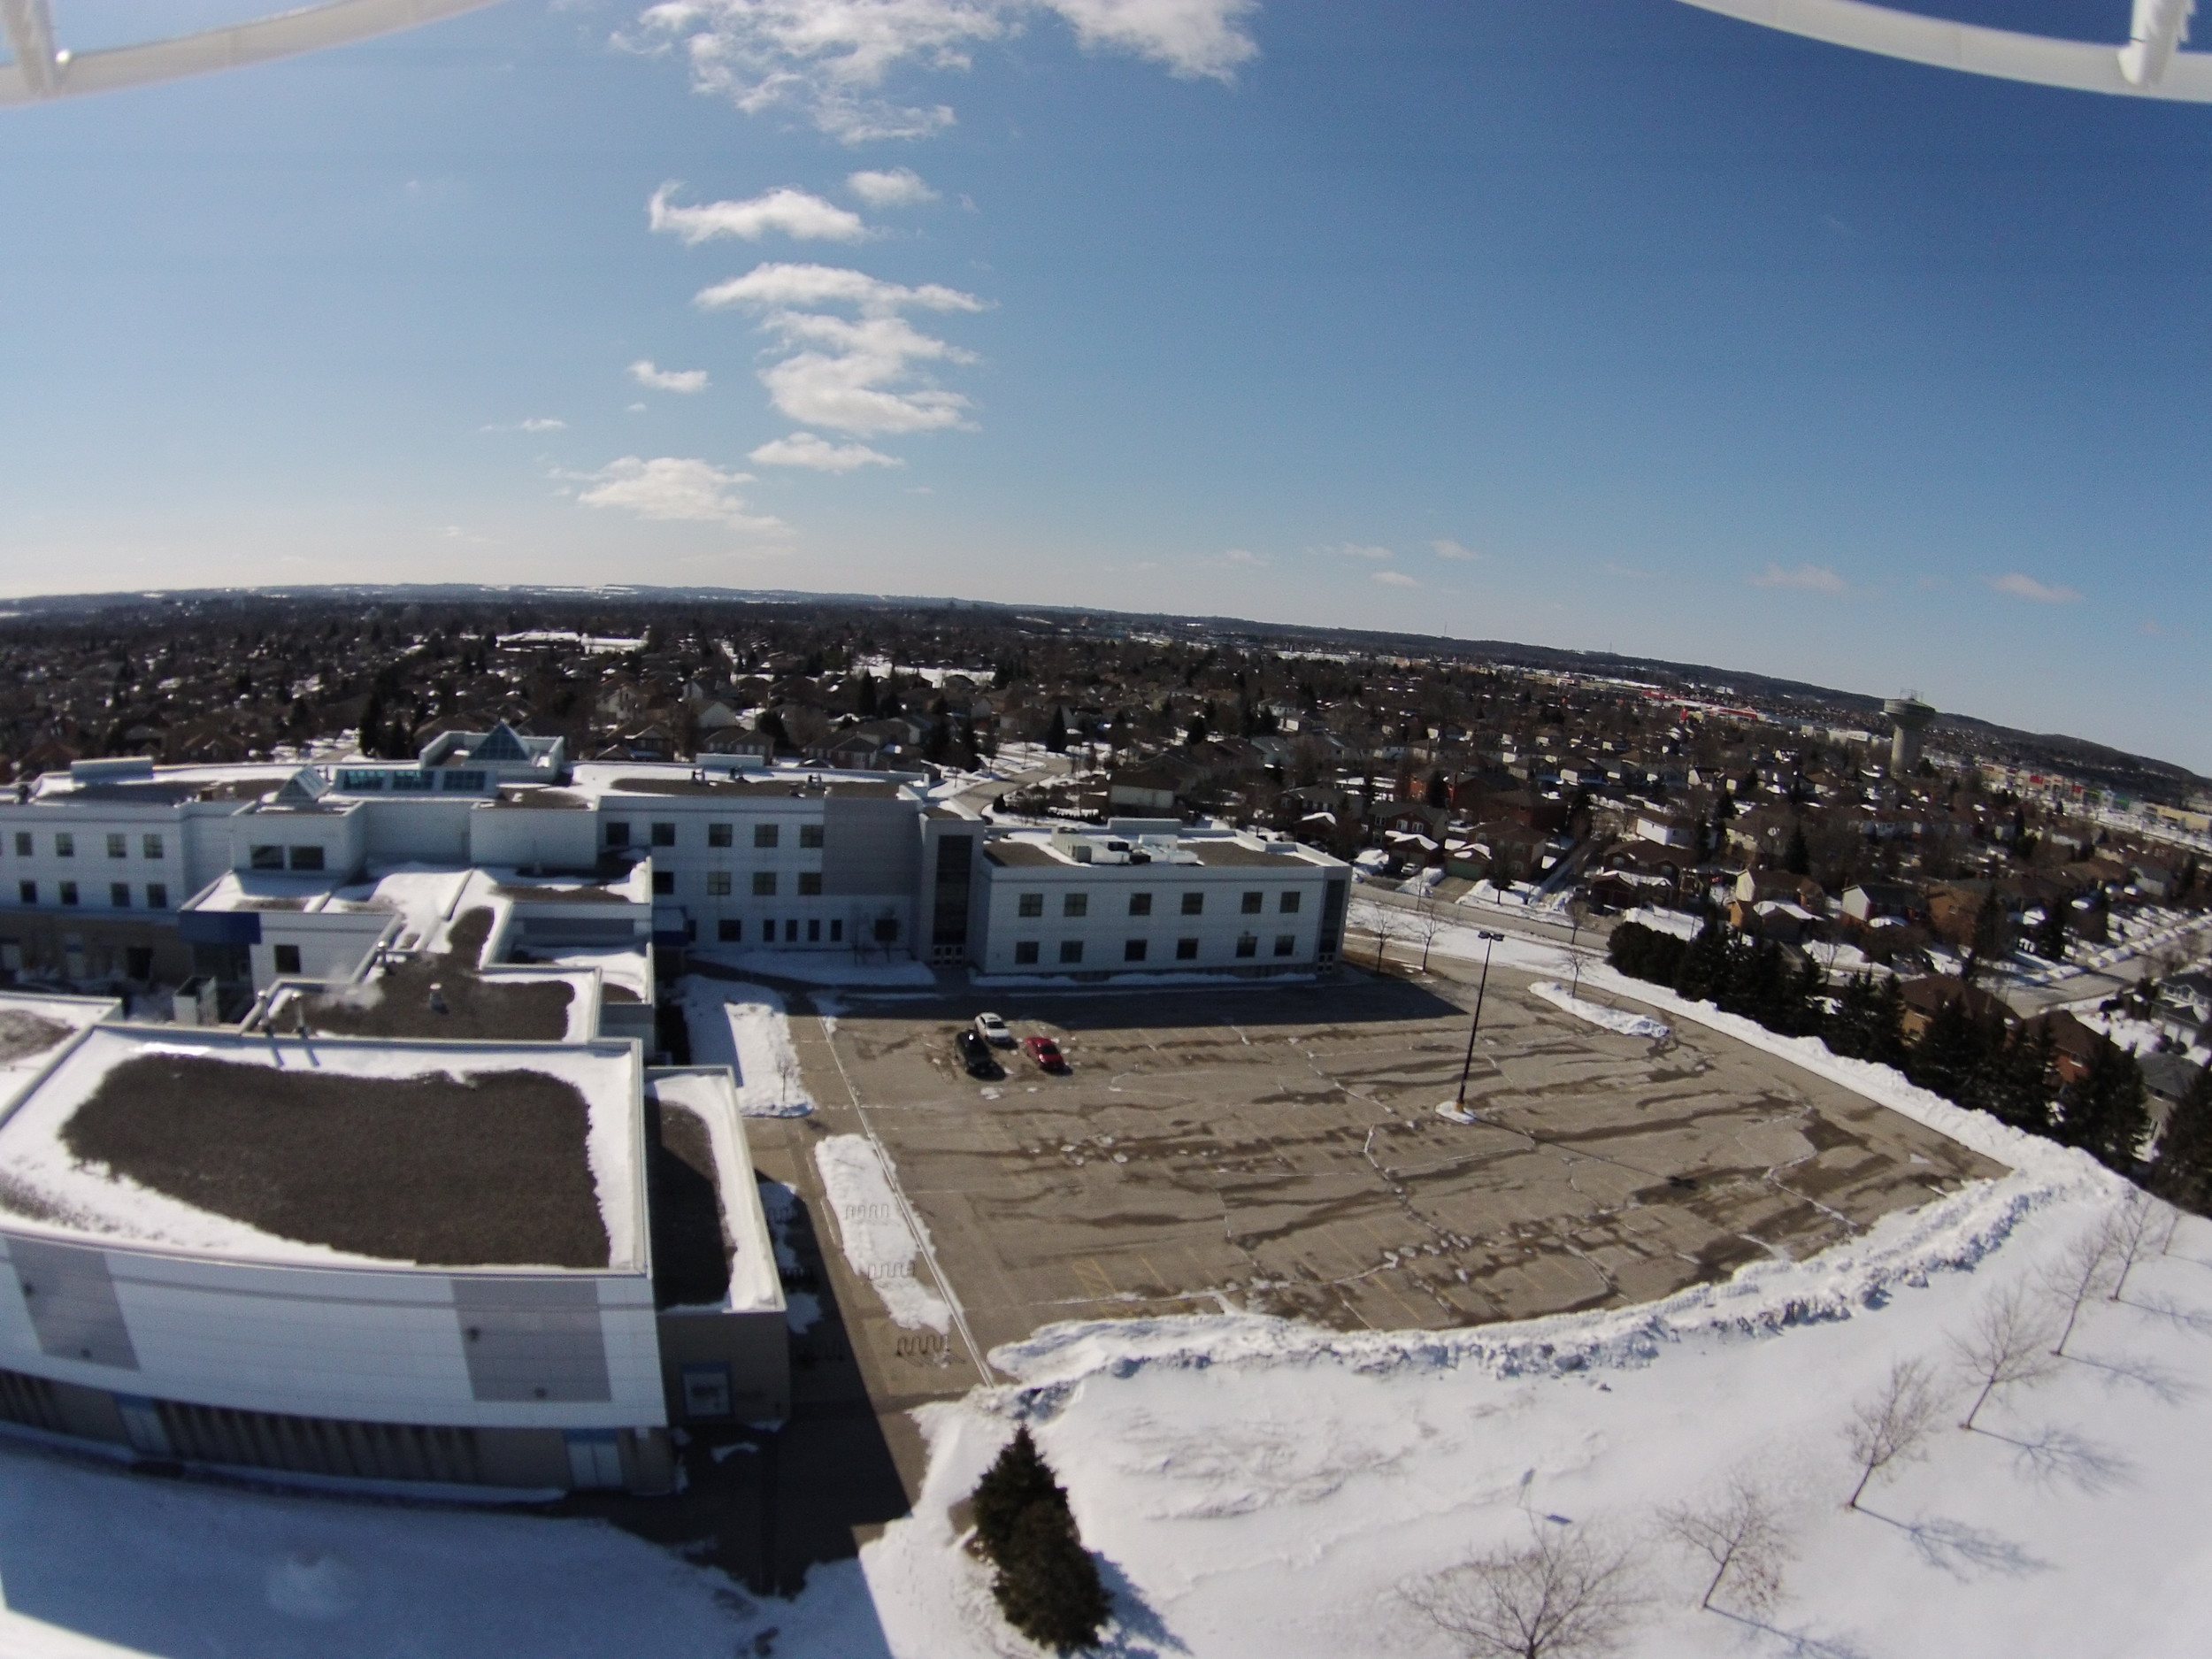
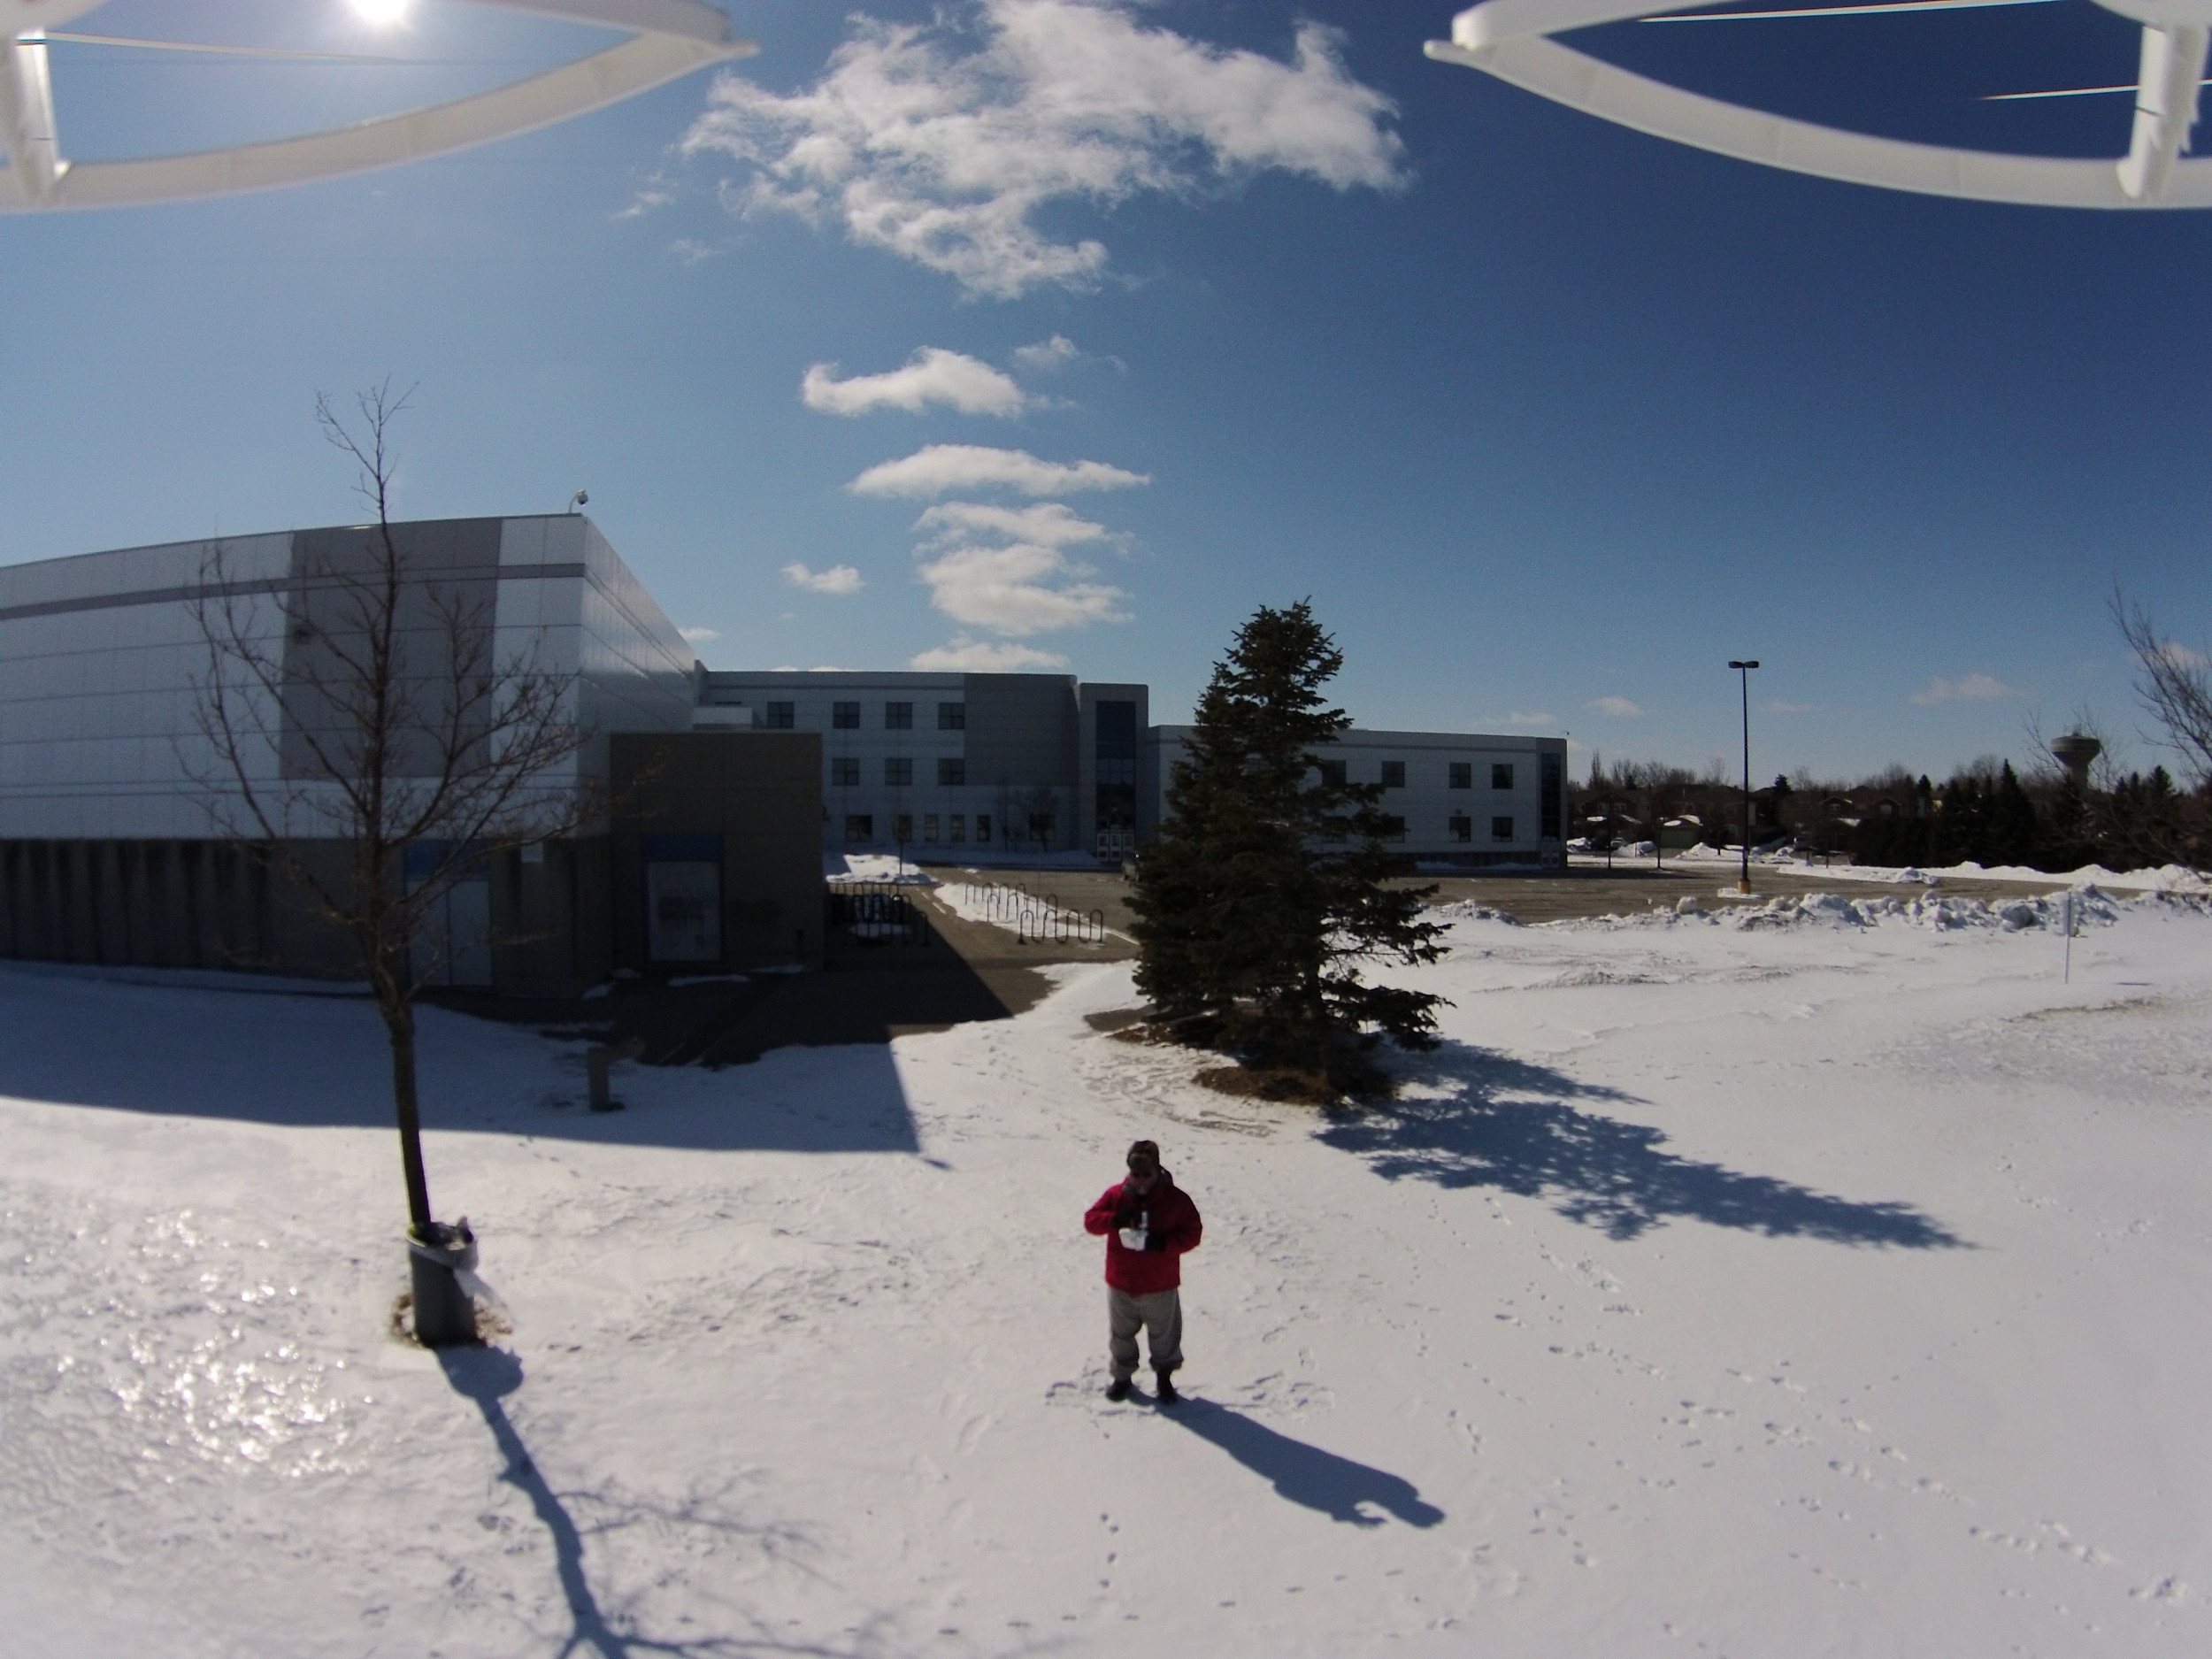
As you'll see from the images, the Phantom II is white.  It does have indicator LEDs, but after some distance they become hard to see.  When I was flying the unit the day I wrote this paragraph it was heavy white overcast and I lost the copter in the sky more than once.  Looking down from the camera view, I saw a vast field of white snow and ice, not a ton of help but with a slow rotation, I got my bearings and used the pseudo radar on the app to fly the copter back into view.

I mentioned in the overview that the Phantom II is really an outdoor only craft.  If you push the throttle to the stops, the craft will max out at about 35 m/s, which means it's out of range in less than 10 seconds.  Altitude increases max out at 10m/s, down is much faster given the helping hand of gravity.

Lifting off is very easy and the general flying does not take long to get the hang of.  DJI includes a Pilot's Handbook that coaches you through flight manoeuvres to build skill.  Even landing is not hard, but I strongly encourage you to learn to flare the copter out about a foot up and then gently lower it to the ground by pulling back on the altitude stick.  Once done, hold the stick all the way back for about 3s to shut down the motors.

DJI claims about 25 minutes flight time on a full charge and my own tests support their numbers.  On my last day of testing, it was -12 Celsius and my iPhone shut down from the cold before the Phantom II did.

Here's a quick video showing what the footage from the camera looks like.  It was shot at 1080p30 on a very blustery day.  There's a fair bit of bouncing around happening, but it's impressive at how stable the Phantom II remained even when being buffeted by winds double the maximum recommended 5 km/hr.


The Remote App

The application that let's you see through the camera lens from the ground and also take stills and video runs on either IOS or Android.  It connects via WiFi to the Phantom II itself. There is no security on this network, so ostensibly, someone else with the app could try to connect to the quadcopter, although I think it is limited to a single connection.

Once connected you get a reminder overlay of what the controls do.  Unlike other quadcopters, you do not fly the copter from your smartphone, you only control the camera.  Since the camera is servo mounted, this is more useful that it may seem, plus the joysticks give more granular control of the craft instead of using the accelerometer built in to your smartphone.

On IOS, the sliders are really up and down buttons, a tap per change, rather than a continuous sliding scale. This is not a big deal since you don't want to constantly be sending instructions over WiFi outdoors if you would like any kind of reasonable control time.  For me, this is the biggest drawback.  I started my first test with over 40% battery in my iPhone 5 and after 15 minutes or so, it shutdown.  Now it was darn cold on that day, and I failed to shutdown other applications that were running in the background but the app seemed to be very demanding of power on my iPhone even though it is not doing all that much.

In addition to the stepped tilt control, you can put the quadcopter camera into a mode where the pitch and yaw of your smartphone causes the camera to tilt and rotate to match  your actions.  This is cool, but I think I would need a lot more video game skill to be able to do this, fly the copter and not crash into anything all at once.

You can use the app to download your stills and video from the Micro SD card to your smartphone but speedy it isn't and it does eat up battery on both sides.  Better to pull the card out and load the files into your computer using a card reader.

You can make all your settings for the camera in the app itself.  There are controls for video quality, still quality, ISO, White Balance and the like.

Plainly the camera is there for video first.  Shooting at 1080p30 produces really excellent video, and you can run it all the way up to 1080i60 if you think you will be doing any slow-motion work in your edit.

The major downside of using your smartphone is that the screen gets washed out in the sunlight.  The first day was bright harsh sun and it wasn't bad.  The second day was heavy overcast and the screen was nearly unusable.  You might need to make a cardboard hood to ensure that you can see your phone.

The app also provides you with a near real-time view from the camera, as well as distance, battery charge, artificial horizon and pseudo radar that indicates the position of the controller and the quadcopter.

Conclusions

The Phantom II Vision kit retails for $1,319.99 with pretty much everything you need to go.  Considering that there is a really good POV camera in the kit that is remotely controllable, this is a pretty decent value as plain old quadcopters sell in the $800 range.

Of course I would suggest some accessories.   You are going to want to get a car charger since you likely won't be flying this in your back yard.  You may even want a spare battery. And while the camera comes with two spare pairs of blades, you definitely want to order a couple of extra pair of each, and I cannot recommend the blade guards strongly enough.  If your touchdown point will be asphalt you might want to order up a spare set of landing gear.  The gear is lightweight and a bit springy by design and a bad landing on hard ground could break it.  There are extra shock mounts in the box for the camera mount, and you can buy more if needed.

I really like the Phantom II Vision.  I know I could get a plain old Phantom II and a gimbal mount kit to use my existing GoPro with the quadcopter, but this is just so simple and straightforward and I don't have to worry about different vendor apps and interoperability and other concerns.

DJI also has a pretty decent user community, and there are already kits out to bring a Phantom I up to spec and I've seen some third party mods on radio controllers and such.  A strong community behind a product like this is critical and the DJI family is already proven.  More to the point, they also do pro-grade aerial cameras, so the expertise developed in this space naturally flows down to the consumer Phantom II Vision.

If you love the idea of flying your own POV camera, with minimum hassle on an easy to fly platform, the Phantom II Vision is the choice for you.  Thanks again to Chris Atkinson at Henry's for the opportunity to use a unit for this review.  You can see the Phantom online at Henry's here.

Announcing One To One Training - Portrait, Couples and Executive Photography

I am very pleased to announce a new training offering from The Photo Video Guy. Now available are one to one training classes over a four week period on a variety of topics.  Classes are held live in Newmarket Ontario.  The attendee must have his or her own camera and suitable lens.  Professional grade studio flash, modifiers and continuous light options will be provided for the course.  Here are the first three courses.

Portrait Photography

This program introduces the attendee to the key principles in successful portrait photography.  The attendee will learn;

1.  How to use Lighting to creative effect, including effective light placement, use of reflectors and use of scrims as well as the "Peter Hurley Look" as invented by industry leading headshot photographer Peter Hurley.

2.  How to pose a variety of subjects, men, women, children and babies using proven posing techniques.

3.  How to interact with your subjects to make them feel comfortable and deliver great expressions for great images.

4.  Editing the portraits, including proven techniques to help your subjects feel great about their portraits.

The class is taught by Ross Chevalier, the Photo Video Guy, a former professional and professionally trained photography.  Contact ross@thephotovideoguy.ca to sign up and for more information.

Couples Photography

This program introduces the attendee to the key principles in successful couples photography, suitable for casual portraits and engagement portraits.  The attendee will learn;

1.  How to use Lighting to creative effect, including effective light placement, use of reflectors and how to light two subjects properly so as not to create inappropriate shadows or discomfort for the viewer

2.  How to pose couples for diverse outcomes, casual, engagement, recommitment.

3.  How to interact with your subjects to make them feel comfortable and deliver great expressions for great images.

4.  Editing the portraits, including proven techniques to help your couples feel great about their portraits.

The class is taught by Ross Chevalier, the Photo Video Guy, a former professional and professionally trained photography.  Contact ross@thephotovideoguy.ca to sign up and for more information.

Executive Portraits

This program introduces the attendee to the key principles in successful executive image-making, suitable for web sites, annual reports, and business documentation.  The attendee will learn;

1.  How to use Lighting to creative effect, including effective light placement, use of reflectors and how to light the business leader to convey different moods and communicate different messages

2.  How to pose the business leader to show leadership, poise, openness and negotiating power.

3.  How to lead the executive to deliver great expressions for great images in a compressed time period.

4.  Editing the images, including proven techniques to reinforce the message of the containing documents or web sites.

The class is taught by Ross Chevalier, the Photo Video Guy, a former professional and professionally trained photography.  Contact ross@thephotovideoguy.ca to sign up and for more information.

REVIEW : The Olympus OM-D E-M1

On New Year's Day 2013 I did a short review of the then new OM-D E-M5 and to paraphrase a pop song, I liked it.  When Olympus announced the advent of the E-M1, a more professional and feature rich option, I was interested and with great thanks to Chris Atkinson of Henry's Newmarket, I have now completed my review of the camera and a variety of lenses for it.  How did it fare?  Read on gentle friends, read on....There's no doubt that the advent of mirror less cameras has been massively successful.  Except in North America where the numbers are upside down compared to the rest of the world.  I don't know why this is, but it is and the mirror less explosion has not happened on this continent.  Yet.  The OM-D E-M1 could be the first camera to really tip the scales. What Do People Have Against Mirrorless?

When I talk to other photographers about their next camera, invariably they tell me it will be a DSLR.  When I ask why it comes down to a few consistent reasons.  Let's explore them and get them out of the way.

  • Choice of Lenses - Major line DSLR providers have lots of lenses to choose from, and this is augmented by third parties.  And despite significant enhancements in high ISO performance, fast lenses are still in demand.  So to are fast primes, even moreso than faster zooms lenses.  There's a strong perception that mirror less doesn't have the lens choice yet.  This is true in general but when you look at the lenses I assembled for the review, the only thing missing are the monster fast long lenses and the super fast primes.  You may be ok without them, depending upon your work.
  • Has a Viewfinder - Many folks who have looked at mirror less as an alternative to DSLR cameras cite the lack of an eye level viewfinder as a major stop sign.  Or there is a very significant added cost to include a clip on EVF.  This is a partially valid argument, although I would say that today's top line mirror less cameras all have very good viewfinders to supplement the rear LCD panel.
  • Looks like a more Professional Camera - Ok, how do you argue with subjective assertions.    If the camera is a tool of the artist, who cares what it looks like, but I confess that if I am shooting somewhere with the Hasselblad or I've dragged the Sinar somewhere into the field, I am given space by other photographers because I must therefore be a more professional photographer.  I also have found the opposite is true.  I street shoot with the Leica because it doesn't look like a big pro camera and is therefore less intimidating.
  • I Want High Quality Images - this is a plain error since in many cases the sensor in a mirror less is IDENTICAL to the sensor in a DSLR.  There are multiple scenarios where the sensor in a Sony NEX is the same sensor as in a Nikon DSLR.  I do hear this misunderstanding fostered in camera stores by representatives who are either driven by margin/spiff or would not be able to find their own buttocks with both hands.
  • Too Many Too Small Buttons - I have had this complaint myself about Japanese cars for years.  I have a mixed Russian / Highlander heritage.  I am a large and somewhat clumsy person and while my hands are not enormous, they require XL sized gloves.  I feel this way about a lot of mirror less cameras myself.  I need something to hang on to that is easy to work with.

Which leads me to the OM-D lineup.  They look like DSLRs.  Just smaller.  The M43 lenses are also smaller, so you can carry more of them without needing a chiropractor.  The smaller sensor does have more depth of field at a given aperture so the mechanics of focus speed are less demanding.  But at the same time, the performance of the sensors is extraordinarily good.  As part of my testing I shot at an Auto Show at ISO 3200 for the entire event.  The image quality was easily as good as, and often better, than DSLR cameras with a body price close to that of the E-M1.  So if one were to consider a mirror less as his or her next camera, instead of a DSLR, is the OM-D E-M1 a fit?

Yes it very likely is.

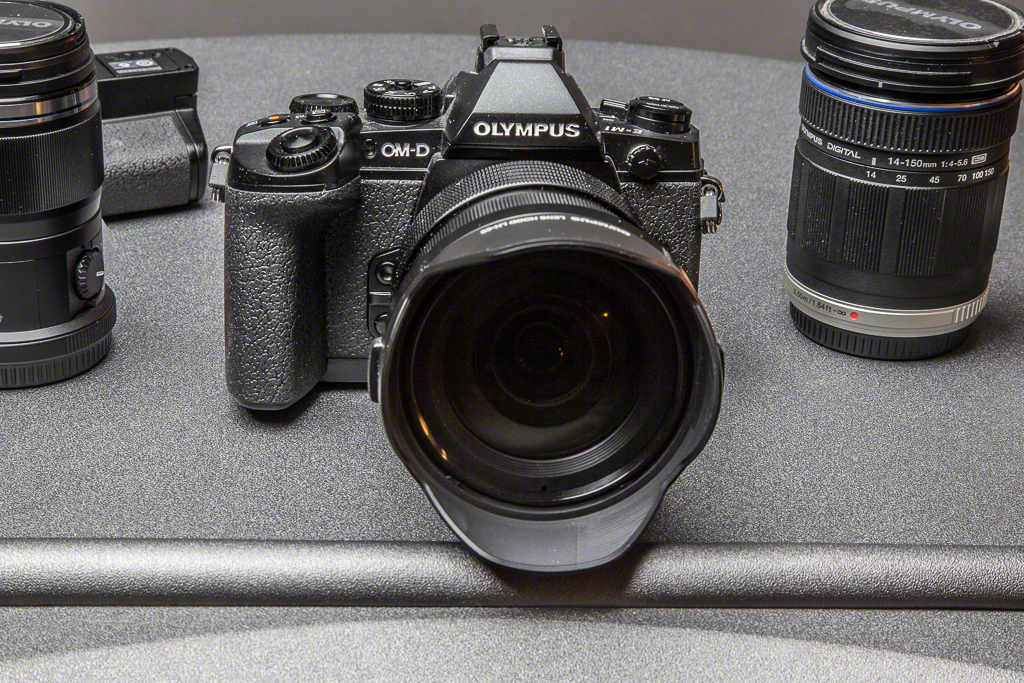
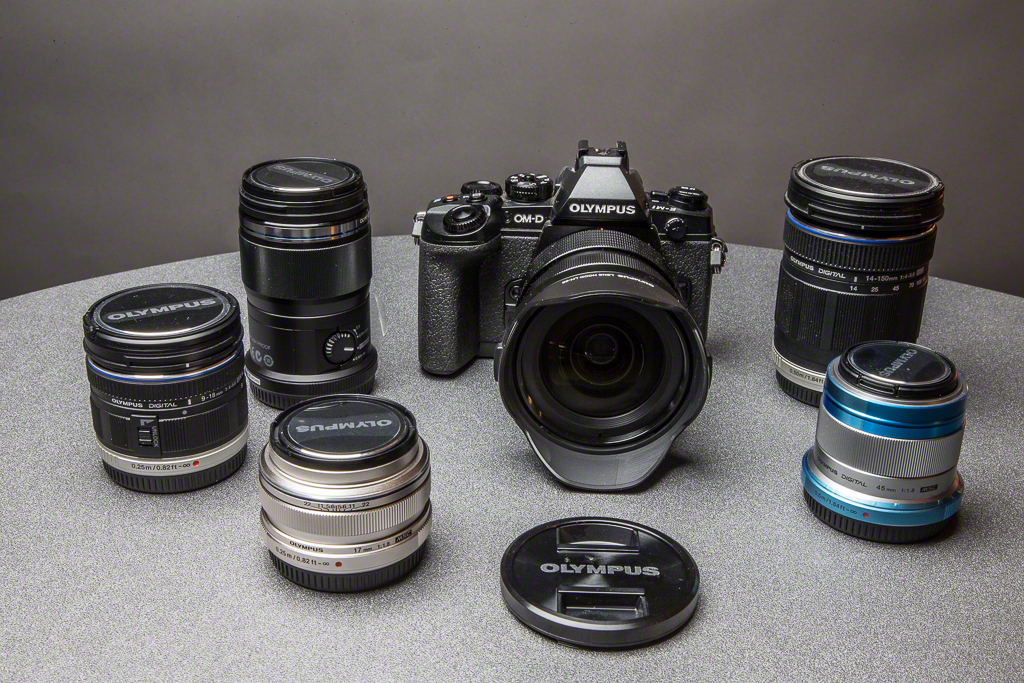
The OM-D E-M1 I evaluated for this review was part of a complete kit.  It included the body, the 12-40/2.8 short zoom, the battery grip, the FL-360 flash, the 60mm Macro, the 17/1.8 prime, the 45/1.8 prime, the 14-150/4-5.6 do everything lens, and the 9-18/4-5.6 wide angle zoom.  If that sounds like a complete kit, it's pretty darn close to one, although my perfect pack looks subtly different.  I will come back to that.

The Body

The E-M1 looks and handles like a DSLR.  My large hands held the camera just fine, but smaller hands found it easy to grip and easy to use as well.  The control layout is intelligent with a nice amalgam of analog style dials with an assortment of programmable buttons.

Looking down on the top on the left is what would have been the film rewind on an Olympus OM-1.  In this case it is a pair of buttons, one for focus type selection / metering mode and the other for drive mode / self timer / HDR setting.  Below this to the right is a lever that turns the camera on and off.  This is the first big improvement over the E-M5.  Buttons are easy to use and while you must be looking through the viewfinder or at the rear panel to make a selection, while turning dials, acclimatization is quick.  Then there is the "pentaprism" which of course is not a prism at all simply a bulbous DSLR like housing on which sits the hot shoe and a coupling for other accessories like a stereo microphone.  The shoe accepts any shoe mount flash but has pinouts for Olympus' own TTL connections. Immediately to the right of the prism is the mode dial, offering the usual PASM, intelligent Auto, a couple of scene modes and a video mode.  Easy to use and understand.  I get why there are Scene modes for marketing purposes but I don't understand why they take up space on a mode dial on a camera designed for people who will likely be shooting RAW.  To the right the grip starts to protrude and from front to back there is the shutter release with an adjustment ring around it whose function varies depending on mode, a contrast button that produces a Levels style layout in the viewfinder, the start stop button for video and a rear adjustment wheel similar in function to the one encircling the shutter release.

Top Deck

Observing from the front, there is a programmable button and a depth of field preview for the shooter's right hand, and a lens release button on camera front left.  There is also a real PC sync port under a screw on cap to use with older style cable only flashguns.

EM-1-500

On the right side is the single door that give access to the SD card slot.  My tests involved the use of a Sandisk Extreme Pro 32GB card and I had no issues at all.

On the left side are covered ports for an external microphone, USB connector and micro HDMI out.  The covers are all semisoft plastic that click positively in place.  It should be noted that you will have to rotate the LCD a bit to easily open these covers.

Before going on gentle reader, you will note none of my frustration with badly placed strap lugs.  This is because while OIympus also favours the triangle shaped strap rings, someone actually must have tried the camera with a strap connected because they are well placed to not get in the way of the photographer.  This alone makes the OM-D preferable to most every other camera I have reviewed in recent months.  Nikon and Sony particularly need to get their thumbs out and go look at how Olympus did the job right.

The rear of the camera looks like most any other DSLR you've ever seen.  Upper left is a button to control the selection of the EVF/LCD, then the EVF viewfinder itself and its diopter adjuster.  The LCD is large and very bright and can be angled down or up, but not swung out.  To the right of the EVF is an AE Lock / AF Lock button with a two position switch.  I set it for back button focus as I do on my regular cameras and it did as it should.  Upper right is a programmable Function button Fn1 that I never had cause to use.  On the right side of the back is the four way rocker switch with the Set button in the middle.  There is an Info button above and a Menu and Play button positioned below.  Near the button edge is the differently colour coded Trash button.  All the buttons are small but sufficiently large to use and have enough throw that you know when you are using them without having to take your eye away and look.

EM-1-501

The bottom plate as an all metal tripod screw socket in standard ¼ - 20, the primary battery container and a multi pin connector with a cover that is removed when you wish to add the external battery grip.  The external battery grip HLD-7 has space for a second battery, and replicates the adjustment wheels and shutter release from the top deck.  There are also two programmable buttons on the rear of the grip.  I set mine up for back button focus and AE lock.  The grip adds size and weight but in my mind makes the camera that much easier to handle.  While I could certainly use the E-M1 without a grip, I would be adding one in short order if I did not get one with the body.  The lower part of the grip is much wider than ostensibly needed but this ridge turns into a wonderful finger grip when shooting in portrait orientation.  I added an Arca-Swiss style dual dovetail plate to the bottom of the grip so I could use it with my Really Right Stuff clamps.

The Lenses

EM-1-504


The 12-40 f/2.8

This is a really nice little lens, and in keeping with M43 metrics it is like a 28-80/F2.8 in the full frame world.  It is very wide, much more so than the other lenses I evaluated, primarily in order to deliver the practical maximum aperture of f/2.8  The lens has a programmable L-Fn function button that I never used, then a very smooth and pleasantly stiff zoom ring.  This zoom does not creep.  In front of this is the manual focus ring.  You pull the ring towards you to engage the manual focus which reveals a mostly useless set of distance markers.  Don't forget to push the ring forward to engage AF or you may find yourself happily shooting out of focus images if you are not paying attention.  The lens is priced at $999.99 typically although it is available at a bundled price with the body.  While this seems somewhat expensive, consider that both Nikon and Canon have lenses in similar focal length and aperture ranges at higher prices.  The lens is very good, very sharp and there was no startling distortion to be found with it.  I expect that this is the first lens that will go with most E-M1 bodies.  It takes a 62mm filter and includes a scalloped lens hood. Olympus says that the lens is dust / splash and freeze proof.

Olympus 12-40/2.8 12mm

Olympus 12-40/2.8 40mm

The 60mm f/2.8 Macro

This is a very odd little lens.  It is quite long and has a rotary switch on the barrel.  The switch is used to control the range of focus.  The default is from 0.19m to Infinity but other options exist for 0.4m to Infinity and 0.19m to 0.4m to prevent excessive hunting in macro work.  There is also a spring setting that does something internally to allow for 1:1 life size that then returns to the 0.14m - 0.4m range.  The maximum aperture is f/2.8 and I really liked the sharpness of the lens and negligible vignetting and distortion.  35mm full frame equivalent is 120mm offering very good standoff distance for macro work.  The lens takes a 46mm filter and is fitted for a bayonet mount lens hood.  The hood is extra and herein lies one of my major gripes with the Olympus glass.  Manufacturers make hoods because they are necessary.  Leaving the hoods out of the box is just nickel and diming customers and most photo retailers who stock the lenses fail to stock the hoods making them hard to get and stupidly overpriced.  Olympus says that the lens is dust and splash proof.  The lens sells for $499.99 typically.  Olympus hoods range in price from $34.99 to $79.99 so Olympus is clearly following the major vendor customer ripoff model.

Olympus 60mm Macro #2

Olympus 60mm Macro #1

The 9-18mm f/4-5.6 Zoom

I shot this lens extensively at the car show.  It is small, very light and the zoom action is smooth and fast.  What could make it better?  A faster maximum aperture.  This thing would kill at f/2.8 but that would drive the cost up.  With a 35mm full frame equivalence of 18 - 36mm this fits the slot that Nikon and Canon fill with their 16-35 zooms.  This one is slower but also ¼ the weight.  There is noticeable barrel distortion at 9mm at the edges but nothing that is not expected when pushing the limits of an ultra wide.  The construction is less robust than the first two lenses I discussed and there is no mention of this lens being anything proof.  The barrel feels like a cheap plastic even though it houses ED glass.   It also incorporates that odd lens lock where you have to unlock and extend the lens before it can be used.  This lens dates from the EP family of cameras and is probably due for a refresh.  It takes a 52mm filter and a bayonet mount hood that it of course does not come with.  Typical sell price for the lens is $749.99 similar to what one might pay for a similar focal length for a DSLR.

Olympus 9-18mm #1

The 14-150mm f/4 - 5.6

I have looked at the OM-D for travel.  I wanted something lighter and smaller than my Canon 1D Mk IV or 1Dx but with a great all in one walk around lens.  Canon does a 28-300 that is sharp but enormous and heavy.  I have shot the 14-150 a lot, as it has been around for some time.  I used to use one on my Lumix GF1 back when I still owned that camera.  For a single walk around lens it's perfect.  Yes there is barrel distortion at the wide end and pincushion distortion at the telephoto end, and yes the barrel is all cheap plastic but it is lightweight, compact and very sharp.  I can correct the distortions in Lightroom and at a typical sell price of $629.99 this is a great choice.  The hood is bayonet mount and separate and sells for $34.99   Filter size is 58mm

Olympus 14-150mm

The 17mm f/1.8

Since this is just like a 35/1.8 you might guess this would be my street lens of choice and you'd be right.  After all the go to lens on the Leica M240 is a 35/2.  Construction is metal, manual focus is silky smooth and the lens is so small that it is completely pocketable.  It takes a 46mm filter and of course doesn't include a hood which is metal and sells separately for $62.99  You can typically find the lens itself selling for $499.99 which is again pretty close to what you would pay for a similar full frame lens.  Being a prime, the design is simple and its nice and sharp.  Couple that with the next lens and you have a really nice kit...

Olympus 17mm

The 45mm f/1.8

Okay get past the fact that this one looks a bit odd and think of a 90/1.8 in full frame.  Now imagine that fitting in a smaller pocket and needing only a 37mm filter.  If you are thinking something along the size of a 50mm Leica M lens, you are on track.  Light, optically fast, tack sharp, it's a great little portrait lens with wonderful out of focus highlights (the completely abused bokeh) shallow depth of field wide open and negligible distortion.  The lens sells for usually around $399.99 and the hood is about another $40.  So it's a bit less than a comparable 85/1.8 in full frame.

Olympus 45mm

The FL-600R Flash

The OM-D comes with a little tiny slip on flash, probably so they can say it comes with a flash.  The guide number is so low and the tube so small, that using it as a flash should constitute emergency measures.  What it is good for is remotely controlling an external TTL flash.  Hence the FL-600R.  It has a guide number of 36, so similar in power to a Nikon SB-910.  Remote control of the flash involved a menu setting on the camera and a single setting on the flash.  It is line of sight control of course so you'll have to experiment with angles and positioning if you are not Joe McNally.  Mr. McNally of course could make line of sight work across the arc of the sun.  Neither of us is Joe McNally.  That said it works really well and is so easy to get going that there is no reason you would not carry this with you all the time to use as a little fill flash kicker.  The unit sells for around $299.99. Unfortunately there are not a lot of third party TTL flash choices for Olympus.

Off Camera Remote Flash

Usability

Ok, so how does it work in the real world.  Candidly it's freaking great.  If I did not have a ton of cash invested in other gear and if this thing had very fast primes my bank account would be in peril.  Yes it is that good.

The viewfinder is bright and easy to see, with a good and flexible level of information display.  This is the first time I have really used the flip up rear display and with its 1M pixels, the images were very sharp and easy to see.  I found it very simple to shoot low to the ground or over the heads of a crowd using this display and the different shutter buttons on the battery grip.  As I was using the 9-18 for these shots, depth of field was solid and I was able to get shots I would otherwise have not achieved.

A 16MP sensor of M43 size is more than adequate for my needs.  Images had good contrast, didn't block up and were very well exposed.  I forced the auto white balance into horrible conditions and it did a very good job considering the varying sources and colour temperatures of the different lights present.  As I was shooting in low light and at high ISO I was hoping for higher shutter speeds, but sometimes this would not work out.  If I work at it, I can shoot the 1Dx with a 14mm down to 1/20 of second without microshake being evident.  I routinely shot the E-M1 at 1/15 of a second.  The 5 axis in body stabilization is really that good.

Off Camera Flash

I carried the FL-600R around with me and managed it using only the little pop on flash.  I was able to get it to fire the remote more than 80% of the time in a large hall with lots of specular lighting.  Exposures were very good given the lack of reflecting backgrounds, a situation where TTL usually blows out completely.  Battery life is ok but I would be really worried about the first impact that the flash takes as it feels cheaply constructed.  My Metz units have been called upon too many times to prove that gravity works and they still do.  I don't think that the FL-600R would survive day to day work.  Given how good Canon and Nikon have made their Speedlight systems, Olympus needs to up its game here.

Changing lenses is fast as you would expect and I only got hung up by the locking mechanism on the 9-18 twice.  All other lenses were very responsive and I was overall pleased with the image quality across the board.

Menus

Using the menu system takes some work if you are coming off another body.  Menu layout is inconsistent with some pages being limited to screen length and others rolling over.   Naming conventions in menus is quite good and you can mostly find what you are looking for.  Of course I have zero use for all the Art filter crap or JPEG scenes so if there was a way to make those vanish completely in favour of simpler menus I would be all over that.

Video Performance

The video is very good.  It's not Sony A7 good but it is very good nonetheless.  Having the separate start stop is critical and AF in video does work decent enough, albeit with too much hunting for my like.  The focusing helicoids in the lenses are very steep so micro manual focus is challenging.  Perhaps a Zeiss Touit would be a better choice for serious video.

I do like that you can jack in a decent stereo mic into the hotshoe, and that there is a proper high impedance mic input on the body but for a camera of this cost, there should be a headphone jack.  Nothing destroys great video faster than crap audio and you need to be able to monitor the audio if you are recording in camera.  Yes you can buy an outboard device for audio but that defeats the purpose of an all in one device.

High ISO Performance

As I have already mentioned, I shot a lot of images at ISO 3200 and was very pleased with the originals.  That was about the threshold for images that I would use for HDR though as that process always seems to find every element of noise and light it up.  As I often do, I have a series of shots of Sondra here from ISO 200 to ISO 25600 so you can decide for yourself where the system starts to fall apart.

Downsides

If you use two batteries, you have to remove the battery grip to get at the one inside the body.  I would rather that they follow the Canon model where attaching the grip moves both batteries into the grip so you can swap them out without having to disassemble the camera.  Sounds like a bit of nitpicking but it is so.

Olympus includes only starter paper documentation, with the useful stuff on a CD.  The last three computers I have purchased have not had a CD/DVD drive.  Stop being cheap asses and put ALL the manuals on a memory stick and put it in the box.  Finding Olympus documentation on the Internet is more a pain in the ass than it should be.  The documentation when found is not very well written and is very lightweight on details.  Lens documentation, particularly for the macro needs work to become useful.

Both zooms are showing their age and need a refresh to better construction.  For the prices being charged, the barrels need to be metal and they need to be dust and splash proof if Olympus wants the OM-D to be taken seriously.  A camera that is well sealed is less useful if the lenses are not.  I understand why Olympus would not want to create segregation in their M43 line between Pro and Consumer grade lenses, but seriously, get over yourselves.  Canon and Nikon have already paved that road.

I love the wide range of bracketing options but don't like that the steps max out at +-1 EV. I would much rather have fewer exposures at wider EV variants.  Seriously what do I need 7 shots at ⅓ EV intervals for when the sensor is as good as it is.  This is "feature for the sake of marketing", not feature for the sake of value.  I would also like to be able to manipulate bracketing without having to dive so deep into the menu system.

The OM-D E-M1 is the top of the line camera, definitely a prosumer device so why do I have to go into menus to simply change the ISO?  If there was a dial to do this, then plainly I missed it.  Yes I know I could program a button, but why should I have to?

And if it is a prosumer device, could less CPU be wasted by dumping all the Art filter crap and in camera HDR that no serious photographer is ever going to use?  Scene mode?  Really?  RAW Rules guys, did you miss the memo?

Conclusions and Would I Buy?

The OM-D E-M1 is the best mirror less camera I have ever used.  It fits my hands, is very fast to shoot, is intuitive and produces great quality images.  There are lots of Olympus lenses, and a wide variety from other providers in the Micro Four Thirds consortium.  There are no super telephotos, and really fast primes don't exist.  Yet.  M43 is farthest along in mirror less and while Sony is doing good work, the E-M1 is a much better camera to me than the A7 I recently evaluated and has magnitudes of more glass available.

I don't need or want all the JPEG centric crap built into the camera and in my perfect world there would be a menu option to disable useless (to me) junk.  I don't think I am Mr. Super Photographer, I simply shoot only in RAW and prefer to manage my artistic work in post not in some JPEG that tosses away 70% of the data being captured by the oh so good sensor.

If I were in the market for something smaller and with very fast AF and interchangeable lenses, I would be putting Mr. American Express on the counter for the EM-1.  As it stands, I have my Leica for when I want unobtrusive and I'm not so sanguine about duplicating all my Canon glass.  And I do want that fast glass and long fast telephoto option, mostly because I have it today.  The high ISO performance is definitely good.  Not as good perhaps as the 1Dx, but more than needed for most anything I do with regularity.

As more and faster primes with weather sealing become available, and perhaps an update of the 14-150, this camera becomes more and more attractive.  Back in the days of film, the OM-1 and OM-2 were physically smaller than their peers.  They made excellent images with the right driver behind the lens.  The OM-D lineup is smaller than today's DSLRs but just for yucks, I pulled out my venerable (and still perfectly functional) Minolta XD-11.  Taking the size of the lenses out of the equation, the OM-D is not much smaller than the XD-11 which for its time was a standard sized SLR.  Today's "pro" DSLRs are considerably larger than their film counterparts.  It's not about the size, it's about what you can do with it, and the Olympus OM-D E-M1 brings you all the tools you need.  And if getting what you want involves carrying a couple of bodies and a load of lenses all day, your spine will thank you for the OM-D, even if your chiropractor does not.

Specifications (Courtesy Olympus) - lifted right from their website

FOCUSING SYSTEM

With the new 16 MP Live MOS Sensor, the OM-D E-M1 automatically switches between Contrast Detection AF or Phase Detection AF to deliver blazing fast autofocus speed - no matter which Olympus Zuiko lens you use. All of our lenses -- from our super-quiet MSC Micro Four-Thirds lenses to our renowned SWD Four Thirds lenses work seamlessly and to their full potential when paired with the OM-D E-M1. Features such as Focus Peaking and Magnified Focus Assist let you use your favorite OM lens with the appropriate adapter for beautiful results.

AF system

High-speed imager AF (Contrast detection / On-Chip Phase-difference detection)

*For complete compatibility and full AF performance with our super quiet MSC Micro Four-Thirds and SWD Four -Thirds lenses.

Focus mode

Single AF (S-AF) / Continuous AF (C-AF) / Manual Focus (MF) / S-AF + MF / AF tracking (C-AF + TR)

  • Full-time AF
  • Available
  • Magnified frame AF
  • Selectable from over 800 AF points

Enlarged view check by magnify button (available with old lenses*)

Magnification x5, x7, x10(Default), x14 selectable

* lenses without data communication

Face detection AF / Eye detection AF

Available / Available

Eye Detection AF mode: Off / Nearer-eye priority / Right-eye priority / Left-eye priority

Focusing point / Focusing point selection mode

81-area multiple AF (Contrast detection AF), 37-area multiple AF (Phase-difference detection AF)

All target, Group target area (3x3-area),

Single target(Standard Target Size/Small Target Size)

AF illuminator

Available

Manual focus assist * Customize function

Live view image is magnified when the focus ring is rotated. (at S-AF+MF or MF mode)

Peaking function

Available (White edge type, Black edge type)

AF tracking

Yes


SHUTTER

The OM-D E-M1 has a 1/8000 second high-speed mechanical shutter, allowing you to freeze quick-moving action without blurring. Use prime lenses at their maximum aperture to capture beautifully defocused background images in bright daylight.

Shutter type

Computerized focal-plane, high-speed, mechanical shutter

Shutter speed

1/8000 - 60 sec. (1/3, 1/2, or 1EV steps selectable)

Bulb/Time: default setting 8min. (1/2/4/8/15/20/25/30 min. selectable)


DRIVE

High-speed sequential shooting as fast as 10fps can be accomplished when using the Tracking AF (C-AF + Tr), which works in tandem with the Autofocus to follow your subject. 6fps in C-AF.

Sequential shooting  maximum speed[Sequential shooting H mode]* 10.0 fps * in case of "I.S. Off"* including AF tracking (C-AF + TR)* Focus and exposure are fixed at the values for the first shot.[Sequential shooting L mode] 6.5 fps* in case of "I.S. OFF".* including C-AF* When using the M.ZUIKO DIGITAL ED 12-50mm f3.5-6.3 EZ, M.ZUIKO DIGITAL ED 12-40mm f2.8PRO.Max. recordable pictures

[RAW] Max. 50 frames (in seq. shooting L), Max.41 frames (in seq. shooting H)

on sequential shooting *

[JPEG] Max. Card Full frames (in seq. shooting L), Max. 95 frames ( in seq. shooting H)

* When using the M.ZUIKO DIGITAL ED 12-50mm f3.5-6.3 EZ.

* With TOSHIBA SDHC UHS-I card, based on Olympus in-house measurement conditions.

Self-timer

Operation time: 12 sec., 2 sec.,custom (Waiting time 1-30sec.,Shooting interval 0.5/1/2/3sec.,Number of shots 1-10)


REVOLUTIONARY DESIGN

For photographers who prefer composing their shots using an eye-level viewfinder, the OM-D E-M1 will be a revelation. The new, interactive high-definition EVF features a 2.36 million dot resolution, an impressive 1.48x magnification, 29ms image display lag, eye sensor for automatic switching between the EVF and monitor and intuitive functionality for real-time viewing of any shooting situation.

Product Type

Micro Four Thirds interchangeable lens system camera

Memory

SD Memory Card*1 (SDHC, SDXC, UHS-I , compatible, Eye-Fi Card compatible*2 )

*1: Class 6 or higher is recommended for Movie shooting.

*2: Not compatible with Endless mode.

Lens mount

Micro Four Thirds Mount


DIMENSIONS / WEIGHT

The OM-D E-M1 is built around the Micro Four Thirds standard, making it smaller, lighter and more portable. Pack light and pack more lenses on your important photo outings. Shoot all day without lugging around a heavy, outdated system.

Dimensions

130.4mm (W)× 93.5mm (H) × 63.1mm (D)

5.1" (W) x 3.7" (H) x 2.5" (D)

[CIPA guideline compliant, excluding protrusions]

Weight

[CIPA guideline compliant, with BLN-1 battery and Memory card]

Approx. 497g/17.5oz(1.1lbs)

[body only]

Approx. 443g/15.6oz(0.98lbs)


BODY CONSTRUCTION

Outer Material

Metal

Inner Frame

Magnesium Alloy

RUGGEDNESS

Rain or snow, mud or dust – the E-M1 is ready for whatever mother nature can throw at it. Its rugged design expands your field of photography to any place on earth.

Freezeproof

Yes

Dustproof

Yes

Splash proof

Yes

OPERATING ENVIRONMENT

Temperature

-10 ~ +40℃ (operation) / -20 ~ +60℃ (storage)

+14 ~ +104 °F

Humidity

30 - 90% (operation) / 10 - 90% (storage)

-4 ~ +140 °F


VIEWFINDER

The new, interactive high-definition EVF features a 2.36 million dot resolution, an impressive 1.48x magnification, 29ms image display lag time, eye sensor for automatic switching between the EVF and monitor and intuitive functionality for real-time viewing of any shooting situation.

Finder typeEye-level electronic viewfinder, approx. 2.36M-dot resolutionField of view / Viewfinder magnificationApprox. 100% / Approx. 1.30x*1 - 1.48x*2 (-1m-1, 50mm lens, Infinity)*1: at Finder Style 1, 2 (aspect 4:3)*2: at Finder Style 3 (aspect 4:3)Image Display Lag Time29 milli seconds

Eye point / Diopter adjustment range

Approx. 21mm (-1m-1, Distance from rear lens surface) / -4 ~ +2m-1

Preview

Available with Live Preview function button

Displayed Grid

Off / Normal Grid / Golden Grid / Scale / Diagonal / Movie Grid selectable

Level Gauge

2-axis level gauge; horizontal /vertical

One Touch Tele-Converter

2x magnification

Finder Style

Selectable from 3 types

Brightness / Color temperature control

Available/Available

Eyecup

Optional eyecup EP-13 is available.


REAR MONITOR

Its tilting, touch screen display makes focusing, choosing AF points, releasing the shutter, swiping through images in playback and changing settings effortless.

Screen size

3.0-inch / 7.6-cm

Monitor type

Tilt Touch Wide LCD with approx. 1037K dots resolution

*8: Approx.1037k dots, Touch control in electrostatic capacitance Type

Touch control

Touch shutter release, Touch enlargement, Touch Live Guide, AF area selection, AF area enlargement, Frame advance/backward, Enlargement playback, Touch Super Control Panel, Touch Art Filter menu,Wi-Fi function

Tilting angle

Upward tilting angle: up to 80 degrees / Downward tilting angle: up to 50 degrees

Brightness / Color temperature control

±7 levels / ±7 levels

Color tone select

Vivid / Natural


LIVE VIEW

Live view

Approx. 100% field of view,

Exposure compensation preview, WB adjustment preview,

Gradation auto preview, Face detection preview (up to 8 faces),

Grid line, Histogram, Magnification display (x5/x7/x10/x14), Normal, Highlight & Shadow, Level Gauge, Off

Type

Image Sensor type

Field of view

Approx. 100%

Display Mode

Normal Mode, Histogram Mode, Level gauge, Highlight and shadow, Off

Magnification Ratio

x5, x7, x10 (Default), x14

Monitor information

Aperture value, Shutter speed, Auto Bracket, AE Lock, AF mode, IS, Shooting Mode, Battery Check, Myset, Internal Temperature Warning, Face / Eye Detection, Histogram, Number of storable still pictures, Record mode, ISO, Sequential shooting, Self-timer, White Balance, Metering Mode, AF confirmation mark, Exposure Compensation Value, Spot metering Area Flash Mode, Flash Status, Flash intensity Control, Super FP, Focal length, Tone control, Eye-Fi condition, Digital teleconverter, Battery check

Display of Face Detection

Max 8 frames of face detection can be displayed.

Live View Close Up Mode

Available at HDR1 and HDR2 shooting


POWERFUL VERSATILITY

SYSTEM ACCESSORIES

Lenses

32 Olympus Lenses and 57 lenses from all Four Thirds consortium members

Optional Battery Grip

HLD-7 Battery and Grip

Grip Strap

GS-5

Underwater Housing

PT-EP11


FLASH

Flash intensity control method

TTL Auto, Auto*, Manual, super FP*(FP-TTL AUTO, FP-MANUAL)

* Available on the external flash

Bundled flash*

TTL flash,GN=7(ISO100・m) / GN=10 (ISO200・m)

* Attach it on the hot shoe and connect it to the accessory port 2. Available on FL-LM1/2.

Flash mode

Flash Auto, Redeye, Fill-in, Flash Off, Red-eye Slow sync.(1st curtain), Slow sync.(1st curtain), Slow sync.(2nd curtain), Manual 1/1 FULL 1/64

Synchronization speed

1/320sec. or less*

* It depends on flash models or flash mode

FL-LM1/2: 1/320 sec., Other: 1/250 sec.,

Super FP: 1/125-1/8000 sec.

Flash intensity control

Up to ±3 EV in 0.3, 0.5, 1 EV steps selectable

Compatible external flash

FL-50R, FL-36R, FL-20, FL-14, FL-300R, FL-600R

Colour Temperature

5500±400°

External Flash control mode

TTL Auto, Auto, Manual, FP-TTL-AUTO, FP-MANUAL


WIRELESS FLASH CONTROL

Wireless flash transmission channel settings enable selection of the flash/no flash for groups of multiple flash units. In addition, it allows TTL auto, auto and manual models to be set; offers a bounce and swivel head; and flash coverage is automatically adjusted in several steps to correspond to the image area when zooming.

Compatible external flash

FL-50R, FL-36R, FL-300R, FL-600R

Control method

Triggered and controlled by built-in flash

(Olympus Wireless RC Flash system compatible)

External Flash intensity type

TTL Auto, Auto, Manual, FP-TTL-AUTO, FP-MANUAL

Channel No.

4 channels

Group No.

4 groups (External flash 3 groups + a bundled flash*)

* Available on FL-LM1/2 / FL-600R


PROFESSIONAL IMAGE QUALITY

INCREDIBLE SPEED

With the new 16 MP Live MOS Sensor, the OM-D E-M1 automatically switches between Contrast Detection AF or Phase Detection AF to deliver blazing fast autofocus speed - no matter which Olympus Zuiko lens you use. All of our lenses -- from our super-quiet MSC Micro Four-Thirds lenses to our renowned SWD Four Thirds lenses work seamlessly and to their full potential when paired with the OM-D E-M1.

Product type

4/3 Live MOS Sensor

Number of pixels / Aspect ratio

Number of effective pixels: Approx. 16.3 million pixels

Total number of pixels: Approx. 16.8 million pixels

Aspect ratio: 1.33 (4:3)

Dust reduction

Supersonic Wave Filter (dust reduction system for image sensor)

Filter array

Primary color filter (RGB)

*Uses information communicated from the lens such as aperture setting and optical characteristics to optimize the final image.

Image Processor

TruePic™ VII


IMAGE STABILIZATION

The OM-D E-M1 is equipped with the world’s first 5-Axis image stabilization system with IS-Auto. 5-Axis IS compensates for vertical, horizontal and rotational camera shake that conventional 2-axis systems could not. 5-Axis IS is built into the camera body to ensure stabilization with all lenses and makes stable movie recording possible.

System Type

Built-in (Image sensor shift type for movie & still, 5-axis* image stabilization)

* yaw/pitch/vertical shift/horizontal shift/rolling

Mode

4 modes (S-I.S.AUTO,S-I.S.1, S-I.S.2, S-I.S.3), OFF

IS for finder image

Available (by half-pressing the shutter button or enlargeing operation)

Focal length setting

Available

Lens IS Mode

Available

Available manual focal length setting

Input focal length : 8, 10, 12, 15,16, 18, 21, 24, 28, 30, 35, 40, 48, 50, 55, 65, 70, 75, 80, 85, 90, 100, 105, 120, 135, 150, 180, 200, 210, 250, 300, 350, 400, 500, 600, 800, 1000

Stabilization performance

4 EV steps*

* Based on CIPA measurement conditions.

Shutter speed range

60 - 1/8000 sec. (Not available when Bulb and Time is selected.)


EXPOSURE CONTROL (STILL)

The E-M1 provides DSLR quality in low light photos with an increased ISO sensitivity to 25,600.

Metering system

Digital ESP metering (324-area multi pattern metering), Center weighted average metering, Spot metering, Spot metering with highlight control, Spot metering with shadow control

(TTL Image sensor metering)

Metering range

EV -2 - 20 (at normal temperature, 17mm f2.8, ISO 100)

Exposure mode

i Auto, P: Program AE (Program shift can be performed), A: Aperture priority AE, S: Shutter priority AE, M: Manual, Bulb, Time, Scene select AE, Art Filter, Underwater wide / macro*

* Selectable from menu as a function on Fn-1/Rec button

Scene select AE

Portrait, e-Portrait, Landscape, Landscape + Portrait, Sport, Night, Night + Portrait, Children, High Key, Low Key, DIS mode, Macro, Nature Macro, Candle, Sunset, Documents, Panorama, Fireworks, Beach & Snow, Fisheye Conv., Wide Conv., Macro Conv., 3D*

*3D lens(H-FT012 by Panasonic) only, still only

ISO sensitivity

Auto: ISO LOW (approx. 100) - 25600 (customizable, default ISO LOW - 1600) Manual: ISO LOW (approx. 100) - 25600 in 1/3 or 1 EV ISO steps

Exposure compensation

±5 EV in 1/3, 1/2, 1 EV steps selectable

AE lock

Locked at 1st release of shutter button (can be set to Fn1/Rec button)

Metering standard value adjustment

1/6 EV step, +/- 1EV range


NOISE FILTER

at High ISO setting

Off, Low, Standard, High

NOISE REDUCTION

at Slow shutter speed

Off, On, Auto

On : effective when shutter speed is slower than 1 sec.

Auto : effective when shutter speed is slower than 4 sec. (at ISO 200 or higher) or 8 sec. (at lower than ISO200)


RECORDING (STILL)

Recording format

DCF, DPOF compatible / Exif, PRINT Image Matching III, MPO compatible

File format

RAW (12-bit lossless compression), JPEG, RAW+JPEG, MPO(3D still)

Recording image size

[RAW] 4608 x 3456 pixels

[JPEG] 4608 x 3456 pixels - 640 x 480 pixels

File size

RAW: 4608(H)x3456(V) (approx. 1/1.5 lossless compressed) Approx. 17MB

Set1(LF): 4608(H)x3456(V) (1/4 compressed) Approx. 7.5MB

Set2(LN): 4608(H)x3456(V) (1/8 compressed) Approx. 3.5MB

Set3(MN): 2560(H)x1920(V) (1/8 compressed) Approx. 1.1MB

Set4(SN): 1280(H)x980(V) (1/8 compressed) Approx. 0.4MB”


BUILT-IN WI-FI

WI-FI FUNCTION

Take control of your OM-D E-M1, without touching it! Using the O.I. Share app, you can preview your composition, choose the AF point and release the shutter; perfect for tripod or portrait shooting.

GPS function

Availabe (Aquire the position information from smartphone with GPS function)

Wireless shooting function

iAUTO, P, A, S, M, live valve / time support. Aperture, shutter speed, exposure compensation, ISO speed, WB, continuous shooting setting possible.


Remote live view, remote REC VIEW, wireless touch AF shutter, Shutter timer (countdown with sound), remote power OFF

Image Share Function

Reserve the picture which will be transferred to smartphone. (Max 4 smart device connections) can transfer image; (except MPO) PEG, only MOV.

Smart & Easy Connection

Smart & Easy connection by QR code.


IN-CAMERA CREATIVITY

PICTURE MODE

The new Color Creator feature lets you adjust Hue and Chroma right in the EVF and preview the effect in “real time”

Mode

i-Enhance, Vivid, Natural, Muted, Portrait, Monotone, Custom, e-Portarait, Color Creator, Art Filters

Gradation

Auto, Normal, High Key, Low Key [except Art Flters]

Adjustment parameter

4 levels (Auto, Normal, High key, Low key)

Filter effect (B&W filter)

Neutral, Yellow, Orange, Red, Green for Monotone

Picture tone

Neutral, Sepia, Blue, Purple, Green for Monotone


HDR

HDR art photos can easily be captured with 12EV wide-range bracketing shooting.

HDR(Auto composite)HDR1,HDR2* Available with P, A, S and M mode.* Takes 4 pictures at different exposures composite into a high contrast image.Bracketing for HDR post-process3 or 5 frames in 2.0/3.0EV steps selectable, 7 frames in 2.0EV steps selectable.* HDR picture can not be made by this function.* HDR function can be called by Fn-button.


BRACKETING

Using Art Filter Bracketing when you can’t make up your mind about shooting a filter. Generate multiple pictures with Art Filters with a single shot and then view them as a slideshow.

Exposure bracketing

2, 3 or 5 frames in 0.3/0.7/1.0EV steps selectable, 7 frames in 0.3/0.7EV steps selectable

ISO bracketing

3 frames in 0.3/0.7/1.0EV steps selectable

White balance bracketing

3 frames in 2, 4, 6 steps selectable in each A-B/G-M axis.

Flash bracketing

3 frames in 0.3/0.7/1.0EV step selectable

Art Filter bracketing

i-Enhance, Vivid, Natural, Muted, Portrait, Monotone, Custom, Art Filters selectable


ART FILTER

Twelve in-camera Art Filters are enhanced by new filter variations, art effects and bracketing. You can use Art Filters in all shooting modes as well as filming 1080 HD movies.

Mode (Variation / Effect)

Pop Art (I, II / a.b.c.d.e)

Soft Focus ( - / c.e)

Pale & Light Color (I, II / a.b.c.d)

Light Tone ( - / d)

Grainy Film (I, II / b.c.d.f.g)

Pin Hole (I, II, III / d.)

Diorama ( - / d.)

Cross Proscess (I, II / b.c.d.)

Gentle Sepia ( - / a.b.c.d.)

Dramatic Tone (I / b.c.d.e) (II / b.c.d.e.f.g)

Key Line (I, II / a.b.c.d.e.)

WaterColor (I, II / a.c.d.)

Art Effect

a. Soft Focus Effect

b. Pin-Hole Effect

c. White Edge Effect

d. Frame Effect

e. Star Light Effect

f. Defocus Effect

g. B&W Effect (Yellow, Orange, Red, Green)

h. Picture Tone (Sepia, Blue, Purple, Green)


PHOTOSTORY

With Photo Story, users can shoot a normal, everyday scene from multiple viewpoints and combine them into one image. Simply turning the mode dial to “Photo Story”, you’ll be provided with different formats to choose from, and everyday occurrences will become memorable scenes.

Type (Variation/FrameEffect/WindowAspect)

Standard II,Ⅱ,Ⅲ,Ⅳ/a, b, c, d, e/A, B, C, D

Frame Effect

FunFrameⅠ,Ⅱ,Ⅲ

a. White Frame

b. White Frame & White Edge Effect

c. Black Frame

d. White Frame & Pin Hole Effect

Aspect Window/Pattern

A. 4:3/2Frames

B. 4:3/3Frames

C. 1:1/2Frames

D. 1:1/3Frames

E. 1:1/4 Frames

F. 16:9/5 Frames


INTERVAL SHOOTING

Interval Shooting

1-999 frames, Interval time 1sec-24hours, Time lapse movies

MULTI EXPOSURE

Number of picture / Function

2 frames / Auto gain, Exposing on Recorded picture(RAW)

LEVEL GAUGE

Detection

2-axis (vertical and horizontal)

ONE PUSH TELE-CONVERTER

Magnification

x2

MULTI ASPECT

Aspect Ratio

4:3(Default) / 3:2 / 16:9 / 1:1 / 3:4

Process

RAW: Aspect ratio is recorded as Exif data, JPEG: JPEG image is produced based on the aspect ratio


WHITE BALANCE

White balance mode

Auto WB, 7 Preset WBs, 2 Capture WBs, Custom WB(Kelvin setting)

White balance compensation

±7 steps in each A-B/G-M axis * Except for Custom WB

Preset white balance

7 preset WBs (3000K - 7500K)

- Sunny(5300K), Shadow(7500K), Cloudy(6000K), Incandescent(3000K), Fluorescent(4000K), Underwater, WB Flash(5500K)

CWB (Kelvin setting)

1 setting can be registered at Kelvin temperature, 2000K to 14000K.

Capture white balance

2 custom settings can be registered

COLOR MODE

Colour matrix

sRGB, Adobe RGB


RECORDING (VIDEO)

Shoot up to 29 minutes of 1080 30p HD video and stereo sound in either .MOV or .AVI formats. A Direct HD Movie Button switches you from still to movie mode with just the press of a button.

Recording format

MOV(MPEG-4AVC/H.264) , AVI(Motion JPEG)

Movie Mode

[MOV]

Full HD: 1920(H)x1080(V),  30p(29.97 Recording

24Mbps(Fine) / 16Mbps Normal) : Aspect 16:9

HD: 1280(H)x720(V),  30p(29.97 Recording

12Mbps(Fine) / 8Mbps Normal) : Aspect 16:9

[AVI Motion JPEG]

HD: 1280(H)x720(V), 30fps *20, Aspect 16:9

SD: 640(H)x480(V), 30fps *20, Aspect 4:3

*20 : Except for some of the Art Filters

Maximum Recording Time

[MOV]

Full HD : Approx. 29min(Normal) / Approx. 22min(Fine)

HD : Approx. 29min(Normal) / Approx. 29min(Fine)

[AVI]

HD : Approx. 7min*21 / SD : Approx. 14min*21

*21 : Except for some of the Art Filters

Movie Function

Movie Effect* : One shot echo / Multi echo / Art fade *Default ON


Art Filter Movie, Aperture priority Movie, Shutter Priority Movie, Manual Shooting Movie

Movie Tele-converter

×4* Avairable on Movie effect mode

TimeLapse Movie

Available AVI Motion JPEG  1280×720,10fps)

IS for Movie

Built in (Image sensor shift type image stabilization)

M-IS.ON,off, Panasonic OIS lens priority

AE Lock

Available

Exposure control - Movie

P: Program AE, A: Aperture priority AE, S: Shutter speed priority AE, M: Manual, Art Filter

* S mode and M mode: Shutter speed is limited in less than 1/30 sec.

Compression ratio

Motion-JPEG Format: 1/12(HD), 1/8(SD)

File size

MOV Format: Max 4GB

Motion-JPEG Format: Max 2GB


RECORDING (SOUND)

Recording format

Wave Format (Stereo linear PCM/16-bit, Sampling frequency 48kHz)

Microphone/Speaker

Stereo/Mono

Microphone function

Wind Noise Reduction, Recording Volume

Audio dubbing possible for still pictures (up to 30 sec.)

Maximum Recording Time

Picture with Sound: 30sec.

Movie: depend on Movie Recording Time

INTUITIVE MENUS

SUPER CONTROL PANEL

Information (shooting)

Battery information, Shooting mode, Shutter speed, Aperture value, Exposure compensation value, ISO sensitivity,Exposure compensation indicator, Exposure indicator, Flash intensity compensation indicator, Date, Auto BKT setting, NR setting, WB, WB compensation value, Record mode, Flash Status, Record mode, Image size, Drive mode, Flash intensity compensation value, Metering mode, Recordable still image number, Focusing mode, AF frame, Colour space, Sharpness, Contrast, Saturation, Internal Temperature Warning Gradation, IS activating mode, Face detection, My Mode, Multi Exposure, Aspect Ratio, Super FP

LIVE CONTROL

Information (shooting)

Battery information, Shooting mode, Shutter speed, Aperture value, Exposure compensation value, ISO sensitivity,Exposure compensation indicator, Exposure indicator, Flash intensity compensation indicator, Date, Auto BKT setting, NR setting, WB, Record mode, Flash Status, Image size, Drive mode, Flash intensity compensation value, Metering mode, Recordable still image number, Focusing mode, AF frame, Internal Temperature Warning, IS activating mode, Face detection, My Mode, Multi Exposure, Aspect Ratio

LIVE GUIDE

Setting Menu

Color saturation, Color image, Brightness, Blur Background, Express Motion, Shooting Tips

PLAYBACK

Playback mode

Single-frame, Information display, Index display (4/9/25/100 frames), Calendar, Enlargement (2x - 14x), Movie (with sound, FF/REW/Pause), Picture rotation (auto), Slideshow *(with BGM/BGM+Sound/Sound)

* Slideshow : Still/Movie/Still+Movie, When a camera is connected to HDTV with HDMI cable, 2 new slideshow effect can be selectable.(Still) 1 BGM replaceable. Auto angle correction

Information display

Histogram (independent luminance / RGB available), Highlight/Shadow point warning, AF frame, Photographic information, OFF

MENU

Languages

34 languages selectable:

English, French, German, Spanish, Italian, Japanese, Korean, Traditional Chinese, Simplified Chinese, Russian, Czech, Dutch, Danish, Polish, Portuguese, Swedish, Norwegian, Finnish, Croat, Slovenian, Hungarian, Greek, Slovakian, Turkish, Latvian, Estonian, Lithuanian, Ukrainian, Serbian, Bulgarian, Rumanian, Indonesian, Malay, Thai

RESET & CUSTOM SETTING

My mode

4 settings recordable / Available on allocating to mode dial.

IMAGE EDITING

Editing function

RAW development, Gradation auto, Monochrome, Sepia, Red-eye fix, Saturation, Resize (1280x960, 640x480, 320x240), Trimming, Aspect, e-Portrait, Image Overlay, Postrecording

RAW picture editing

RAW development based on settings of the camera(including Art Filter,ART-BKT)

Detail edit acceptable. (Preview, Memory of 2 setting, re-development)

JPEG editing

Shadow adjustment, Red-eye fix, Cropping, Aspect, Black&White, Sepia, Saturation, Resize, e-portrait

Image Overlay

Up to 3 RAW images

Erasing function

Single frame, All, Selected frames (from Index)

Protect function

Single frame, Selected frames, Release protect (Single/All selected)


ADDITIONAL INFORMATION

INPUT/OUTPUT

USB/AV/Remote controller connector

Dedicated multi-connector [USB: USB2.0 Hi-Speed, Video: NTSC/PAL selectable, Optional Remote cable RM-UC1 can be used.]

HDMI connector

Micro HDMI (Type-D)

Flash attachment

Hot shoe

Accessory Port 2

Dedicated multi-connector [Available for VF-2/VF-3/VF-4, SEMA-1, MAL-1 and PP-1.]

Wireless LAN

MIC. Input Jack

φ 3.5 stereo mini jack

PC interface

USB2.0 Hi-Speed

TV interface

HDMI (HD/Stereo Sound), VIDEO-OUT(SD/Mono Sound)

DC-in

POWER REQUIREMENTS

Battery

BLN-1 Li-ion battery (included)

Power battery holder

AC adaptor

Sleep mode

Available (1/3/5 min. off selectable)

Number of recordable pictures

Approx. 350 shots [IS ON, CIPA test standard]

(with BLN-1 and TOSHIBA super high-speed Class 6 SDHC 4GB card)

BOX CONTENTS

Box contents

Body, Li-ion battery BLN-1, Li-ion battery charger BCN-1, FL-LM2 Flash, USB cable, Shoulder strap, OLYMPUS Viewer 3 (CD-ROM), Instruction manual, Warranty card

Episode 88 - The Photo Video Guy Podcast

Nikon Interview at CP+, China most important emerging market, Americas bad for mirror less, smartphones are opportunity, DSLRs still best in low light, Df is not a failure, 3rd party lenses not a threat, no answer on D300s replacement, 4K video plan exists perhaps in the Nikon 1,Nikon D4s is official, and it's a slightly updated D4. Nikon updates firmware on AW1 Nikon releases new RAW software Capture NX-D Nikon announces the QuickDraw strap developed in conjunction with BlackRapid Nikon has issued a worldwide technical service bulletin offering replacement of the shutter assembly on D600s at no cost and regardless of warranty status Canon initiating share buyback Canon EF-s 24mm STM expected this summer Canon 1Dx dominates World Press Photo List Canon to replace Pixma Pro 1, 10 and 100? Canon updates firmware again for Cine cameras, announces RC-V100 remote control and coming dual pixel AF upgrade for the C300 in May Canon is considering reducing the number of point and shoot cameras in its range. Confirmed that Canon will not make the EOS-M2 available in North America Sigma ART 50/1.4 for Canon coming in April Fuji updates firmware for X series Adobe Camera Raw 8.4 has Fujifilm profiles Leica announces silver version of the X Vario. $2850 Leica to release a 100th Anniversary commerative set with the Leica S only $34,500


Solving Microshake blurring with Piccure

How many times have you made a shot, checked the LCD on the back of the camera, and thought you had "it"?  Then you get home, upload the RAW files from the card to the computer, pop the image open in your editor and WAAAH! it's not tack sharp.  Oh it's there and it's not bad, but you can see the subtle blurring that comes from microshake.  Well now you can fix this with a plugin called Piccure. I first looked at Piccure in the fall of 2013 and my first experiment went badly because I didn't follow the instructions.  The manufacturer's representative, a real class guy called Lui, wrote me to point this out and when I used the software as documented it was very good, certainly comparable and in some cases superior to Photoshop's own shake reduction.  But I was critical of the plugin because I don't use JPEGs much at all (ok nearly never) and at that time Piccure required the sRGB colour space.  They listened and a new update just came out that brings support for multiple colour spaces including my preferred ProPhoto RGB.

If you have used shake reduction before, you may not have experienced that at high resolution and in high gamut colour spaces that the math involved is very intensive.  Quick it is not.  There are also posts suggesting that you can cure microshake with aggressive sharpening.  Perhaps, but not well.

With Piccure, you open your image in Lightroom or Photoshop and then use the plugin.  This opens the original as a copy and starts the inspection and rebuild process.  Remember that I said to be patient.  The math involved is very demanding and depending on your CPU it can take some time.  In the end, the result is most often worth it.

Piccure is designed to resolve microshake.  That said, you as the user have a great deal of latitude as to how much shake correction to apply.  It is very much a one by one experiment with no one size fits all answer.  I have inserted two images in this article, the first a 7 step HDR where the camera was mounted on a Manfrotto magic arm for a macro shot.  There was microshake involved purely from vibration in the room, given the less than optimal mounting platform.  The second is the same image adjusted in Piccure at one step more aggressive correction than the micro setting.  I used this explicitly to give readers a sense of the power in Piccure.  More aggressive settings on images that are already very sharp, can produce a crunchy effect similar to an aggressive high-pass sharpening, but without the glopping effect and haloing that aggressive sharpening delivers.

OM-D E-M1 7 Step 32 Bit HDR


Looking closely, you can see the effect of the micro shaking.  The image is just a bit soft.  At this point no adjustments have been made at all, this is the TIFF output from HDRsoft's 32 Bit HDR processing only.  As there were no lens corrections in Lightroom for the camera - lens combination, no corrections were provided prior to the application of the HDR process.  Ghost elimination was turned on in the software.

OM-D E-M1 7 Step 32 Bit HDR after Piccure processing


Even in these 72dpi JPEG exports from Lightroom, the quality improvement is significantly visible.  This was as noted using the shake correction at one level up from Micro, probably more than I would normally use.  I chose this setting to give you a better sense of why Piccure is nothing like trying to fix shake with sharpening algorithms.  There is a dimensionality and texture restored that is what the dying rose looked like under the lights.  You can also see none of the contrast overload or halo effect found with heavy sharpening, or high pass filter based enhancements.

One reader asked why I would suggest buying a plugin when Photoshop CC can be had on subscription so low priced and incorporates camera shake correction.  It's a fair question, and I would say for the same reason one buys any other plugin.  It's probable that the work of any plugin can be done in Photoshop, with sufficient time, expertise and practice.  A great plugin can accelerate the achievement of the artistic goal, giving you the artist more time behind the lens.

I have come around completely on Piccure.  Being able to send it images in ProPhoto RGB colour space right from RAW or a very big TIFF resolves my single major stop gate.  My take is that if you want the best images you can get, without the softening of microshake (long lens bird photographers, this may be you!) Piccure is a fast and cost effective solution.  It is designed to do one thing, and does it extraordinarily well.

The folks at Piccure have been really professional to work with and have welcomed me into their beta program.  I hear great things are coming in Version 2 and look forward to sharing that information with The Photo Video Guy readers when I can.

The folks at Piccure have offered a special deal where The Photo Video Guy subscribers can get a discount on the plugin by purchasing through our link and using coupon code photovideo2014.  Click the logo below to buy your own license.

Making Better HDR Images

HDR or High Dynamic Range has taken a beating over the last couple of years, and sometimes rightly so, not because the concept is bad, but because too often the execution is so over the top and screams fakerooni.  In this article I look at the benefits that HDR can bring and explore the output from Photomatix Pro 5, Nik HDR Efex Pro 2, Photoshop Merge to 32 Bit HDR and HDRsoft's 32 Bit Merge alternatives.HDR images don't have to look overcooked.  HDR can be subtle.  Before we get there, let's explore what the original point of all this was. High Dynamic Range - Origins

A long time ago, Ansel Adams defined the Zone System.  The principal was to use multiple meter readings to determine the dynamic range of an image to be made, to maximize the exposure and then to work in processing and printing to get the widest possible dynamic range.  The Zone System measured from Zone 0 to Zone 10, effectively 11 stops of exposure, although many implementations exist and range does vary.

When digital cameras, particularly digital SLRs came out, the sensors were limited to between 5 and 6 stops of dynamic range, after which content either fell into unrecoverable blacks or blown out whites.  This is very much less of a problem today, than it used to be as we see sensors with 11 and even 12 stops of native dynamic range.  So what digital photographers would do would be to make multiple exposures of the same subject, using the evaluative metering system and then consciously choosing to under and over expose the subsequent shots.  The premise was that the wider range of exposures made, the more content would be there for the next step.

That next step was quite a doozy.  Using predominantly Photoshop layers, each image would be imported into its own layer, then layer masks would be created where different parts of the different images would be combined to create a single final image with much wider dynamic range than any one of the shots.

The premise was that if the evaluative meter gave you 18% grey, then a -2 EV underexposure would put whatever the base reading considered to be white, into middle grey, pulling more data out of the highlight areas and keeping them from blowing out.  Then a +3EV overexposure would be made to pull the blacks up nearly to middle grey getting more detail into the shadows area that under normal conditions would be black.   These under and over exposures would render much of the image either dumped into the blacks or blown out completely, hence the need for masks and layers.

Automation in Capture

Camera manufacturers had long known of the practice of bracketing, the idea to make multiple exposures of the same scene at different EV levels to help the photographer shooting film to compensate for excessive white like snow, or excessive black like a night shot, being pushed towards middle grey by the internal meter that measures reflective light.  In the days of film, cameras had manually operated exposure compensation dials.  It was an easy step for manufacturers to write subroutines for the computers in the digital cameras to shoot a sequence and have the exposure compensation adjusted automatically.

Nikon really took this to heart offering 3, 5, and 7 shot brackets at full stop intervals.  The thought was that the more exposures over a wider range would provide more fodder for the HDR process.  Sadly, misinformation and missing documentation convinced legions of photographers that they needed more shots than they may have actually required but at very small exposure increments.  Shooting a 7 shot bracket at 0.3EV (⅓) stop increments is a lot of data.  Better to shoot a 3 shot bracket at full stop increments.  You end up with the same dynamic range but in fewer shots and therefore with faster processing.

A decent enough rule of thumb if you want to get the extended dynamic range that the film masters got, is to do what they did.  Autobracketing typically requires the same EV variance to the plus and to the minus, so this is where additional frames can help.  With the quality of sensors in the last couple of years, bracketing with anything less than a full stop difference, isn't really helping you much.

And now of course, you don't have to make your own layers and your own masks.  There is software to do that for you.  In this article I look at four options and offer my opinion where each best fits.  The software options I look at are Photoshop Merge to HDR 32 Bit, HDRsoft's 32 Bit HDR, Photomatix Pro and Nik HDR Efex Pro 2.

Before getting into software, it's also important to note that photographic HDR is less high dynamic range these days and more a processing effect.  Traditional HDR involves mapping the tones in the histogram to extend the dynamic range.  The processing that many people equate with HDR is really a series of effects comprising multiple programmatically created adjustments that extend beyond exposure to include noise, sharpening, softening, saturation, clarity, structure, blend modes and numerous other options.

The overcooked HDRs that some love and some hate place more emphasis on the effect side of the equation than on the tone mapping side.  HDRsoft, the company that makes Photomatix Pro calls this Fusion, so that's as good a name as any.

The Software

Photomatix Pro V5 and HDR Efex Pro 2 are 16 bit editors that offer a wide range of presets going from the subtle to the nauseating.  Like any preset, they are a place to start in your image processing, and rarely an end in themselves.  Followers of Trey Ratcliff have come to recognize the Photomatix look, and indeed until the release of V5 of their software, subtle was really not in the vocabulary.  The current version is a significant improvement in usability, image quality and flexibility.  I commend the company for the work in the upgrade and if I was driven towards effects oriented HDR, this would be my choice.

When I started doing HDR, I tried the older versions of Photomatix, but never really liked the output, so I went with Nik's HDR Efex Pro, and later Pro 2, before Google bought Nik and made the bundled suite so darn affordable.  HDR Efex Pro 2 has definitely been a go to for landscapes, automobiles and other wide scoped themes where I wanted a blend of subtlety and effect.  I still like it today, and you cannot beat the price.  That said, Google has not offered a major revision since taking over Nik, and the offering is losing its competitive edge.

Last year, maybe the year prior, I learned of the merge to 32 bit HDR option in Photoshop.  I had never been really nuts about the Photoshop HDR options until I learned about this from Matt Kloskowski at Photoshop World.  By choosing 32 bit mode, with the only other checkmark being ghost reduction, I could have Photoshop do the layer masking work and send the image back to Lightroom without further manipulation.  Then I would have this single image with massive embedded dynamic range and I could use the Lightroom sliders of Highlights and Shadows to real advantage.  Until recently, this has been my go to for true dynamic range expansion.  When Photoshop was updated to CC, the process became a bit more confusing, but I believe that with the latest update Adobe has restored the former simplicity.  Shooting cathedral interiors, or flowers or jewellery, really anything with lots of fine detail benefits from the dynamic range extension without the "effects" look.

When I bought the upgrade to Photomatix 5, I purchased the Pro bundle which included a Photoshop Plugin and the 32 bit HDR option in addition to the Lightroom plugin.  This new implementation of a 32 bit plugin is stunningly good, and while it takes about as much time to complete as the Photoshop option, you never have to roundtrip to Photoshop and back, with everything happening (ostensibly) in Lightroom.  There is no edit window, no settings are required, you simply Export with Preset and in a couple of minutes the image comes back to you with extended dynamic range.  At first glance, you might think that you give up a lot of control in this model, but that's not true.  The control is in the Lightroom sliders and functions that you already know.

Best Practice for Better HDR

The trick to wide dynamic range is to get images well outside the boundaries of the generic camera.  Let's say your camera has a dynamic range of 6 stops.  By doing a 3 shot bracket at +2EV and -2EV you will effectively have a 10 stop dynamic range.  If you go farther down and farther up to include +3EV and -3EV, you get to 12 stops.  You can see then that doing ⅓ or ½ stop increments is kind of pointless and even +1EV and -1EV brackets only extend your range by two stops.  Now sometimes, the light that's available simply won't allow for the massive exposure shifts.  If the light is low and you try for a 3 stop push, you could end up with subject movement, even when your camera is on a tripod.  If the light is super bright, even the lowest ISO and smallest f stop may not allow a high enough shutter speed to give you a 3 stop underexposure.  These are probably more exceptions than the rule, particularly the underexposure option, but keep the idea in mind.

Example Images and Processing

In this series of images, I used the same three originals, and exported them to the four different HDR approaches.  I took the most neutral selections in Photomatix Pro and Nik HDR Efex Pro 2, and just accepted the 32 bit round trips from Photoshop and HDRsoft.  All images were then edited in Lightroom for Exposure, Highlights, Shadows, Whites, Blacks, Clarity and Vibrance.  No other corrections were done.  Once the Lightroom edits were complete, the images were sharpened in Nik Sharpener Pro 3 (Output Sharpening - Web) and then passed through Nik Dfine for noise reduction.

Photomatix Pro 5 Natural

The goal here was a simple HDR process to lift the shadows and put some detail into the highlights.  Photomatix has been best known for the HDR look.  I really am very impressed with version 5 of the software.  Despite being shot at ISO 2500, the images combined nicely and were not made excessively noisy in the HDR process.  The Natural look is a default preset and I changed nothing in its settings to produce this output.  There is good colour rendition overall and a good representation of the shadow detail in the grill without it looking overcooked.

Photomatix Natural Final

Nik HDR Efex Pro 2

This is the Default outcome from running the images into Nik.  I found the original return too warm and had already cooled it down, before I realized I was doing so.  It looks nice now and this is the only time where any edit change was done, other than as noted in the précis for this section.  Note the increased shadow detail in the grill.

Nik HDR Efex Pro 2 Default Final

Photoshop Merge to 32 Bit HDR

This is what I would have typically gotten from Photoshop's 32 bit HDR mode out of Photoshop CC.  It's clean and sharp with really good tonal range.  The returned image offers a ton of dynamic range so I could pull more detail out of the shadows in the grill and spoiler without compromising the rest of the image.  That's the real advantage of the 32 bit  models.  The image you get back is still mostly RAW but with extended dynamic range.

Berlinetta PS 32 HDR

HDRsoft 32 Bit

This is the HDRsoft version of what Photoshop CC does so well, with a simpler process and fewer clicks.  There is still all that uninterrupted dynamic range available to play with.  As in the PS version, I did nothing to the image except what was noted above.  It's a very natural look and doesn't scream out "I'm an HDR"

Berlinetta HDRSoft 32 Final

The situation to make the captures was far from ideal but is indicative of the types of scenarios we can run into.  In this case, I was in the basement of a convention centre with really horrible light and colour temperatures all over the place.  The lighting was not particularly bright so the ISO was set to 2500 on the Olympus OM-D E-M1 I brought with me as part of its evaluation review.  I used the Olympus 9-18 zoom which gives a full frame equivalent of 18-35mm   It's optically pretty slow so the shutter speeds were longer, than I would have gotten had I been shooting my usual 1Dx and 16-35/2.8.  There were no Lens Corrections for the combination in Lightroom, so you see what the lens produced without any optical corrections applied.  I am grateful to the folks at Ferrari Maserati of Ontario for allowing me to place my tripod inside the rope to make the images.

A Great Car, A Great Couple

Last night, #Bryan Weiss and I ventured into the throngs at the Canadian Auto Show at Toronto's Metro Convention Centre.  Lots of nice cars of course, but this post is about a couple and the car that they showed.  It's a stunningly beautiful 1939 Lincoln Zephyr.Bryan and I were doing what we usually do, quietly and respectfully making images of cars that appealed to us.  As in past years, we seem to enjoy the exotics and the classics most of all and on entering the Cruise Nationals area, I came upon this wonderful Lincoln Zephyr, restored by Mr. Dave Jolly. I had made a number of images and had been bracketing exposures because this was my first time shooting Olympus' OM-D E-M1 as part of a forthcoming review.  The thought had occurred to me to also do some HDR because let's face it, the lighting at Auto Shows is usually horrible, very contrasty, with harsh shadows and because I recently purchased V5 of Photomatix Pro.  Photomatix has not been my favourite HDR tool.  I tend more to Nik's HDR Efex Pro 2 or the 32 bit HDR option in Photoshop.  Some initial tests with some shots from Camp 30 impressed me greatly.  Be sure that Photomatix is still capable of that overblown, over saturated, over ghosted, overdone HDR it is so well-known for.  Fortunately, there are other and better options, including a much improved 32 bit implementation.  But that's for a different article.

For the course of our evening, dealers, and owners as well as the cleaning professionals had been incredibly gracious, letting us set our small carbon fibre tripods inside the ropes and walls to obtain unobscured shots.  I thank everyone who made my image making more successful, and specifically thank Dave Jolly as you'll see and the very nice fellow from Grand Touring Automobiles who allowed me to get an unobstructed shot of the interior of the beautiful Silver Wraith.  Bryan did meet one grumpy sort and neither of us will post photos of his metal flake pickup that does not evoke the wonderful history of the real truck.

Which brings me back to the wonderful Mr. Dave Jolly and his lovely wife.  Mr. Jolly opened up his Lincoln so I could grab a shot of the lovingly restored interior.  He didn't have to do that.  I was actually moving on when he offered.  Mr. Jolly and his wife also spent time with me telling the story of the restoration, correcting my own misunderstandings and errors of knowledge and were just wonderful folks.  I mentioned that I was sorry to see that the Zephyr had not won first prize as it absolutely turns on the Wayback machine.  The paint is as close to what was available in 1939 that Mr. Jolly could discover.  The duotone is not what would have come from the factory, but does nothing to prevent you from taking a trip back in time.  This is a pre-war, post-depression vehicle, of a time when Lincolns were scarcer and very high end.  It has great character with its warship prow and immensely long and elegant tail.

Mr. Jolly has done a beautiful job.  You cannot see in the photos the six inches of steel all around the coachwork bottom that Mr. Jolly had to create and bend to replace the corroded original body.  It would be tempting when doing a car like this to go for a brighter colour, perhaps with out of time metal-flake, but Mr. Jolly went with a colour that resonates and replicates the time when these cars ruled our roads.

I saw many cars that I really liked at the show, from current Ferraris, the aforementioned Wraith, the Aston Martin Vanquish, and my long dreamed for Charger R/T 440 Magnum in that electric purple long gone and never replicated.  That said, the car that inspired me most was the beautiful Lincoln Zephyr.

The images here are all HDRs done in Photomatix Pro V5 after basic editing in Lightroom.  The camera was the Olympus OM-D E-M1 with the Olympus 9-18mm wide zoom.  ISO was 1600 to allow for the low light.  Exposures were a bracket of 3 frames +- 1 EV.  I used a slightly modified Enhance 2 preset in Photomatix Pro for the external shots, and a more ethereal custom setting for the interior to enhance the sense of ghosts.  All shots were sharpened in Nik Sharpener Pro and then adjusted for noise in Nik Dfine.

REVIEW : Sony A7

A number of readers have asked for my thoughts on Sony's compact A7 camera.  So with the support of Chris Atkinson at Henry's Newmarket, I obtained an evaluation unit to put through the paces.  The start was inauspicious however, because Sony is one of those companies that is SO STUPID that the only way to charge the battery is to have it in the camera and plugged into the wall.  Minuscule charge indicator, no ability to charge a battery while using the camera, no ability to use the camera while charging the battery, and a charge time of only 310 minutes which doesn't look nearly as crappy as 5 HOURS.  Whichever would be rocket surgeon (that's a W reference btw) thought this was a smart idea in a prosumer product needs to be packed into a missile and fired directly into the Sun.  Idiots.  Fortunately, things get better...The Basics The A7 is an interchangeable lens camera offering a 24.3 megapixel full frame sensor driven by Sony's BIONZ X series processor.  The camera uses Sony E Mount lenses.  What makes the A7 and its sibling the A7r special is the size.  It's small.  In fact it reminds me of the wonderful Olympus OM-D E-M1 in form factor.  Except instead of being M4/3 it's full frame!

The viewfinder is electronic as one would expect in a mirror less system camera.  It uses an OLED display with 2.4M dots so it is very bright and very easy to read.

There's a lot to like about the A7 as you'll see but there are a couple of items that annoyed me right out of the box, in addition to the moronic attitude towards battery charging.  The strap lugs are the triangle type.  The lugs are positioned ideally to ALWAYS be in the way of your right hand fingers.  I'm becoming certain that no one actually tries these things out with a strap mounted during the design process.  The placement is lousy.

The other thing that really puts me off is the fake shutter noise.  The A7 is a mirror less camera.  It could be dead silent.  But the default is a ka-chunk you can hear while a freight train steams beside you.  The A7 is elegantly beautiful and unobtrusive, until you press the shutter button and then it has all the grace of a hippo with gas, passing wind in a bathtub.

Moving on to the good stuff, and there is a lot of good stuff...

The A7 offers a 24MP sensor but if you want more there is the A7r which has a 36MP full frame sensor and no anti-aliasing filter.  Haven't personally seen one, but they do exist.  For the purposes of this review, it's all done with a regular A7.

The camera came with the new FE series 28-70.  For a full frame zoom, this is kind of a short range and it's not a speed demon being f/3.5-f/5.6.  Construction is really solid though, and there are faster FE lenses available in primes and fast zooms, some with Zeiss optics.  Note that I keep referring to FE series.  These are the Full Frame E Series lenses.  The NEX E series are designed for APS-C sized sensors, so while you can mount them up, they do not produce a full frame image circle without some vignetting or falloff.  A limited selection of available FE lenses is going to slow adoption of the A7 and A7r.  You can of course still use the other E mount lenses and the camera offers an automatic conversion to crop sensor similar to Nikon.

A7 Front

The rear LCD is quite nice and has the angle capability seen on other Sony cameras so you can tilt it up or down, but not to the side.  There's usability in this when shooting video.  Indoors it is bright and easy to see but while outside on a sunny day doing test shots, it was nearly unreadable.  I also find that it sucks up nose grease very quickly and is hard to get clean.  You'll want to have a micro fibre cloth in your bag with you.

A7 Rear

The control layout is quite good.  There is a master dial for mode selection, and a secondary dial that gives direct access to exposure compensation.  This is one of my favourite features as it makes adjustment very quick and because you see simulated exposure in the EVF, you get a very good sense of what the compensation is going to do for you.  There is a dial towards the front to control aperture and one towards the rear to control shutter speed.  You can reverse them in the menus if you prefer.  There is no top deck ISO control, and while the AUTO ISO functionality works well, I would rather not have to dive into a menu or navigate the popup from the Fn button on the back just to manipulate the ISO.

Some readers will recall my effusive love of the original RX-100 and how good I thought that Sony's Superior-Auto mode was for most any exposure situation.  The brand new shooter is going to love the AUTO mode because it's the same powerful Superior-Auto as in the RX-100.

And of course the camera has numerous Scene modes and Sweep Panorama that serious photographers aggressively ignore.

A7 Top Deck

The kit lens is what you would expect, sharp enough with reasonable distortion and vignetting control.  When importing RAW files (Sony's own ARW) to Lightroom, there is a Lens Correction profile present that fixes the distortions and vignetting available.  The changes you see are significant.  I do wish that for the lens' not insignificant size that it was either optically faster or had a more useful zoom range.  I found the construction felt good but the zoom was very stiff.  In fairness the day started out at -20 Celsius and only warmed up to -10 Celsius before I left to come home.  I would very much like to shoot this camera with one of the Zeiss optics that are coming for the A7 series.  A camera this size with a fast 35mm and fast 85mm could be very usable.

I was griping earlier about the length of time to charge the battery and that it has to be in the camera to be charged.  You can buy a separate external charger and extra batteries.  These are a must.  After shooting only 115 exposures, I was down to 65% battery according to the display.  This suggests that you will top out just under 400 exposures, so if you are serious about your photography, or doing a lot of bracketing, or simply like being out for a long day of making images, you are going to need more batteries.  I did not obtain the external charger as part of this evaluation, so cannot advise on whether the recharge time is faster than the USB method.

Shutter Speeds

The camera can offer shutter speeds from 1/8000 down to 30 seconds plus bulb mode.  Like Sony NEX cameras, you can buy additional applications and download them to the camera including functions like an intervalometer.  I think that this is nickel and diming the customer given the relatively high price of the camera, but this is of course just my opinion.

Menus

The menu system is quite intuitive and a menu page rarely has more options than the height of the screen.  Options are where you might expect them to be and I would assess the learning curve to becoming very comfortable to be quite shallow.  I would rate the Sony menu system as better than most.

Flash

The A7 has no built-in flash and does include Sony's proprietary multi-pin connector at the front of the shoe.  This allows for more than just flash units to be installed there.  Other items include a shoe mount microphone system.  Sony does offer combo flash / video light units and they are available with full TTL, remote capability, bounce heads and decent guide numbers.  I did not obtain a flash to evaluate.  At some point in the future I will do so to see how the Sony system compares to other line of sight infrared remote flash management systems.

Continuous Shooting and Bracketing

Burst mode is up to 5fps and like other digitals, is leveraged for bracketed shooting.  Up to 5 frame brackets are available at intervals of up to 0.7 EV, and the limit drops to 3 frames at 1 and 2 EV.  Of course you can manually bracket as much as you want but I found the +-2EV 3 image bracket to be very convenient during my outdoor test shoot as it was bright sun on white snow with some trees and other foreground objects.

Image and Clip Storage

Images are stored on SD sized cards, although being Sony, there is still an option to use the long demised and completed unmissed Memory Stick options.  For my tests, I was using a Sandisk Extreme Pro card and had no issues at all.  The card inserts into a front facing slot by opening a door on the right side.  This makes it very easy to change cards if the camera is on a tripod or used with the optional vertical grip.  (It's really a battery grip of course but marketing loves to name things differently).

A7 Card Slot

All major processing software has already been updated to read Sony's ARW RAW format, so opening the files was no trouble at all.  I did discover to my chagrin that the camera came complete with pets, several cat sized dust spots on the sensor.  I was able to correct these in post processing, but it serves to remind owners that there is nothing in front of the sensor when the lens is not mounted.  I was able to use a blower and an ArcticBrush to clean the sensor quickly.

There are programmable buttons on the camera but to my pleasure you don't trip over hundreds of them.  This keeps things simple and easy to use.  I shot all morning outside while wearing gloves and at no time did I need to remove them to alter a setting.  So even though I personally find the buttons very small, they are very usable.

ISO Performance

In order to make test shots at different ISOs I mounted the camera to a Manfrotto ball head on a Manfrotto magic arm on my studio stand.  I was pleased to see that unlike some competitors, the tripod socket is all metal and very sturdy.  While there are not many lenses yet in the FE mount, if Sony really wants this line to launch, they are going to need more glass, and longer glass in short order.

Thinking of ISO, I shot the camera outdoors for a bit in AUTO ISO shooting in all of Program, Aperture Preferred, Shutter Preferred and Manual modes.  The software is well programmed to seek the lowest viable ISO but not at the expense of diminished stability.  When I came back inside, I set the camera on the studio stand to photograph my ever patient model Sondra at a variety of ISOs and was very pleased to see that the A7 holds together very well to ISO 6400, is quite good at ISO 12800 and only really falls apart at ISO 25600.  It's not a Nikon Df or Canon 1Dx from a low light capability but is a very solid performer.  I've put a gallery of the same shot up from ISO 50 to ISO 25600 so you can see for yourself.

Connectivity

Sony makes software available to download your photos direct from the camera, and to convert the RAW format if you don't have a more sophisticated editing application.

They offer a tethering application, although they call it Remote Control that works over USB.  The cable that comes with the camera is VERY short, so you'll need to purchase a USB extension if you want to use the factory supplied cable.  Since the camera side connector is a Micro USB, you may had some difficulty finding long cables of this type.

There is a micro HDMI out, and if you wish to use it, you'll need to go source your own cable.  I did not have one and so did not test streaming through the HDMI port.

There is as one would hope a ⅛" mini jack for an external microphone but there is also a headphone jack, a feature sorely missing on most cameras and critical for audio monitoring when shooting video.

The camera has GPS capability as well as built in wireless.  I could get the wireless to connect to my private wireless network easily and also used it's self-generating network to push images to the Play Memories app on the iPhone.

Although I downloaded and appeared to be able to configure wireless image transfer to the Mac, the image transfer never worked and a perusal of forums suggests others have had difficulty making this work.  I will not hammer Sony for this as I am running a not yet final release of OS X on my Macs.

Sony does think that they are a software company.  I would suggest that they hire a good UI company as their software is neither intuitive nor user-friendly.  I did not discover it trying to open ports and phone home so it would appear that they have learned from past offences.

The camera also incorporates NFC but I was not able to test this function.

What About the Video?

The A7 thinks video out of the gate.  Sony "gets" video and the availability of zebra stripes and focus peaking for stills as well as video is just a bonus for me.  Resolutions go from 640x480 up to 1920x1080 with frame rates of 24p, 30p, 60i and 60p.  Also very cool is that it can push video at up to 24MBps, BluRay levels.

Once there is a wider pantheon of high quality primes for this mount, I can see the A7 being very successful in cinema as a B roll camera, or as a great tool for the hybrid user.

Pros

  • Great size and weight
  • Full frame sensor
  • Fast autofocus
  • Decent control layout
  • Very good image quality
  • Excellent low light / high ISO performance
  • Excellent EVF
  • Useful auto bracketing sequences
  • Great video

Cons

  • Battery charge time / lack of external battery charger
  • Placement of strap lugs and rings
  • Legibility of rear LCD in bright light
  • Kit lens has limited focal length flexibility, optically slow
  • Battery life not optimal
  • Extremely loud shutter
  • Limited selection of full frame lenses

Who Is It For?

The ideal customer for the A7 is someone relatively new to interchangeable lenses but looking for full frame in a very flexible camera, but who also demands to keep the size and weight down.  The hybrid user, who wants both great stills and great video, will like the camera very much.

For those downsizing from a traditionally sized DSLR, the lack of lens options is a real show stopper.  The exception is the existing Sony owner with a load of A mount glass who with an adapter can use it on the A7.  With the adapter, I can also see the A7 as a credible second body to an A99.

Summary and Would I Buy One

I was excited to learn about the A7 when it was announced.  I thought that it would be the logical step up from the M43 Olympus OM-D with Sony's proven full frame sensor.  Plus Sony really understands video and I thought that this would be huge.  After using the camera, I do like it.  I find the automatic white balance to be off, pretty much all the time, and while I do carry a popup grey card with me, having to do so would be annoying.  The control layout is very usable and the EVF is very good.  I'm not nuts about the view from the rear LCD but I only use these for chimping most of the time and only use Live View for awkward positions.  Being mirror less I like that I can shoot video from the EVF.

The stills are good and Sony's Dynamic Range Optimization (DRO) does a decent enough job but I would more than likely keep it turned off and zone place my exposures anyway.  The lack of choice in lenses would be a showstopper for me and for the foreseeable future it's going to be long time coming.  At $2,000 for the body and 28-70, it is priced competitively against other entry full frames and the small size and low weight will make it compelling.

When I did my outside test shots I was wearing photographer's gloves and had the unit on a BlackRapid strap.  Even then those strap rings were constantly in the way.  If it were mine, they'd come off and be tossed out the window.  The placement of the lugs is horrible, and when I got inside, the discomfort made me put the camera on the Titan stand so I would not have to grind the lug into my hand in order to make a steady shot.  I'm also still extremely annoyed at the idiocy of requiring the battery to be in the camera for ¼ day to reach a full charge while plugged into the wall.  The external charger retails for about $60.  It should be in the box.  This is nickel and diming the customer on Sony's part and they need a swift kick in the kneecaps for being so shortsighted.

In the end, I like the A7.  But not enough to buy one.

Product Specifications (courtesy Sony)

Limited Warranty

  • Software

    • Operating System Compatibility : Image Data Converter 4.0: Microsoft Windows® Vista® SP2, Windows® 7 SP1, Windows®8 (Pentium 4 or faster) Mac OS X (10.6-10.8) (Intel Core Solo/Core Duo/Core 2 Duo or faster) PlayMemories Home: Microsoft Windows® Vista® SP2, Windows® 7 SP1, Windows® 8 (Pentium III 800 MHz or faster; for playing/editing HD movies: Intel Core Duo 1.66 GHz or faster/Intel Core 2 Duo 1.66 GHz or faster, Intel Core 2 Duo 2.26 GHz or faster (AVC HD (FX/FH)) Mac OS X (10.6-10.8) (Intel Core Solo/Core Duo/Core 2 Duo or faster)
    • Supplied Software : Supplied Software: PlayMemories Home, Image Data Converter Version 4
  • Advanced Features

    • Image Stabilization : Lens-based (where applicable)
    • Auto High Dynamic Range : Yes, (Auto Exposure Difference, Exposure difference Level (1-6 EV at 1.0 EV step), off)
    • Sweep Panorama : Horizontal (Wide / Standard), Vertical (Wide / Standard)
    • Anti Motion Blur : Yes
    • Shooting Tips : Yes
    • Intelligent Auto : Yes
    • Face Detection : On, Off, Face Registration, Face Selection; maximum eight faces detected
    • Priority Setting (for Face Detection) : Yes (eight faces max)
    • Smile Shutter™ technology : Smile shutter (selectable from 3 steps)
    • Superior Auto : Yes
    • Tracking Focus : Yes
  • Camera

    • Camera Type : Interchangeable Lens Digital SLR camera
    • Lens Compatibility : Sony E-mount Full Frame, operation with Minolta / Konica Minolta Maxxum A-mount lenses confirmed via optional LA-EA3/LA-EA4 adaptor9
    • Lens Mount Type : Sony E-mount Full Frame
    • Color : Black
  • Convenience Features

    • Media/Battery Indicator : Yes
    • Still Image Playback Options : Single (with or without shooting information, RGB histogram & highlight/shadow warning), 9/25-frame index view, Enlarged display mode (Maximum magnification L: 23.0x, M: 15.0x, S: 11.5x), Auto Review (10 / 5 / 2 sec, off), Image orientation (Auto / Manual / Off selectable), Slideshow, Panorama scrolling, Folder selection (Still / Date / MP4 / AVCHD), Forward / Rewind (Movie), Delete, Protect
    • Video Playback Options : Forward / Rewind (Movie)
    • Self Timer : Yes
    • Power Save Mode : Yes
    • Red-Eye Reduction : Yes
    • Erase/Protect : Yes
    • Multiple Language Display : Yes
  • Drive System

    • Continuous Shooting Speed : Continuous shooting: Max. 2.5fps, Speed Priority Continuous shooting: Max. 5.0fps
    • Shutter Speeds : 1/8000 to 30 seconds, bulb
    • Self-timer : 2-sec. or 10-sec. delay,
    • Shutter Type : Electronically-controlled, vertical-traverse, focal-plane shutter
    • Drive Mode : Single shooting, Continuous shooting, Speed Priority Continuous shooting, Self-timer (10/2 sec delay selectable), Self-timer (Cont.) (10 sec. delay; 3/5 exposures selectable), Bracketing (Cont., Single, White Balance, DRO)
  • Exposure System

    • D-Range Optimizer : Off, Dynamic Range Optimizer (Auto / Level (1-5)), Auto High Dynamic Range: Auto Exposure Difference, Exposure Difference Level (1.0-6.0 EV, 1.0 EV step)
    • Auto Exposure Lock : Available with AE lock button. Locked when shutter button is pressed halfway. Can be disabled from the Menu
    • Exposure Compensation : +/-5.0 EV (in 1/3 EV or 1/2 EV steps), with exposure compensation dial: +/-3.0 EV (in 1/3 EV steps)
    • Picture Effect(s) : 13 modes: Posterization (Color, B/W), Pop Color, Retro Photo, Partial Color (R, G, B, Y), High Contrast Monochrome, Toy Camera, Soft High-key, Soft Focus, HDR Painting, Rich-tone Monochrome, Miniature, Watercolor, Illustration
    • Exposure Settings : AUTO (iAUTO, Superior Auto), Programmed AE (P), Aperture priority (A), Shutter-speed priority (S), Manual (M), Scene Selection, Sweep Panorama, Movie
    • Scene Mode(s) : Portrait, Landscape, Macro, Sports Action, Sunset, Night Portrait, Night Scene, Hand-held Twilight, Anti Motion Blur
    • Metering Modes : Multi-segment, Center-weighted, Spot
    • Metering Sensitivity : EV 0 to 20 EV (at ISO100 equivalent, with F2.8 lens attached)
    • Metering : Advanced 1200-zone evaluative metering
    • ISO : Still images: ISO 100-25600 (ISO numbers up from ISO 50 can be set as expanded ISO range), AUTO (ISO 100-6400, selectable lower limit and upper limit) Movies: ISO 200-25600 equivalent, AUTO (ISO 200-6400 equivalent)
    • Noise Reduction : Long exposure NR: On/Off, available at shutter speeds longer than 1 sec., High ISO NR: Normal / Low / Off selectable
    • Creative Style : Standard, Vivid, Neutral, Clear, Deep, Light, Portrait, Landscape, Sunset, Night Scene, Autumn Leaves, Black & White, Sepia (Contrast -3 to +3 steps, Saturation -3 to +3 steps, Sharpness -3 to +3 steps)
    • Color Temperature : 2500 – 9900K with 15-step each Magenta/Green compensation (G7 to M7), Amber/Blue (A7 to B7), Custom
    • White Balance Mode : Auto WB / Daylight / Shade / Cloudy / Incandescent / Fluorescent (Warm White / Cool White / Day White / Daylight) / Flash / Color Temperature (2500 to 9900K) & Color Filter (G7 to M7: 15 steps, A7 to B7: 15 steps) / Custom / Underwater
    • Exposure Bracketing : With 3 frames in 1/3 EV, 1/2 EV, 2/3 EV, 1.0 EV, 2.0 EV or 3.0 EV increments. With 5 frames in 1/3 EV, 1/2 EV or 2/3 EV increments
  • Flash

    • Flash Bracketing : With optional external flash: 1/3, 1/2, 2/3, 1, 2, 3 EV steps, 3/5 frames (1.0/2.0/3.0 EV: only 3 frames) selectable
    • Flash Metering System : With optional external flash: Pre-flash TTL
    • Flash Compensation : With optional external flash: ±3.0 EV (switchable between 1/3 and 1/2 EV steps)
    • Flash Modes : With optional external flash: Flash off, Auto flash, Fill-flash, Rear Sync., Slow Sync., Red-eye reduction (On/Off selectable), Hi-speed sync, Wireless
    • Flash Coverage : With optional external flash: 16 mm (focal length printed on lens body)
    • Flash Type : Optional external flash
  • Focus Control

    • Focus Features : Lock-on AF, Eye AF, Predictive control, Focus lock, Eye-start AF (only available with optional LA-EA2 or LA-EA4 attached), AF illuminator (built-in, LED type, range: Approx. 0.30-3m, AF micro adjustment, AF ON
    • Manual Focus Assist : 35mm full frame: 7.2x, 14.4x APS-C: 4.7x, 9.4x
    • AF Illuminator : Yes (with built-in LED type)
    • Focus Sensitivity : EV 0 to 20 EV (at ISO100 equivalent, with F2.8 lens attached)
    • Focus Area : Multi Point (25 points) / Center-weighted / Flexible Spot (S/M/L) / Zone
    • Focus Points : 117 points (phase-detection AF), 25 points (contrast-detection AF)
    • AF Modes : Single-shot AF (AF-S), Continuous AF (AF-C), Direct Manual Focus (DMF), Manual Focus
    • Focus System : Fast Hybrid AF (phase-detection AF / contrast-detection AF)
  • Imaging Sensor

    • Pixel Gross : 24.7 Megapixels (approx.)
    • Color Filter System : RGB primary color filters
    • Effective Picture Resolution : 24.3 Megapixels (approx.)
    • Anti Dust : Charge protection coating on optical filter and ultrasonic vibration mechanism
    • Imaging Sensor : Exmor CMOS sensor (35.8 x 23.9mm)
    • Processor : BIONZ® X image processor
  • Interface

    • NFC : Yes (NFC Forum Type 3 Tag compatible, One-touch remote, One-touch sharing)
    • DC IN : Yes via optional AC-PW20AM (sold separately)
    • Memory Card Slot : Memory Stick PRO Duo, Memory Stick PRO-HG Duo, Memory Stick XC-HG Duo, SD memory card, SDHC memory card (UHS-I compliant), SDXC memory card (UHS-I compliant)
    • HD Output : HDMI® Type D micro connector
    • Accessory Shoe : Yes, via Multi Interface Shoe
    • A/V Remote Terminal : Yes, via Multi Terminal interface
    • PictBridge Compatible : Yes
    • Tripod Mount : Yes, 1/4" (20 thread count)
    • Remote Commander : Yes, via optional RM-VPR1
    • PhotoTV HD : Yes, with BRAVIA Sync enabled HDTV and HDMI® cable
    • USB Port(s) : USB 2.0 Hi-speed (mass-storage, MTP)
    • BRAVIA® Sync™ : Yes, via HDMI® with compatible BRAVIA HDTV (link menu)8
    • Multi Interface Shoe : Yes
    • Headphone Jack : Yes
    • Microphone Input : Yes
  • Interface

      • Wired : Yes, via optional RM-VPR1
  • LCD Display

    • Peaking : Yes (Level setting: High / Mid / Low / Off, Color: White / Red / Yellow)
    • Real-time image adjustment display : Yes (On / Off)
    • LCD Type : 3.0” (7.5cm) TFT LCD (921,600 dots) with tiltable design
    • Coverage : 100%
    • Histogram : Yes (On / Off)
    • Live View : Continuous Live View
    • Brightness Control : Manual (5 steps between -2 to +2), Sunny Weather mode
    • Grid Display : Graphic Display / Display All Info. / No Disp. Info. / Histogram / Digital Level Gauge / Shooting information for viewfinder mode
    • Customization : Grid, Histogram display, Digital Level Gauge, Grid Line, Magnified display for playback
  • Lens compensation

    • Lens compensation : Peripheral Shading, Chromatic Aberration, Distortion
  • Optics/Lens

    • Direct Manual Focus : Yes
    • Lens Type : Sony E-mount Full Frame
    • Digital Zoom : Yes, approx. 4x
    • Lens Mount Type : Sony E-mount Full Frame
    • EV Compensation : +/-5.0 EV (in 1/3 EV or 1/2 EV steps), with exposure compensation dial: +/-3.0 EV (in 1/3 EV step)
    • Exterior Finish : Black
  • Power

    • Battery Type : InfoLITHIUM® NP-FW50 (7.2V)
    • Power Requirements : One rechargeable battery pack (NP-FW50)
    • Number of Still Images : Approx. 340 images with LCD monitor (CIPA standard)7
    • Battery Capacity : 1080 mAh
  • Power

      • External power : Yes via optional AC-PW20AM (sold separately)
    • Compatible standards : Exif Print, Print Image Matching III, DPOF setting
  • Recording

    • Panorama Still Image Size : Horizontal Wide: 12,416 x 1,856 (23M) Horizontal Std.: 8,192 x 1,856 (15M) Vertical Wide: 2,160 x 5,536 (12M) Vertical Std.: 2,160 x 3,872 (8.4M)
    • Video Resolution : AVCHD™: PS - 1920 x 1080/60p@28Mbps FX - 1920 x 1080/60i@24Mbps FH - 1920 x 1080/60i@17Mbps FX - 1920 x 1080/24p@24Mbps FH - 1920 x 1080/24p@17Mbps MP4: HD - 1440 x 1080/30p@12Mbps VGA - 640 x 480/30p@3Mbps
    • Audio Format : Dolby Digital (AC-3) / MPEG-4 AAC-LC
    • Video Mode : AVCHD format Ver. 2.0 compliant / MP4
    • Color Space : Still: sRGB standard (with sYCC gamut) and Adobe RGB standard compatible with TRILUMINOS™ Color Movie: xvYCC standard (x.v.Color™ when connected via HDMI cable) compatible with TRILUMINOS™ color
    • Still Image Size 16:9 : 35mm full frame: L: 6000 x 3376 (20M), M: 3936 x 2216 (8.7M), S: 3008 x 1688 (5.1M) APS-C: L: 3936 x 2216 (8.7M), M: 3008 x 1688 (5.1M), S: 1968 x 1112 (2.2M)
    • Still Image Size 3:2 : 35mm full frame: L: 6000 x 4000 (24M), M: 3936 x 2624 (10M), S: 3008 x 2000 (6.0M) APS-C: L: 3936 x 2624 (10M), M: 3008 x 2000 (6.0M), S: 1968 x 1312 (2.6M)
    • Still Image Mode : RAW, RAW & JPEG, JPEG Extra fine, JPEG Fine, JPEG Standard
    • Media Type : Memory Stick PRO Duo, Memory Stick PRO-HG Duo, Memory Stick XC-HG Duo, SD memory card, SDHC memory card (UHS-I compliant), SDXC memory card (UHS-I compliant)
    • Still Image Max Effective Resolution : 24.3 Megapixels
    • Video Signal : NTSC color, EIA standards
    • Microphone/Speaker : Built-in stereo microphone or ECM-CG50 / XLR-K1M (sold separately) / Built-in monaural speaker; volume settings in 8 steps between 0 and 7
    • Still Image File Format : JPEG (DCF Ver. 2.0, Exif Ver.2.3, MPF Baseline compliant), RAW (Sony ARW 2.3 format)
    • 14bit RAW : Yes
  • Service and Warranty Information

    • Limited Warranty Term : 1 Year Parts & Labor
  • Viewfinder

    • Display : Disp. Basic Info, Histogram
    • Brightness Control : Auto / Manual (3 steps between -1 and +1)
    • Type : 1/2-inch (1.30 cm) XGA OLED color electronic viewfinder
    • Field of View : 100%
    • Magnification : Approx. 0.71x with 50 mm lens at infinity, -1m-1 (diopter)
    • Diopter Adjustment : -4.0 m-1 ~ +3.0m-1 (diopter)
  • Weights and Measurements

    • Weight(Approx) (Main unit only) : Approx. 14.7 oz. (416 g)
    • Dimensions (Approx.) : Approx. 5 × 3-3/4 × 1-15/16” (126.9 x 94.4 x 48.2 mm) (W/H/D) excluding protrusions
    • Weight (Approx.) : With battery and Memory Stick PRO Duo Approx. 1 lb. 0.7 oz. (474 g)
  • Wi-Fi

    • PlayMemories Camera Apps : Yes
    • View on TV : Yes
    • Send to Computer : Yes
    • View on Smartphone : Yes

The Book : How To Shoot Video That Doesn't Suck by Steve Stockman

I was doing a seminar today called Intro to DSLR Video, hosted by Henry's Newmarket.  We had a marvellous turnout and the folks really wanted to learn more about making great video with their cameras.  We spent most of the session on how-to and gear, but a couple asked about a good book on the subject.  So I recommended Steve Stockman's In my opinion, this is one of the greatest cut the crap, get to the point books on how to make interesting videos.  There's little techno-babble and tons of useful guidance on how to shoot video that will not make your audience want to shove forks into their eyes.

I recommend it highly and if you buy it from Amazon through the link below, you help support The Photo Video Guy.